2.1. Create a source
Create a source for your website or your mobile app
Go to Sources on the left menu and click on Create source.

This is the source form :
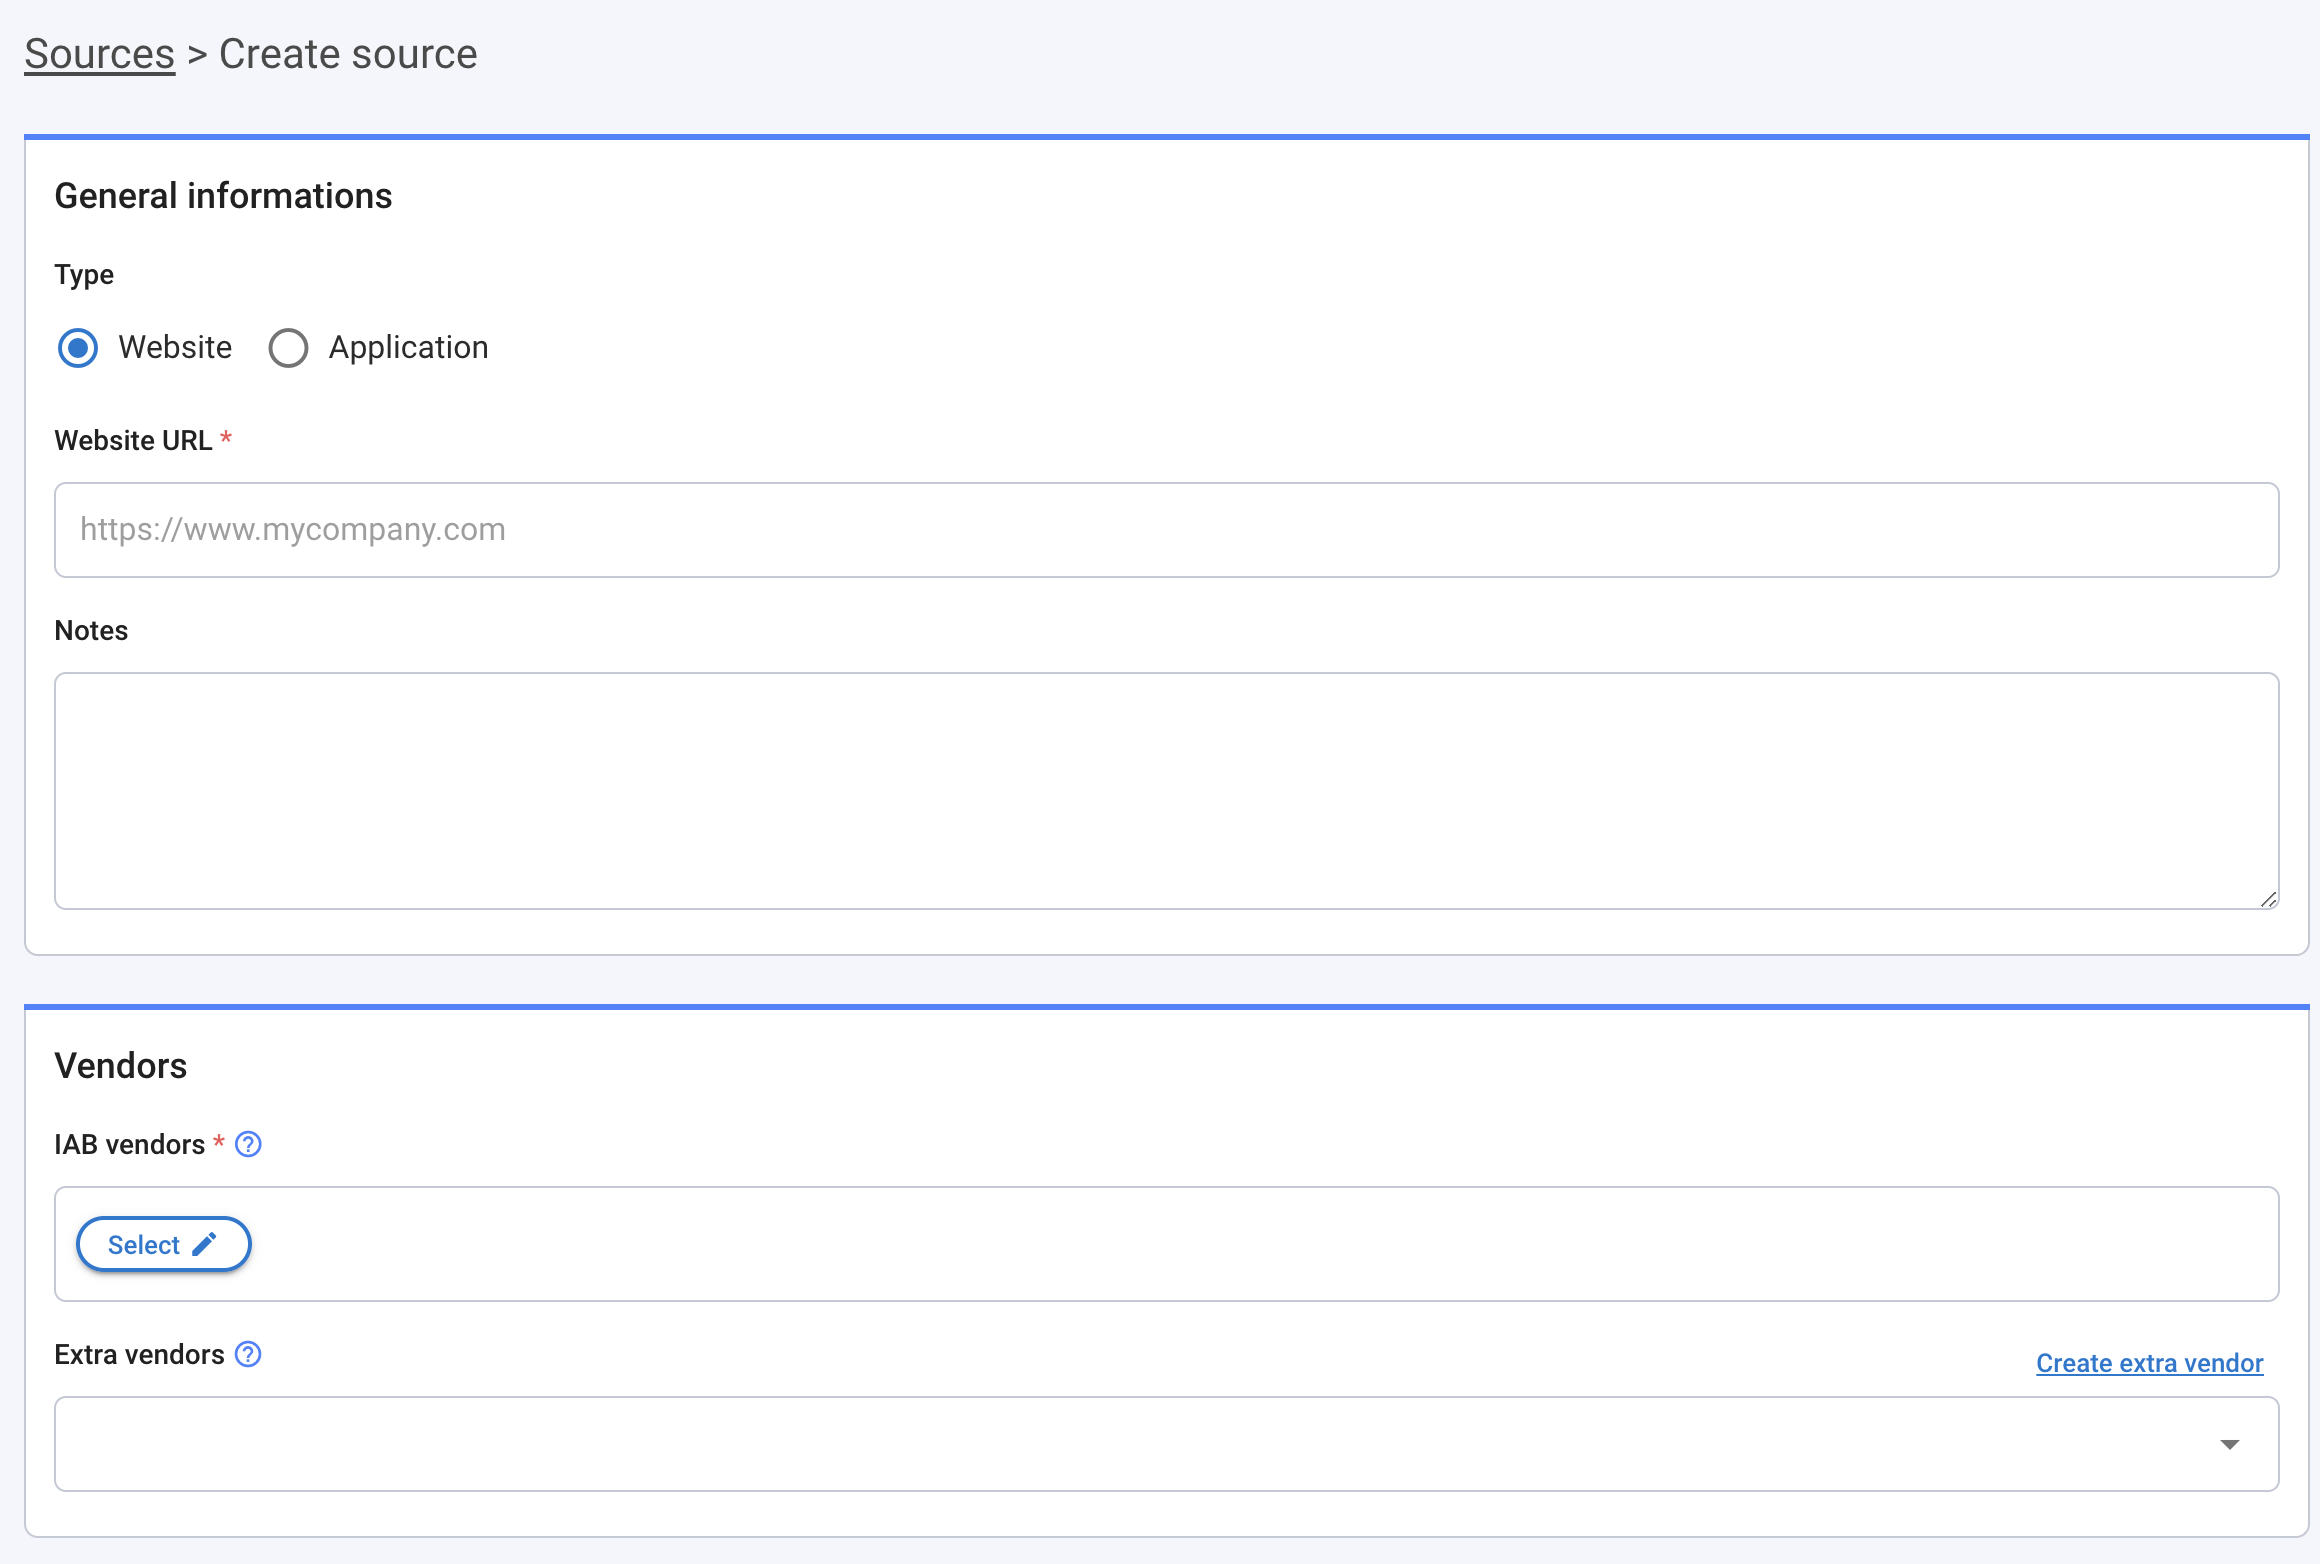
General information
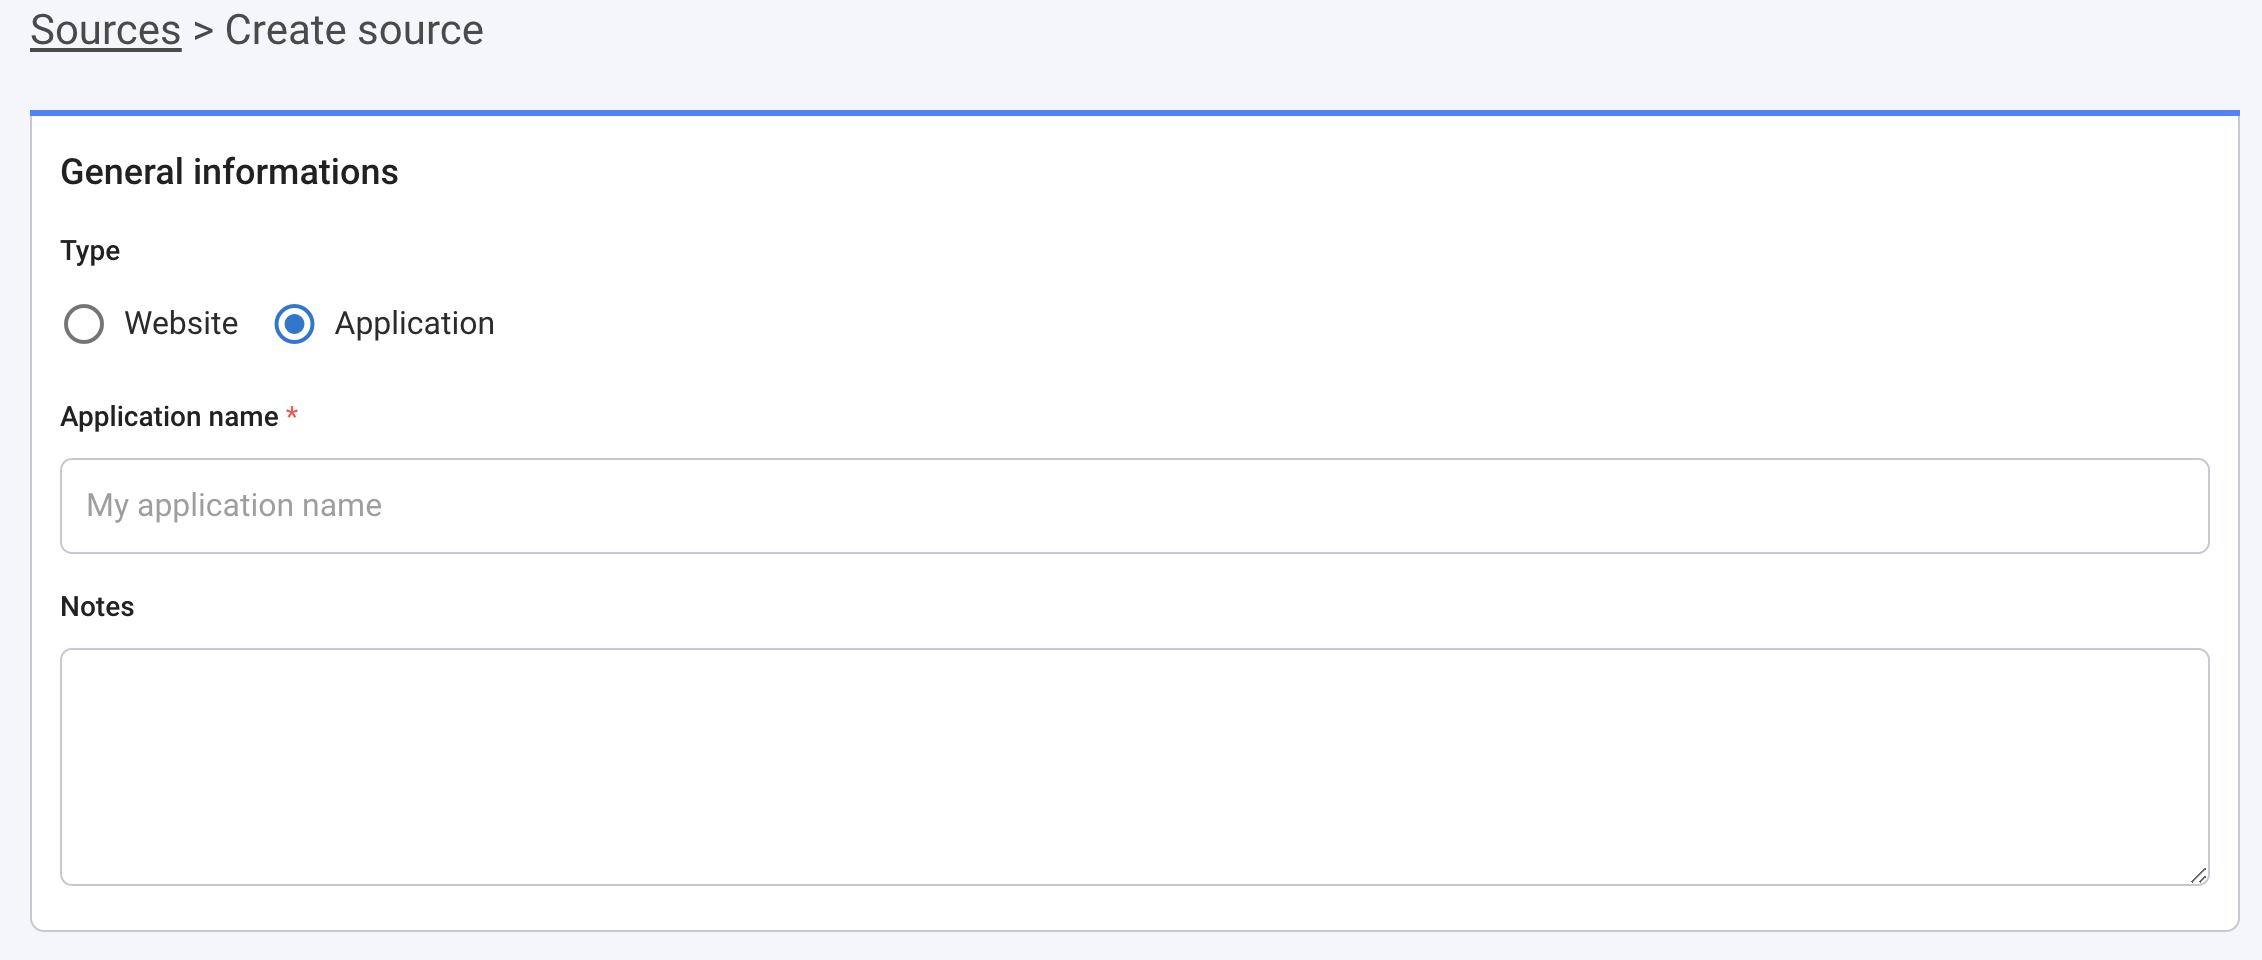
Type: Website or Mobile App
Website URL or Application name: Enter the URL of your website (can be either HTTP or HTTPS) or enter the name of your application
Notes: Leave notes if you need them for your own usage
Vendors

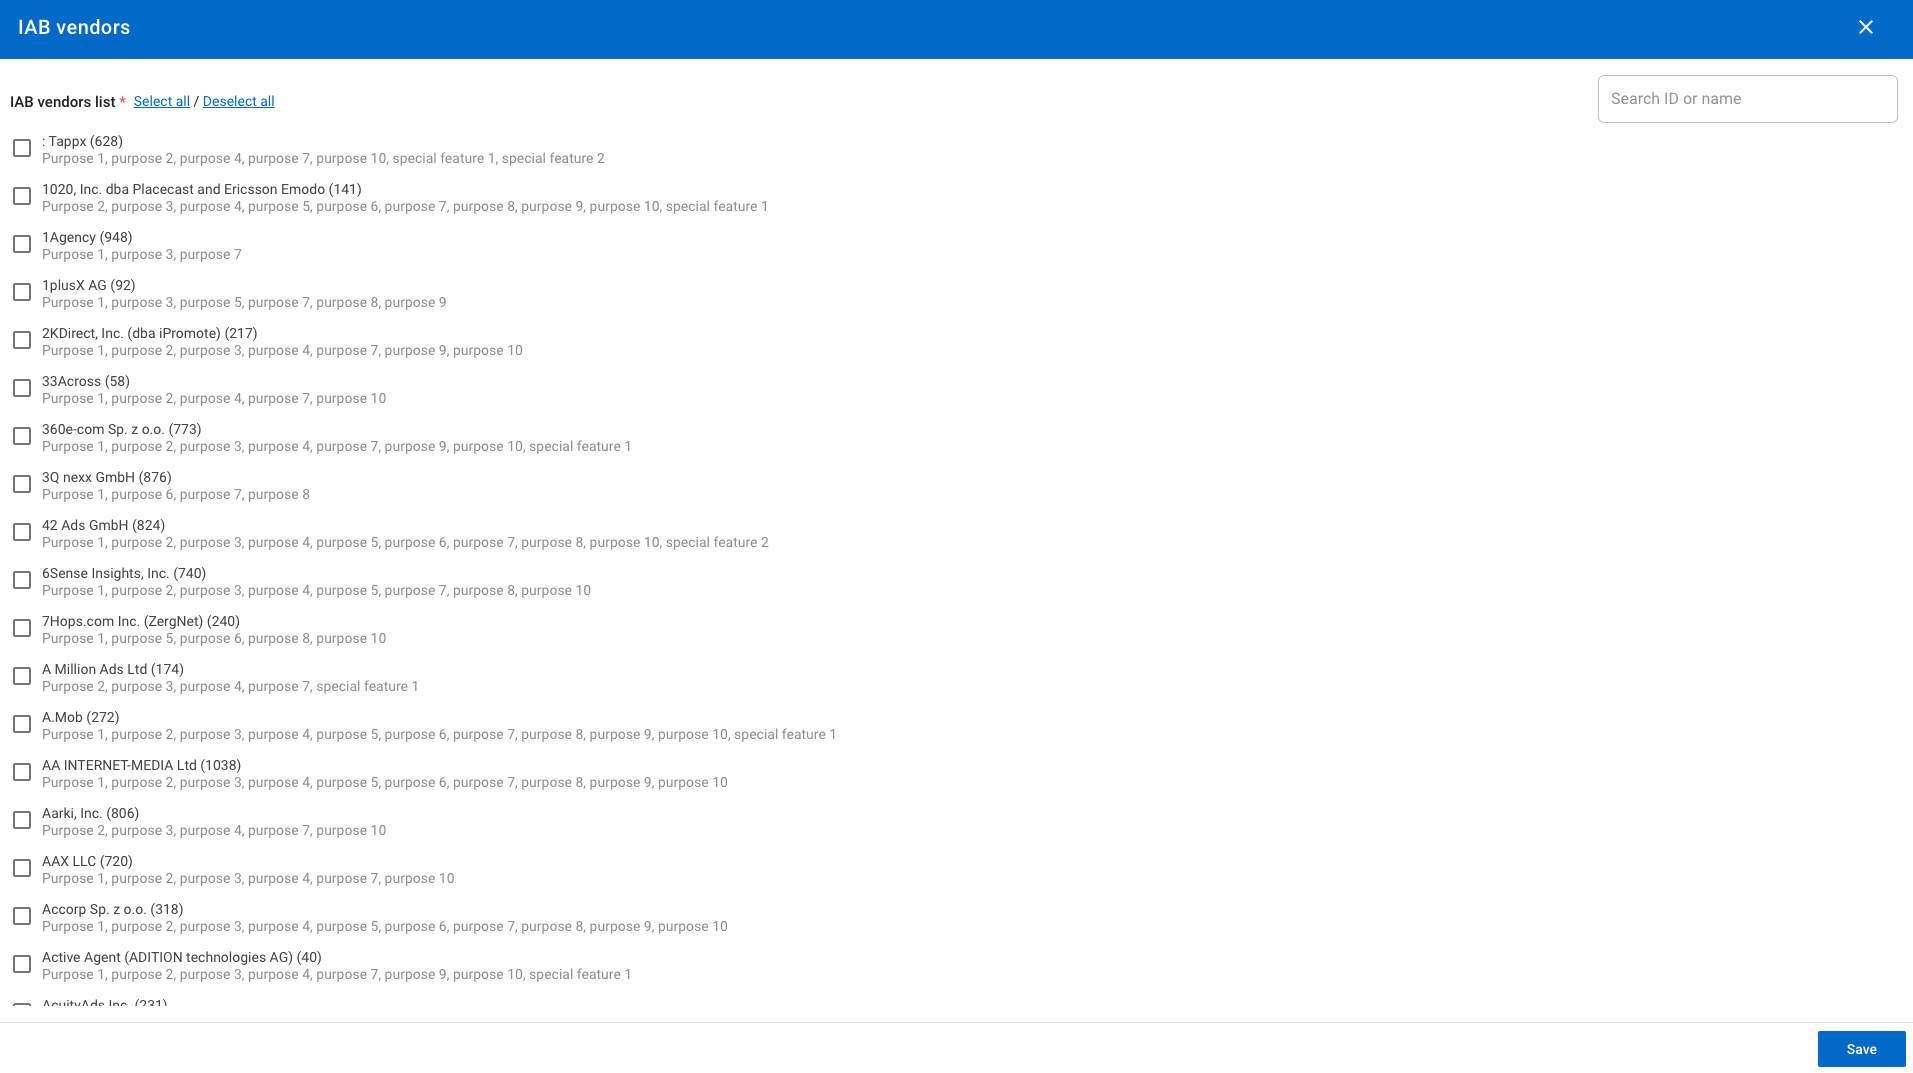
IAB Vendors: Select all the IAB vendors that are present on your website/ app from Select button
Extra vendors: Choose the extra vendors you have created. You will also find a shortcut link "Create extra vendor" to create one at the bottom of the field or leave it blank if you don't have any.
tip
Which vendors are present on my website? To find out, use our Consent Guard tool, you will find all the trackers (cookies and other technical files) that are deposited on your website, and then come back to create your source.
note
GVL: It is updated automatically every Thursday night. In order to apply the new GVL in your notices, already created, you need to edit your sources, select all vendors, and save again the sources, don’t forget to save also the notices associated.
Purposes & Features
note
Using AppConsent CMP, you can get the 12 IAB purposes. To guide you, purposes are automatically selected by us from your vendor's selection, but you can still delete some of them or transform them into stacks (defined group of purposes) that match your data collection and usage.
Concerning the stacks, the only legal rule is that you can't have the same purpose displayed two times for different usages, but our interface won't let this happen.

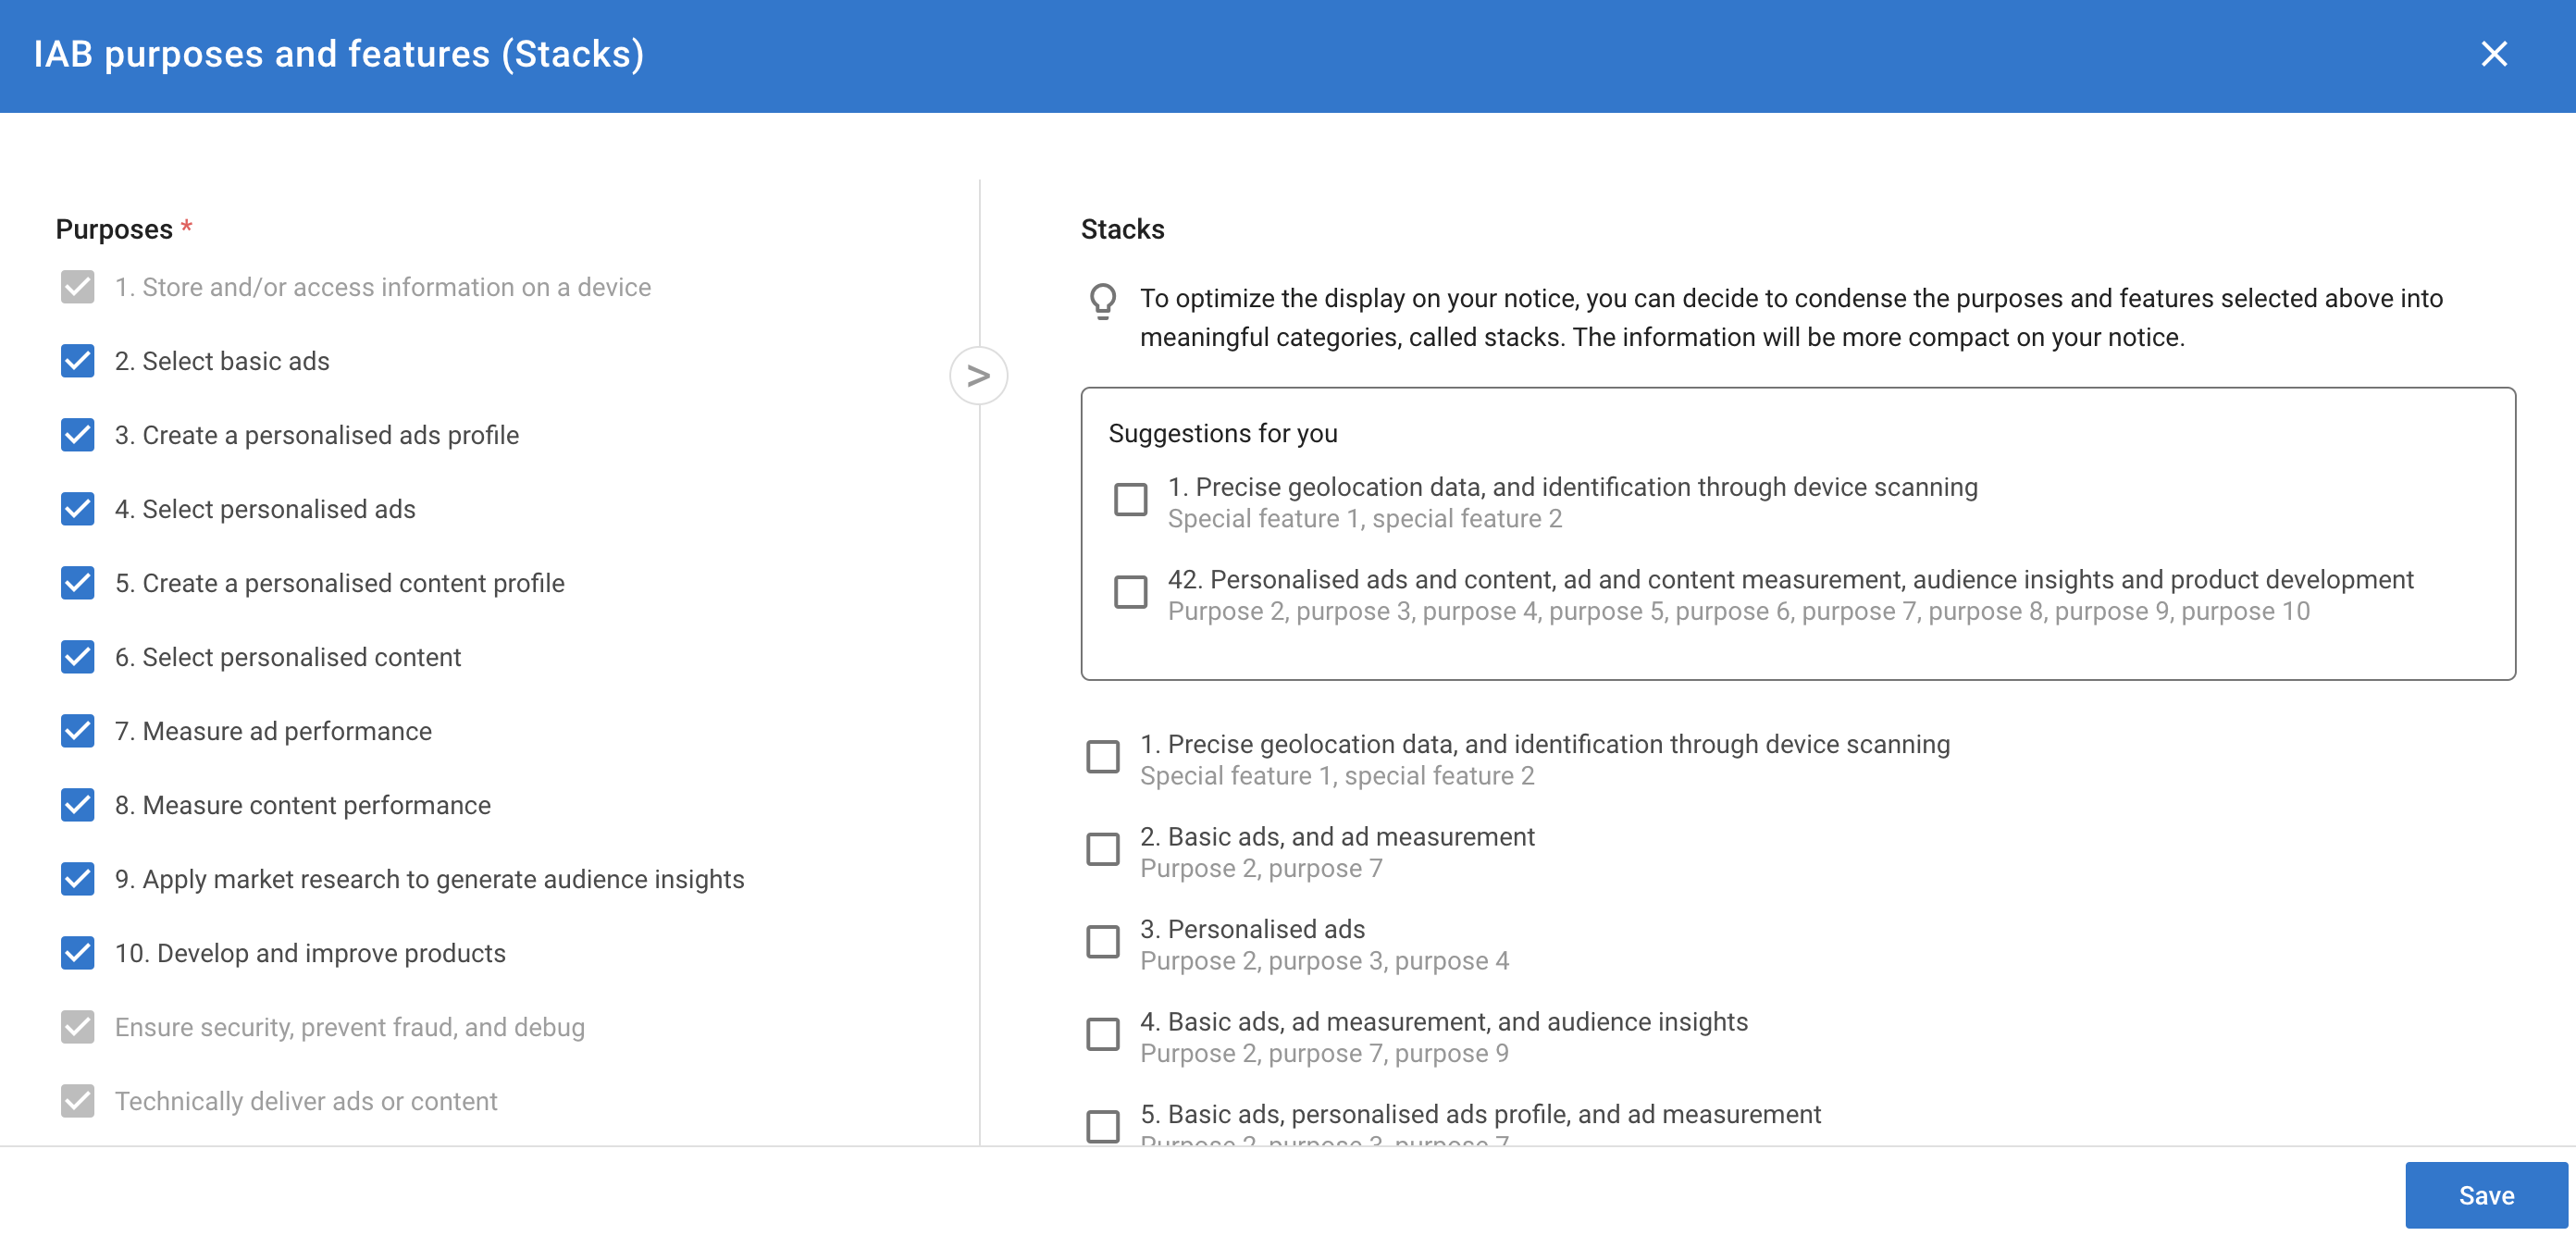
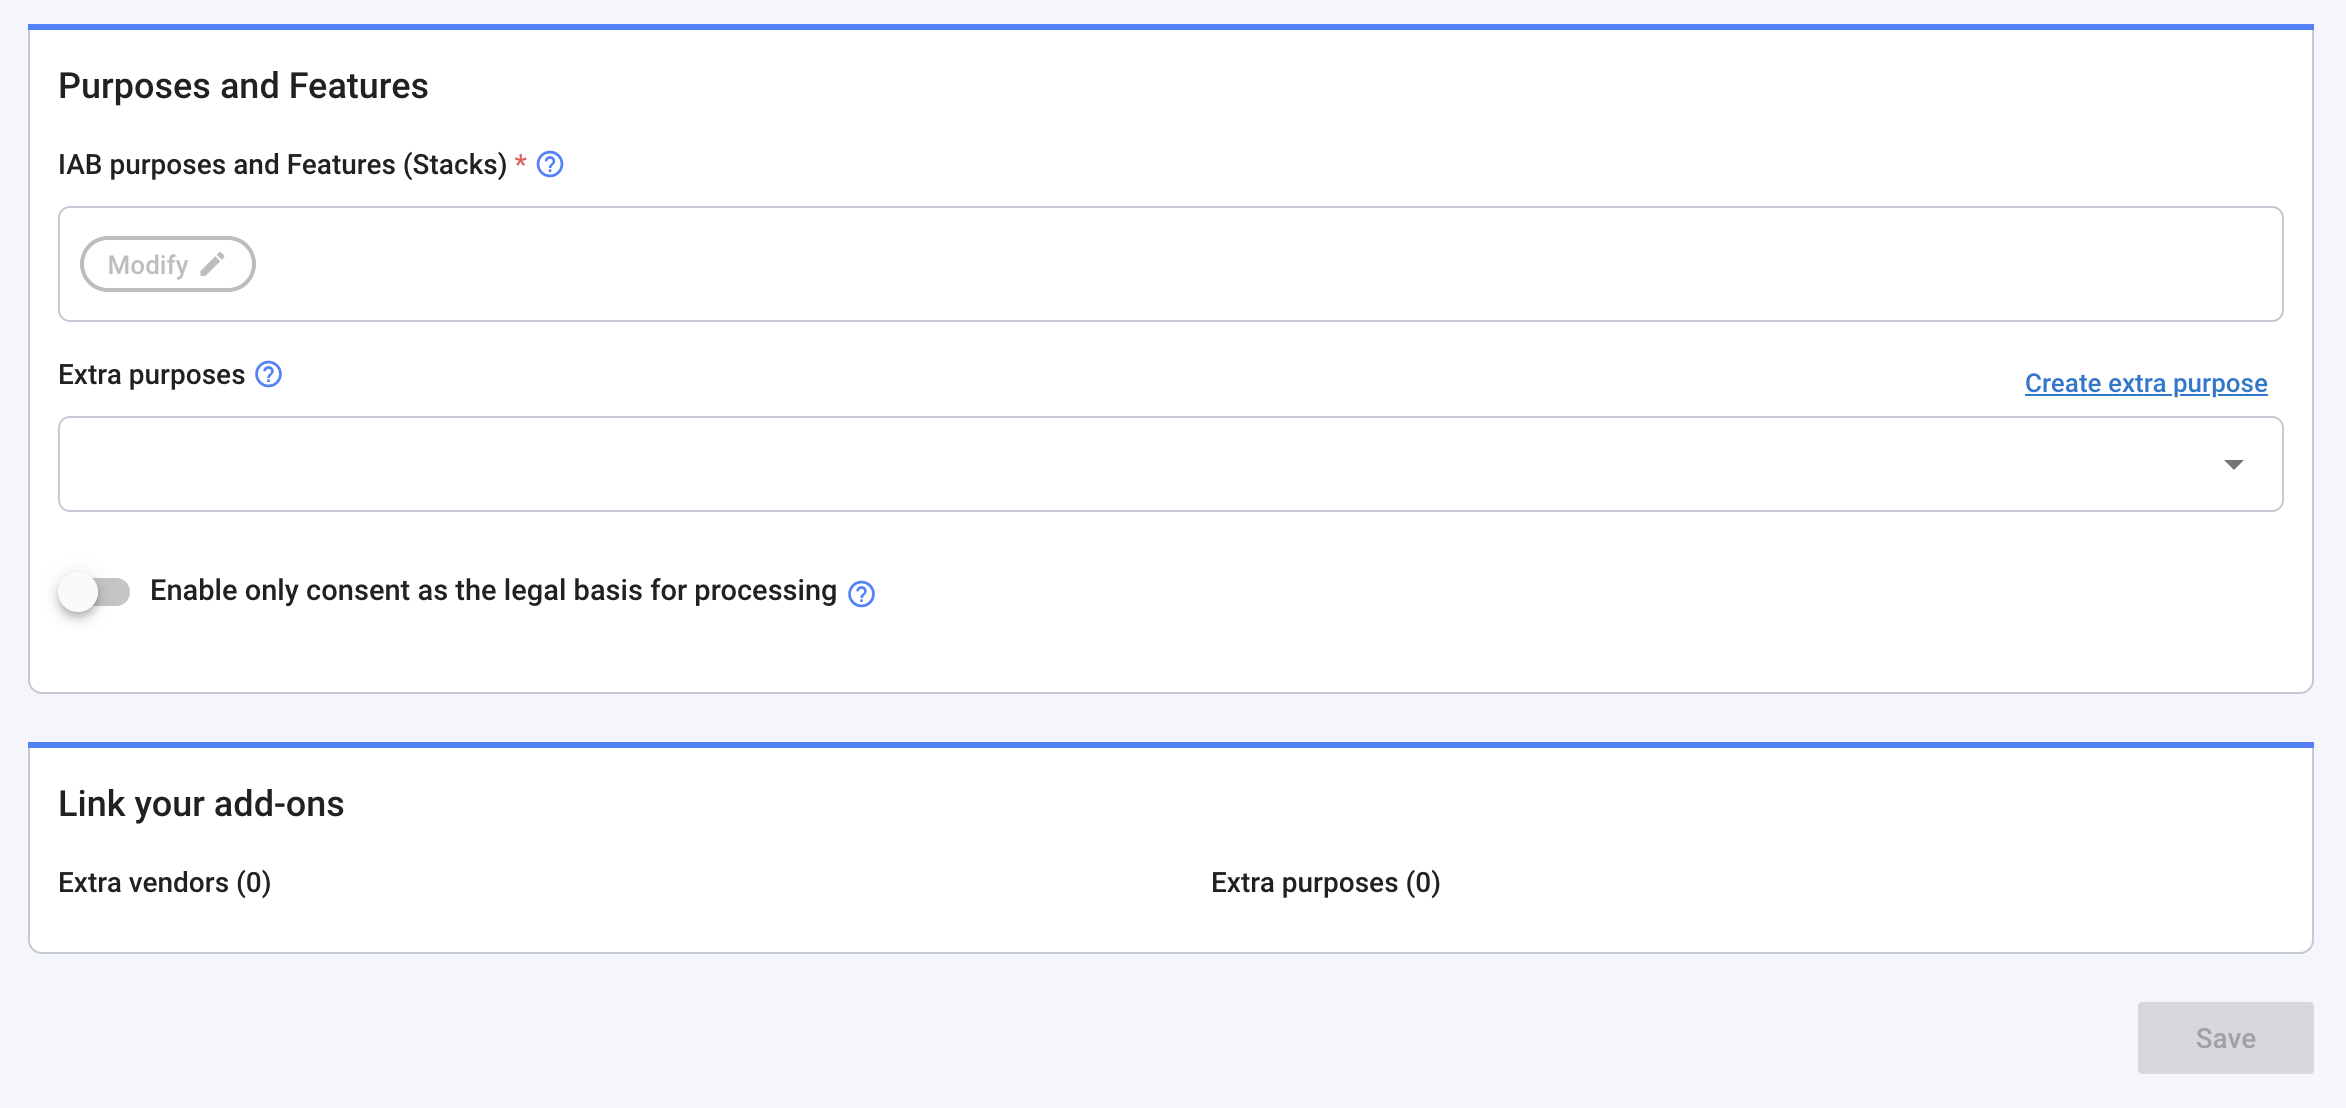
IAB purposes and features (Stacks): you will automatically have purposes and features by selecting some vendors above, but you can still edit them.
Eventually, you can delete some purposes from Modify. By doing so, note that you will automatically delete the associated vendors, as long as the vendors were only present for that goal.
You can't add purpose if you don't have any vendors related to them. To do so, click on Modify.
note
Here is the list of purposes and features that are not editable once you have the vendors related.
- Purpose 1: Store and/or access information on a device
Mandatory:
- Special purpose 1: Ensure security, prevent fraud and debug
- Special purpose 2: Technically deliver ads or content
- Feature 1: Match and combine offline data sources
- Feature 2: Link different devices
- Feature 3: Receive and use automatically-sent device characteristics for identification
From Modify, you can also transform some purposes into stacks. On the right side, click on one or several stacks that match your way of collecting data. Automatically, purposes that composed that stack will be unselected. If you change your mind, just unselect stacks, and purposes associated will automatically be selected
tip
We recommend you to use stacks, it enables you to display less content on the main page of your consent notice, and that will be appreciable for your audience. When clicking on the stack, they will see all the purposes inside.
- Extra purposes: Choose the extra purpose you have created. You will also find a shortcut link Create extra purpose to create one at the bottom of the field or leave it blank if you don't have any.
note
Some of your privacy use-cases are not present in the IAB framework, that's why you can create Extra purpose to display them below the IAB purposes.
Some examples: geolocation purposes for mobile, newsletter...
- [For mobile app source only] Geolocation purposes: A geolocation purpose is created like any other extra purpose, from the Source form, create your geolocation purpose directly with the short link Create extra purpose at the end of the Extra purpose field. It will be added automatically in the field.
Then, select them in the dedicated field: Extra purpose: Geolocation for advertising purpose and/or Extra purpose: Geolocation for marketing purpose.
Leave blank if you don't have any.
caution
For existing notices live in production, if you add or change the purposes linked to a source, you must regenerate the notice concerned by this source: just edit the notice you want and save it (you don't need to alter anything). A new version of the CMP will be pushed to production.
For the modalities of displaying the geolocation purposes, go to the right section for Android and for iOS.
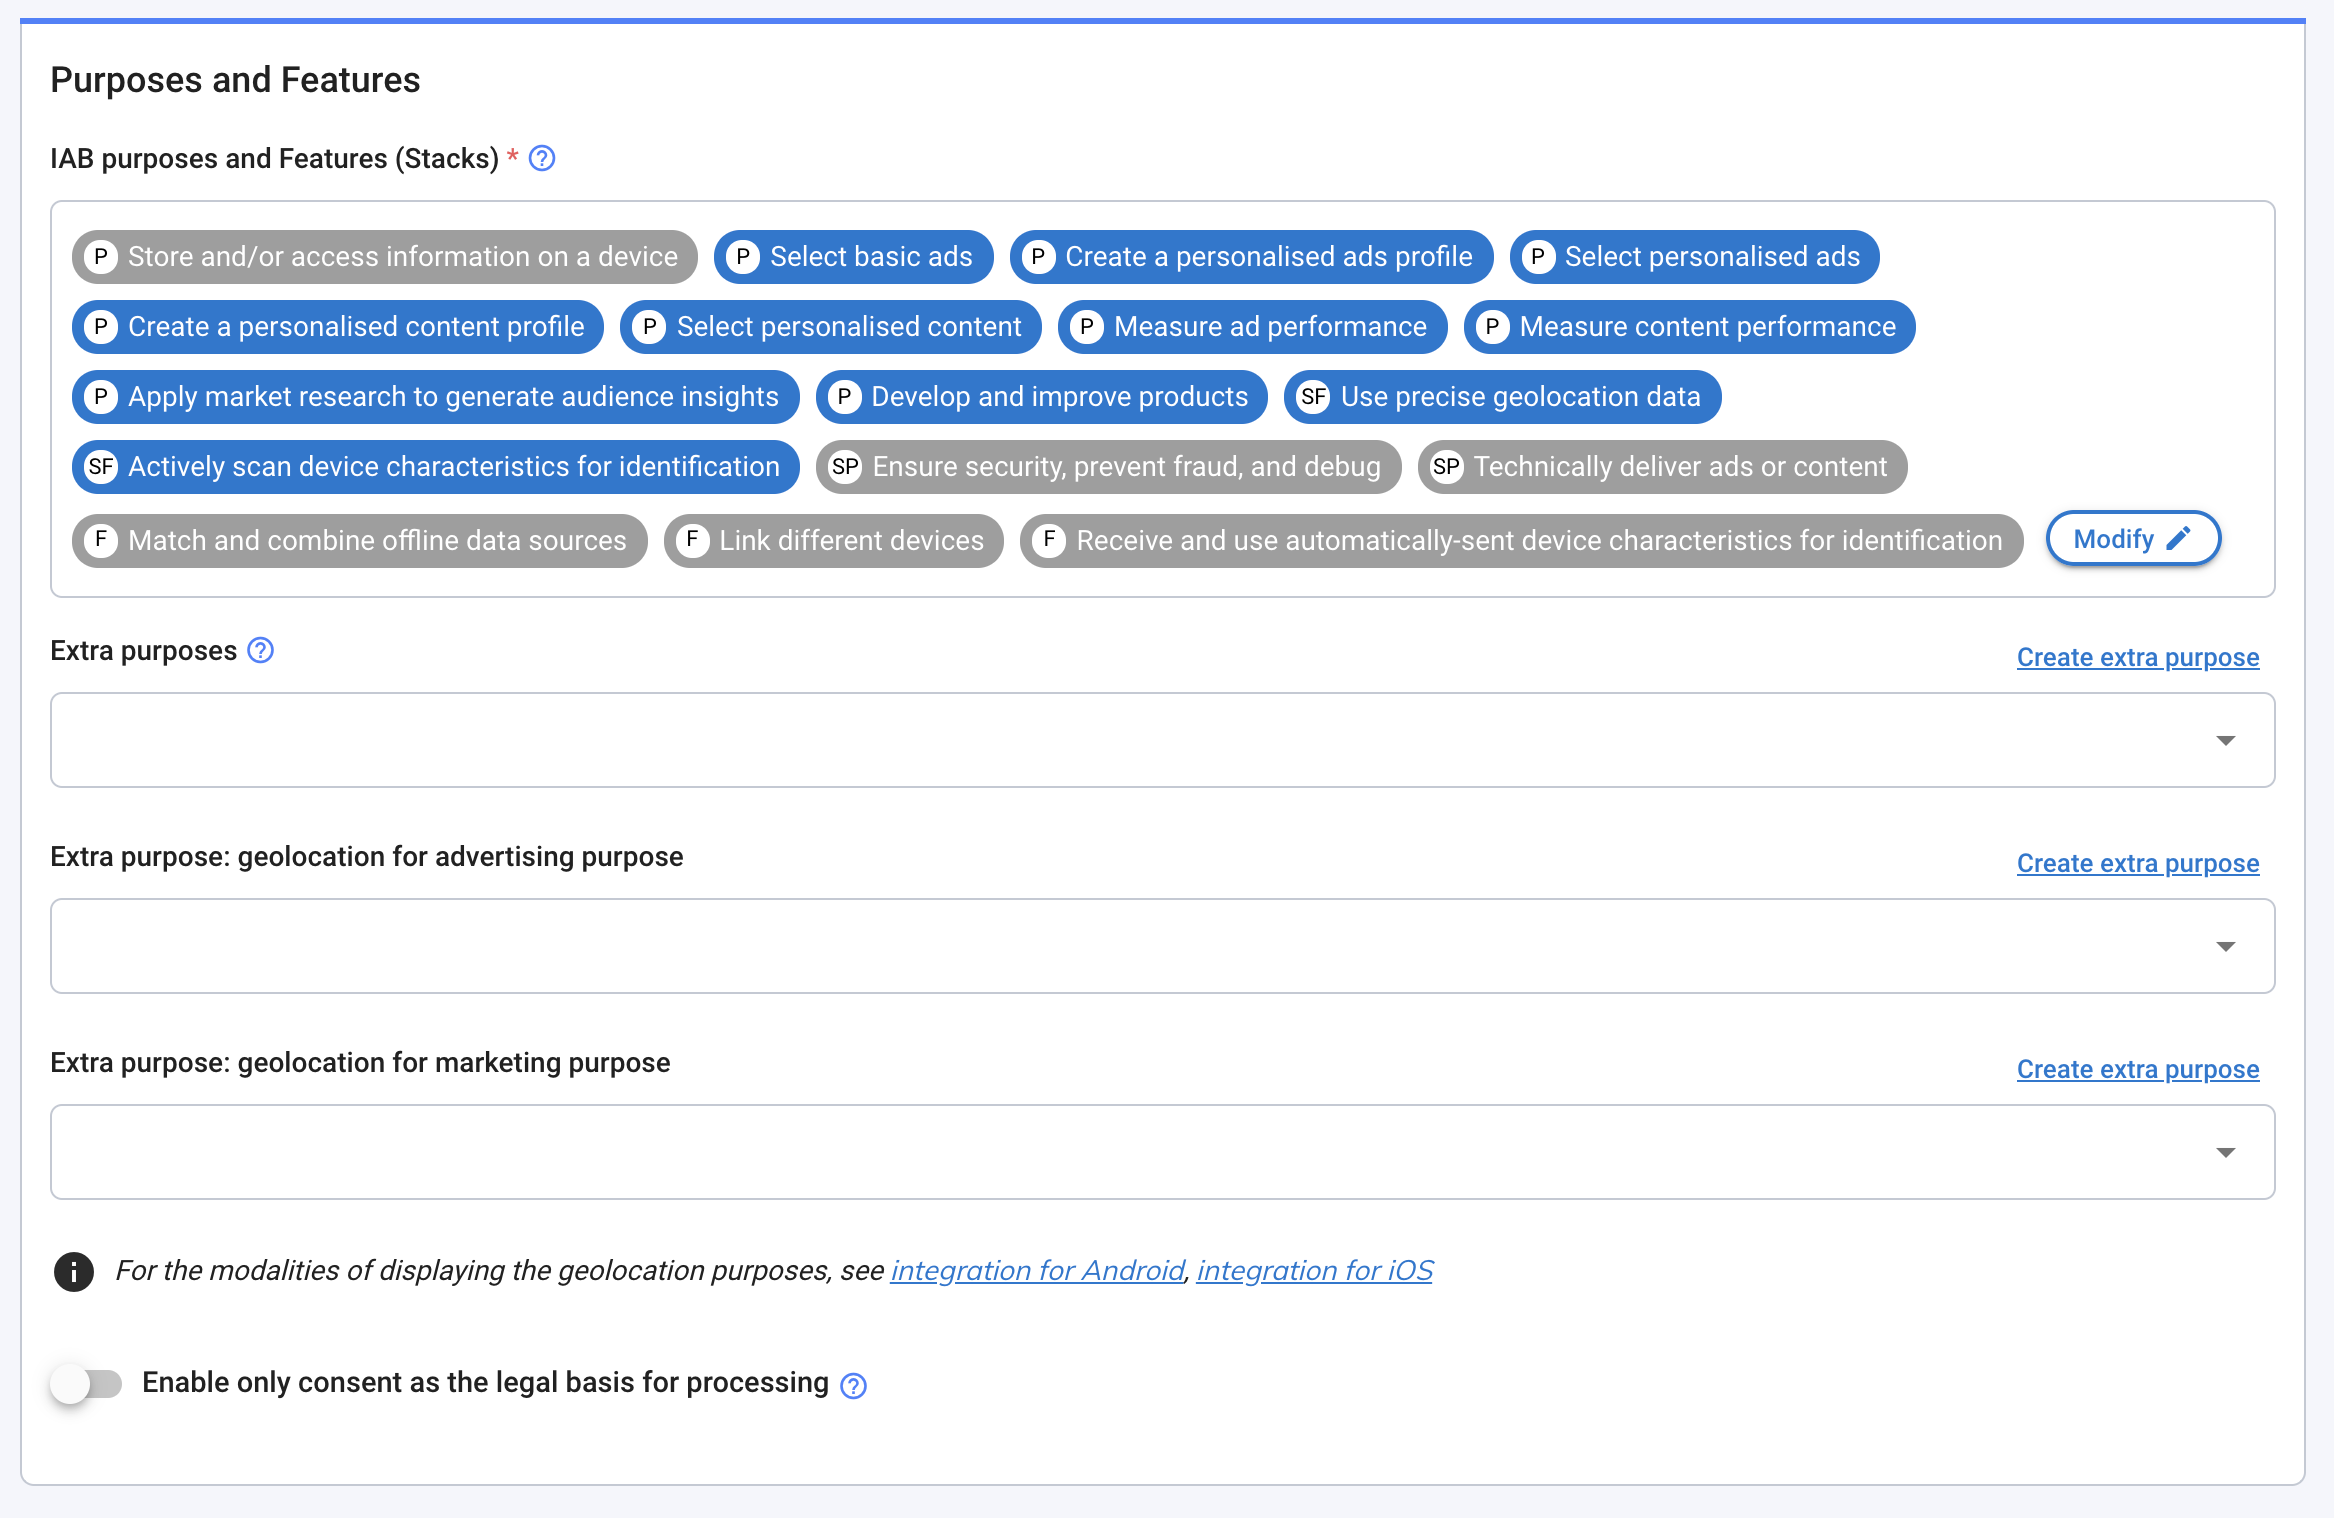
- Enable only consent as the legal basis for processing: if the option is activated, only the purposes falling under the legal basis of consent are taken into account in the collection. Purposes falling under the strict legitimate interest (with right of opposition) are still visible on the notice but won't be collected.
caution
Legitimate interest is one of the actionable legal bases that vendors may want to leverage in order to process your data and the data of your visitors.
In short terms:
- With consent: Without a YES it's a NO,
- With legitimate interest: Without a NO it's a YES.
This legal base is clearly disputed for marketing purposes and moreover, it' not possible to use this legal base in order to access or drop cookies in almost all EU countries.
about flexible legal bases
In the IAB TCF V2, vendors can declare Flexible purposes. That means that they can operate data on both legal base signals.
When you activate Enable only consent as the legal basis for processing, here are the underlying things that happen:
Case 1: Vendor under full consent - No change
Case 2: Vendor with some purposes in Legitimate interest This vendor will lose the right to operate under legitimate interest for selected purposes.
Case 3: Vendor with some purposes in Legitimate interest and Flexibles Purposes. This vendor will see his flexible purposes applied in consent and not a legitimate interest. This vendor will lose the right to operate under legitimate interest for selected purposes.
- Link your add-ons: If you have some extra vendors, you can link them to purpose 1 (IAB) or any other extra purpose that you have created. To do so, click on Choose purpose.
If you have some extra purposes, you can link them to any IAB vendors that you have previously selected or extra vendors that you have created. To do so, click on Choose vendor.

Confirm by clicking on Save.
Your source now appears on the board:

ID: the unique ID of the source.
Target URL or App ID: the name of the source
Creation: Time elapsed since the creation of the notice.
Last Update: Time elapsed since the last update of the notice.
Status: For now only one status: active.
Edit your source
You can edit your source at any time. Just go back to the Sources menu and click on the row of your choice. The page will appear and you can update your source information.
caution
To make the changes appear in the notices, you must save all the notices concerned. Just edit the notice and save it (you don't need to alter anything). A new version of the CMP will be pushed to production.