Comment mettre en place Google Consent Mode v2
Since version 32.8.1 of the CMP, we improved a lot the behavior of the Google Consent Mode v2 in order to be bulletproof regarding the Google requirements.
caution
Cette page est en cours de traduction en FR
What is Google Consent Mode v2 ?
Consent mode lets you communicate your user's cookie consent status to Google. Tags adjust their behavior and respect user's choices. Consent mode receives your user's consent choices from your cookie banner or widget and dynamically adapts the behavior of Analytics, Ads, and third-party tags that create or read cookies.
When you enable consent mode, Google measurement products ensure that a visitor’s consent mode state is preserved across the pages they visit.
Basic consent mode
When you implement consent mode in its basic version, you prevent Google tags from loading until a user interacts with a consent banner. This setup transmits no data to Google prior to user interaction with the consent banner. When the user grants consent, Google tags load and execute the consent mode APIs. The tags send the consent states to Google in the following order:
- Send default consent states.
- Send updated consent states.
However, when the user doesn’t consent, no data is transferred to Google at all – not even the consent status. Google tags are completely blocked from firing. Consent mode's conversion modeling in Ads is then based on a general model.
Advanced consent mode
When you implement consent mode in its advanced version, Google tags load when a user opens the website or app. The tags load the consent mode API and do the following:
- Set default consent states. By default, consent will be denied, unless you set your own defaults.
- While consent is denied, the Google tags send cookieless pings.
- Wait for user interaction with the banner and update consent states.
- Only when a user grants consent to data collection, Google tags send the full measurement data. Learn more about tag behavior.
This implementation enables improved modeling compared to the Basic one as it provides an advertiser-specific model as opposed to a general model.
Find more information in the Google official documentation
caution
In order to leverage Google Consent Mode you need to at least have :
- the Google Advertising Product vendor ( id 755 ) in your source / notice
- and the IAB purposes 1, 3, 4, 7, 9 selected
Activate Google Consent Mode v2
Go to the backoffice in the Notices menu. Then click on the notice you use or you want to implement in your website.
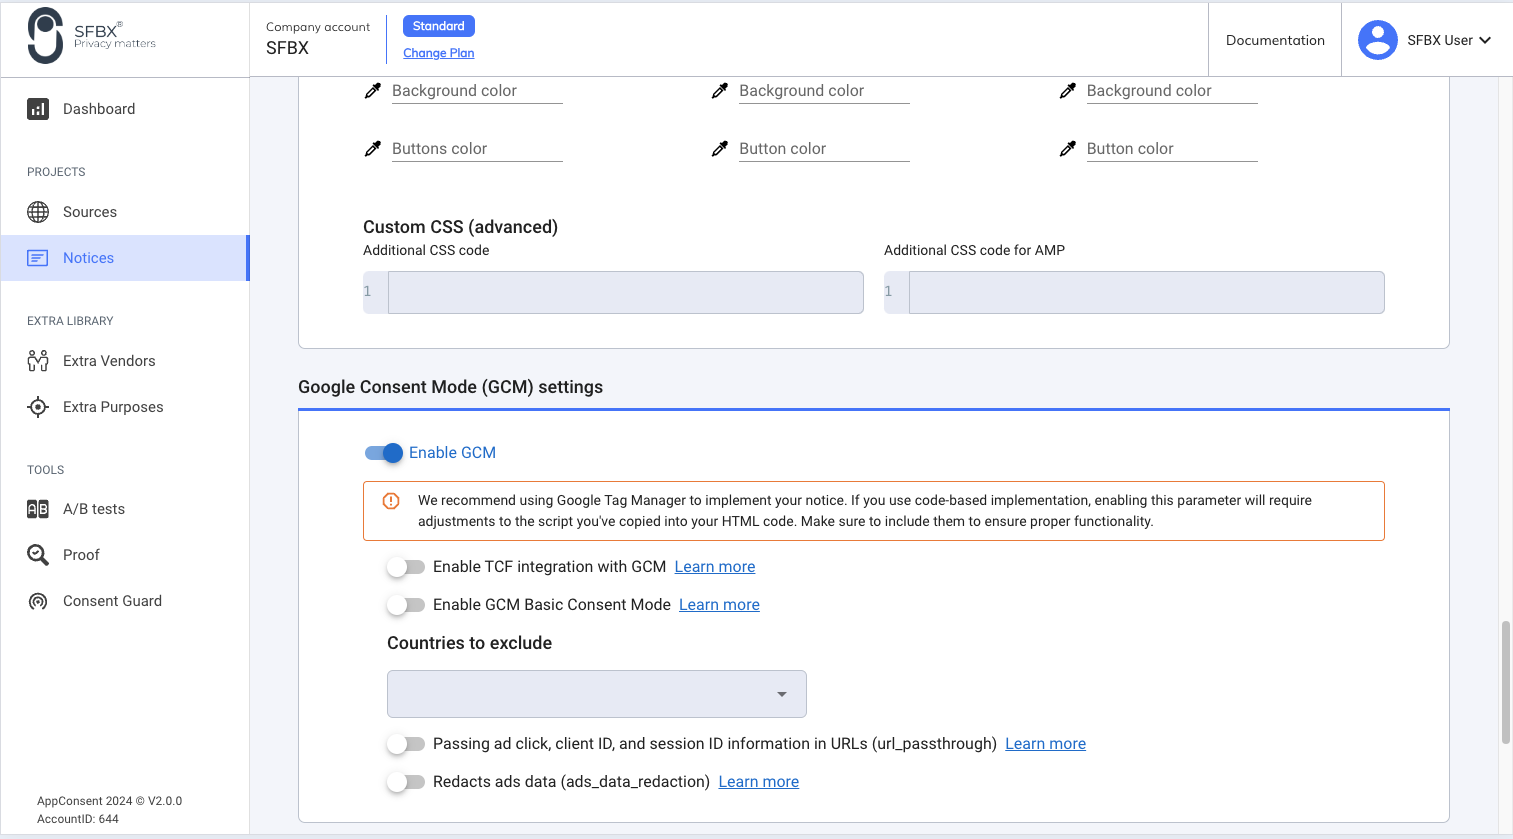
Go to Advanced tab and switch on enableGCM
Implementation using regular code
Find more information in the Google official documentation.
Now you can get the updated code in the Notice menu. Just click on the given notice.

- Click on the copy button on the top right of the code window.
- Then past the code the highest possible just after the
<head>tag
That's It ! Your website is now ready for Google Consent Mode v2
Implementation using Google Tag Manager
You can leverage AppConsent CMP using our last template from the GTM Gallery.
- Install the GTM template Sfbx Appconsent CMP Setup
- Copy/past your APP_KEY
- Click on enableGCM in the tag
- Then deploy.
For more information, see this page : Install Appconsent with Google Tag Manager
Validating the Google Consent Mode v2 using Google Tag Assistant
- Go to https://tagassistant.google.com/
- Click on Add Domain and fill your domain
- On your website, accept the CMP then return to tag assistant
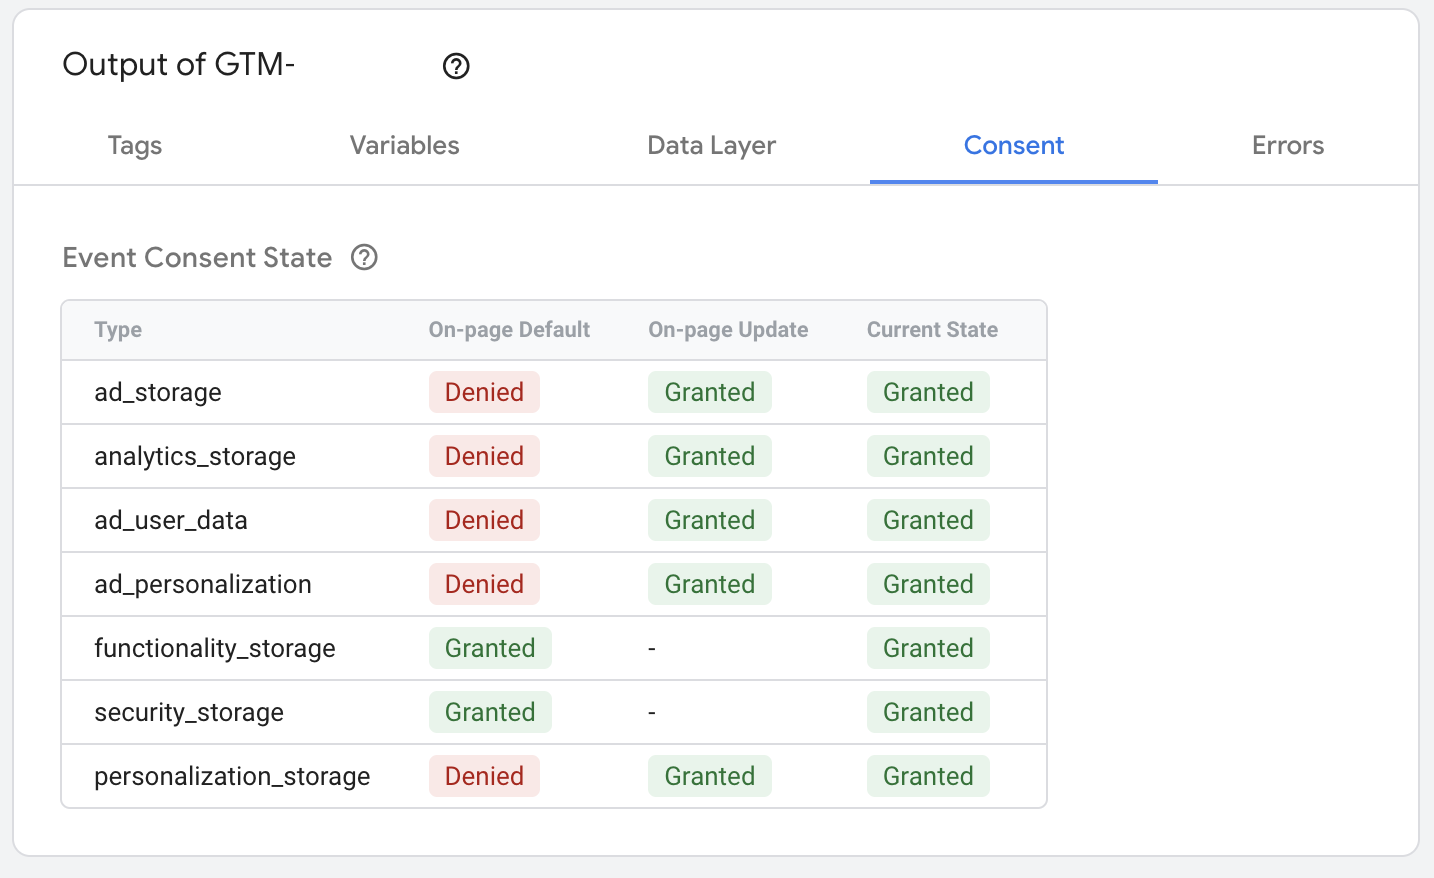
- On the left side, click on the first message entry
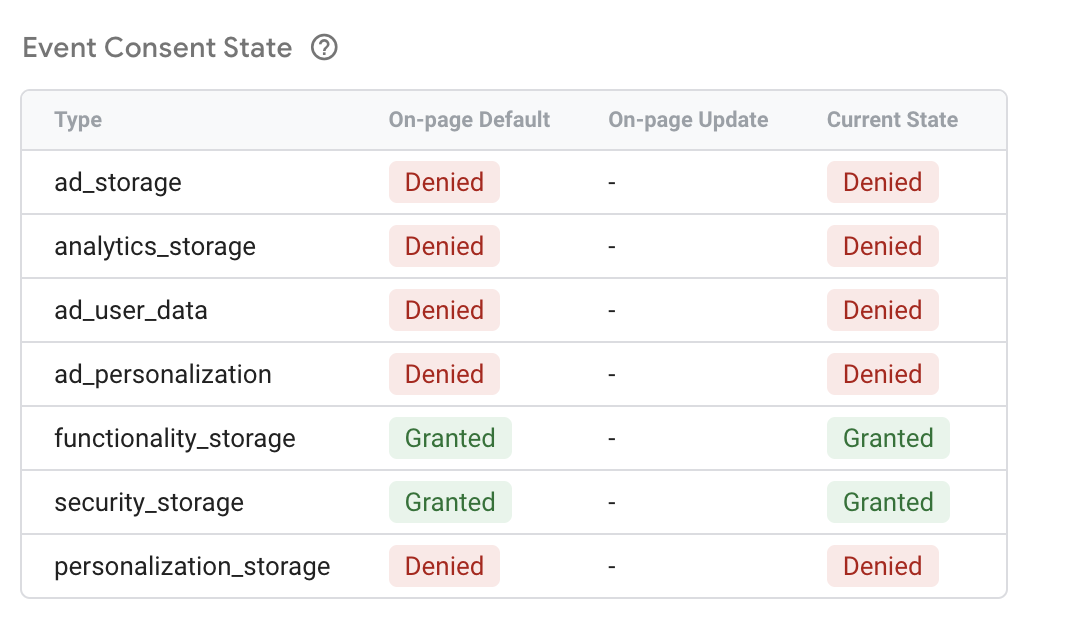
- Now in the middle of the page, select the consent tab, you should have something like below :
If you refuse / deny the CMP , you will get a full denied GCM state :