Configure a web notice
Before creating your notice, you need to have a valid source declared in AppConsent. See section Create a source in order to learn how to create a new source.
In the left menu, click on Notices and then on CREATE NOTICE.

Settings
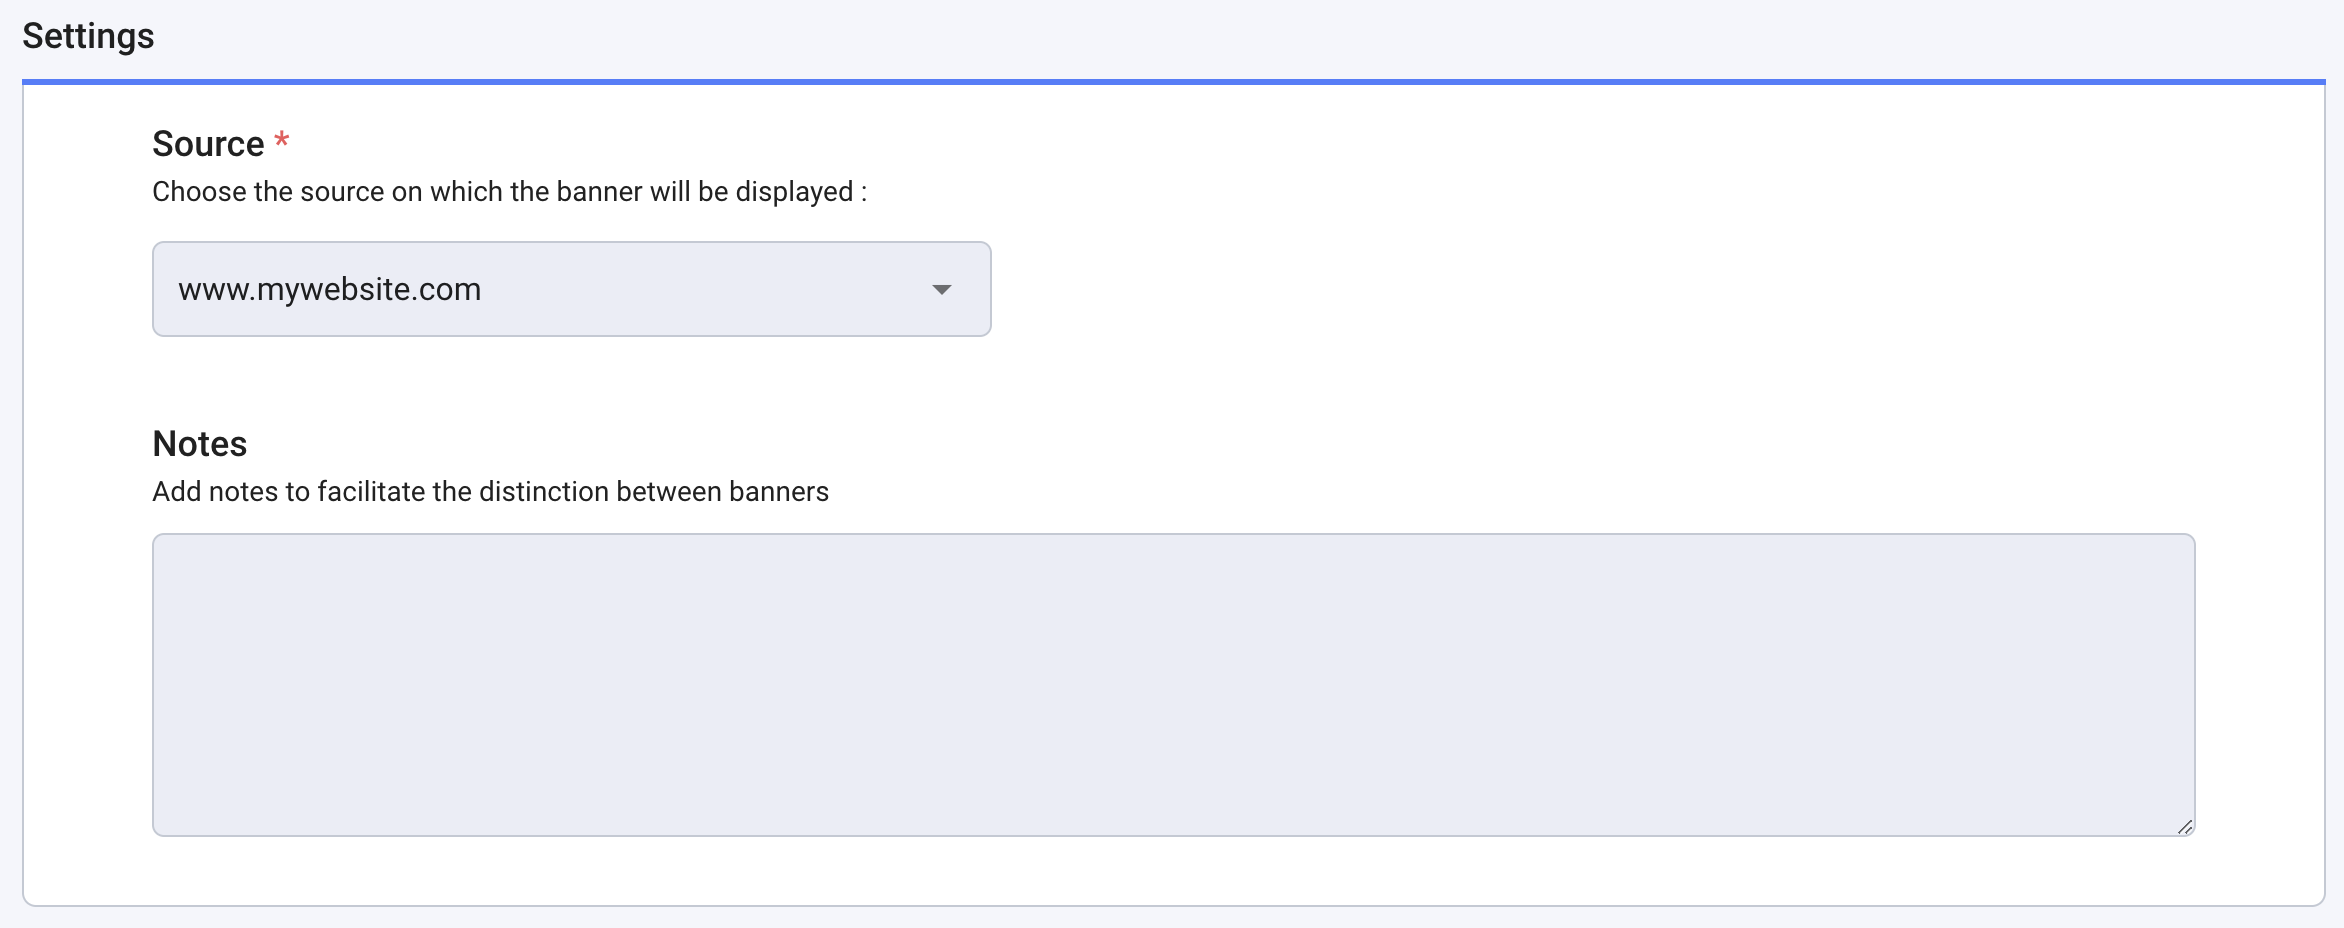
Source: Select the source you want to attach the notice to. Notice is always linked to one source.
Notes: Add the comments you want. It’s a reminder for your own usage and it will not be displayed anywhere in the notice.
Language & text customization
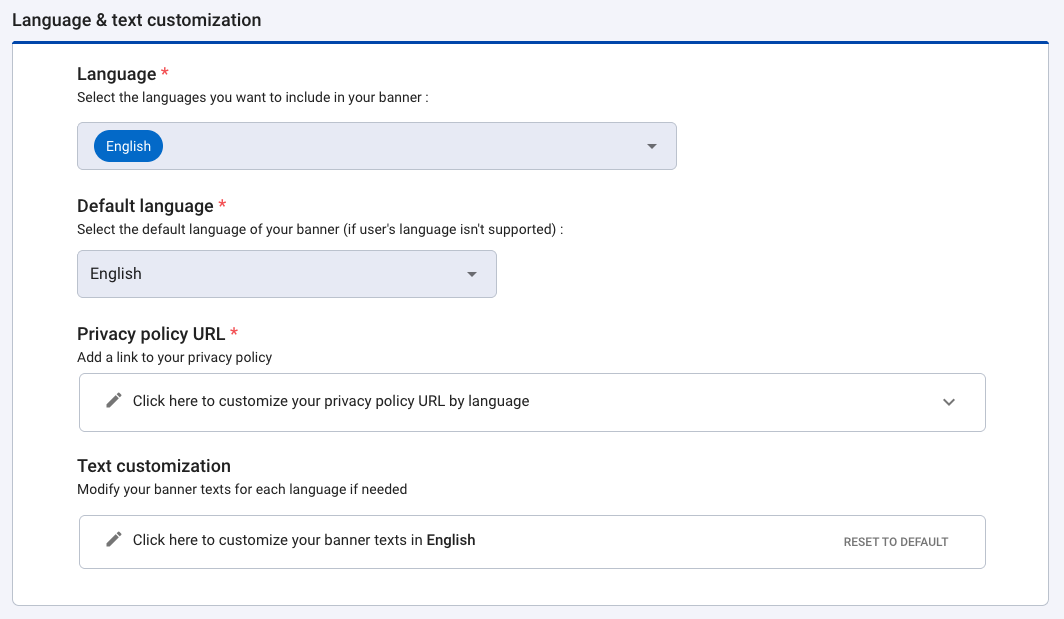
Languages
Select the language you want to be included in your notice. Languages available for web notice:
- English
- French
- Spanish
- Italian
- German
- Dutch
- Portuguese
- Polish
- Bulgarian
- Czech
- Catalan
- Swedish
- Danish
Default language
This language will be used if the browser language is not configured in one of the languages included in the notice.
By default, a new notice is configured in English only. But you can add other languages and translations.
Privacy policy URL
Add the link to your privacy policy for each of the languages selected above. This link will be automatically added to the "See more paragraph" banner field in the text customization section once the notice has been created.
Text customization
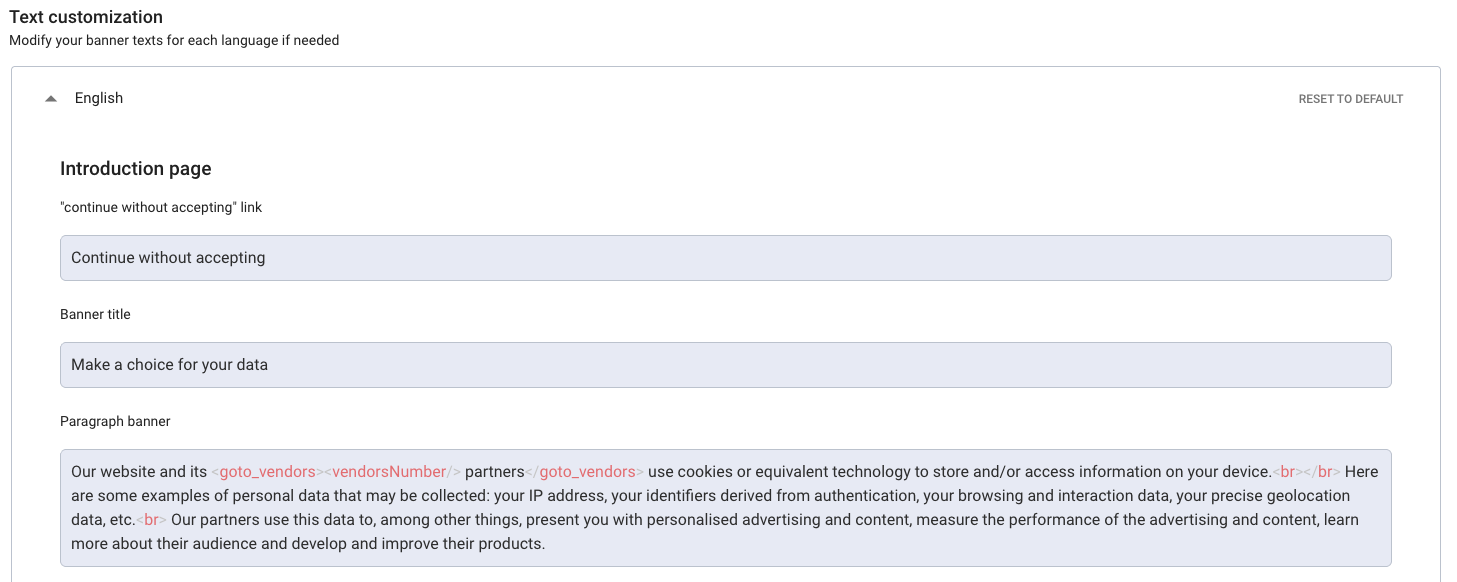
In each language tab, you will find all text of your notice. You can modify them. But you can also reset the default texts by clicking on Reset to default.
Important
Please note that the default text of the banner "See more paragraph" banner field does not mention your link
to your privacy policy page. Make sure to update it with your own link by completing the <a\> tag in each language
selected.
If the <privacy_policy_url> tag is not present in the "See more paragraph" banner field, be sure to add
your own link by completing the <a\> tag.
It is possible to create links in text to redirect users to other parts of the notice. For this, two tags are available:
- <goto_vendors>: Allows to create a redirection link to the list of all partners (vendors) that are present in
the notice.
- Note: The <goto> tag is deprecated, use <goto_vendors> instead
- <goto_settings>: Allows to create a redirection link to consent settings page
The titles of the IAB purposes and their definitions can't be changed. It's due to the IAB TCF compatibility with their Term & Privacy policies.
Banner layout
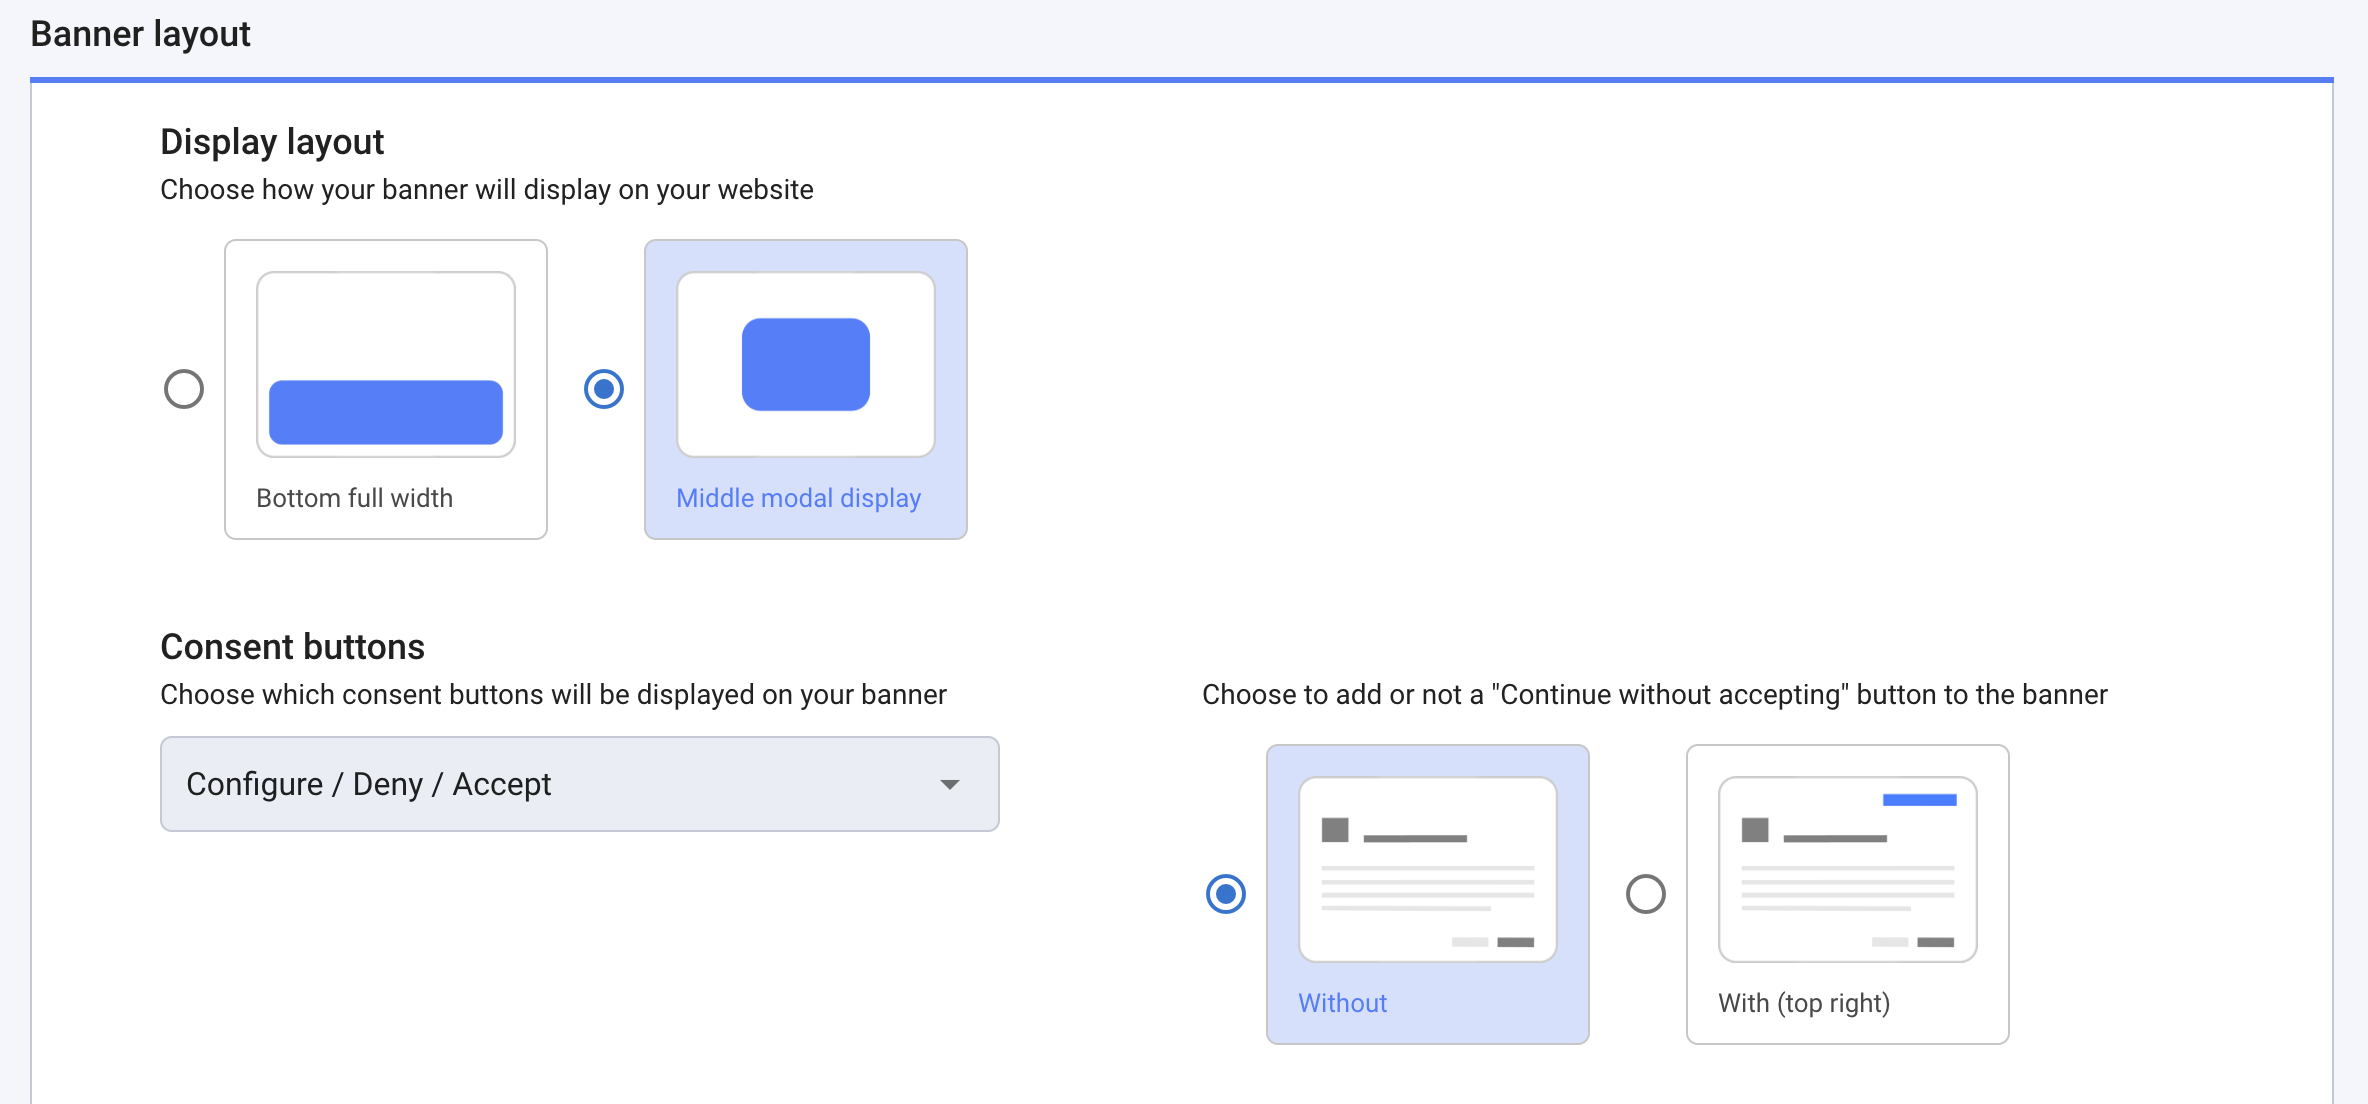
Display layout
Choose between a bottom banner or a middle modal window.
Consent buttons
Choose the buttons and their order on the introduction page
Choose to add or not the "Continue without accepting" button so that the user can leave the notice without making a choice. By default, it is a link "continue without accepting" placed at the top right of the window.
note
From April 1st, 2021, the "Refuse All" button is mandatory in France. To learn more about the new guidelines of the CNIL since April 1st, you can have a look at our dedicated article
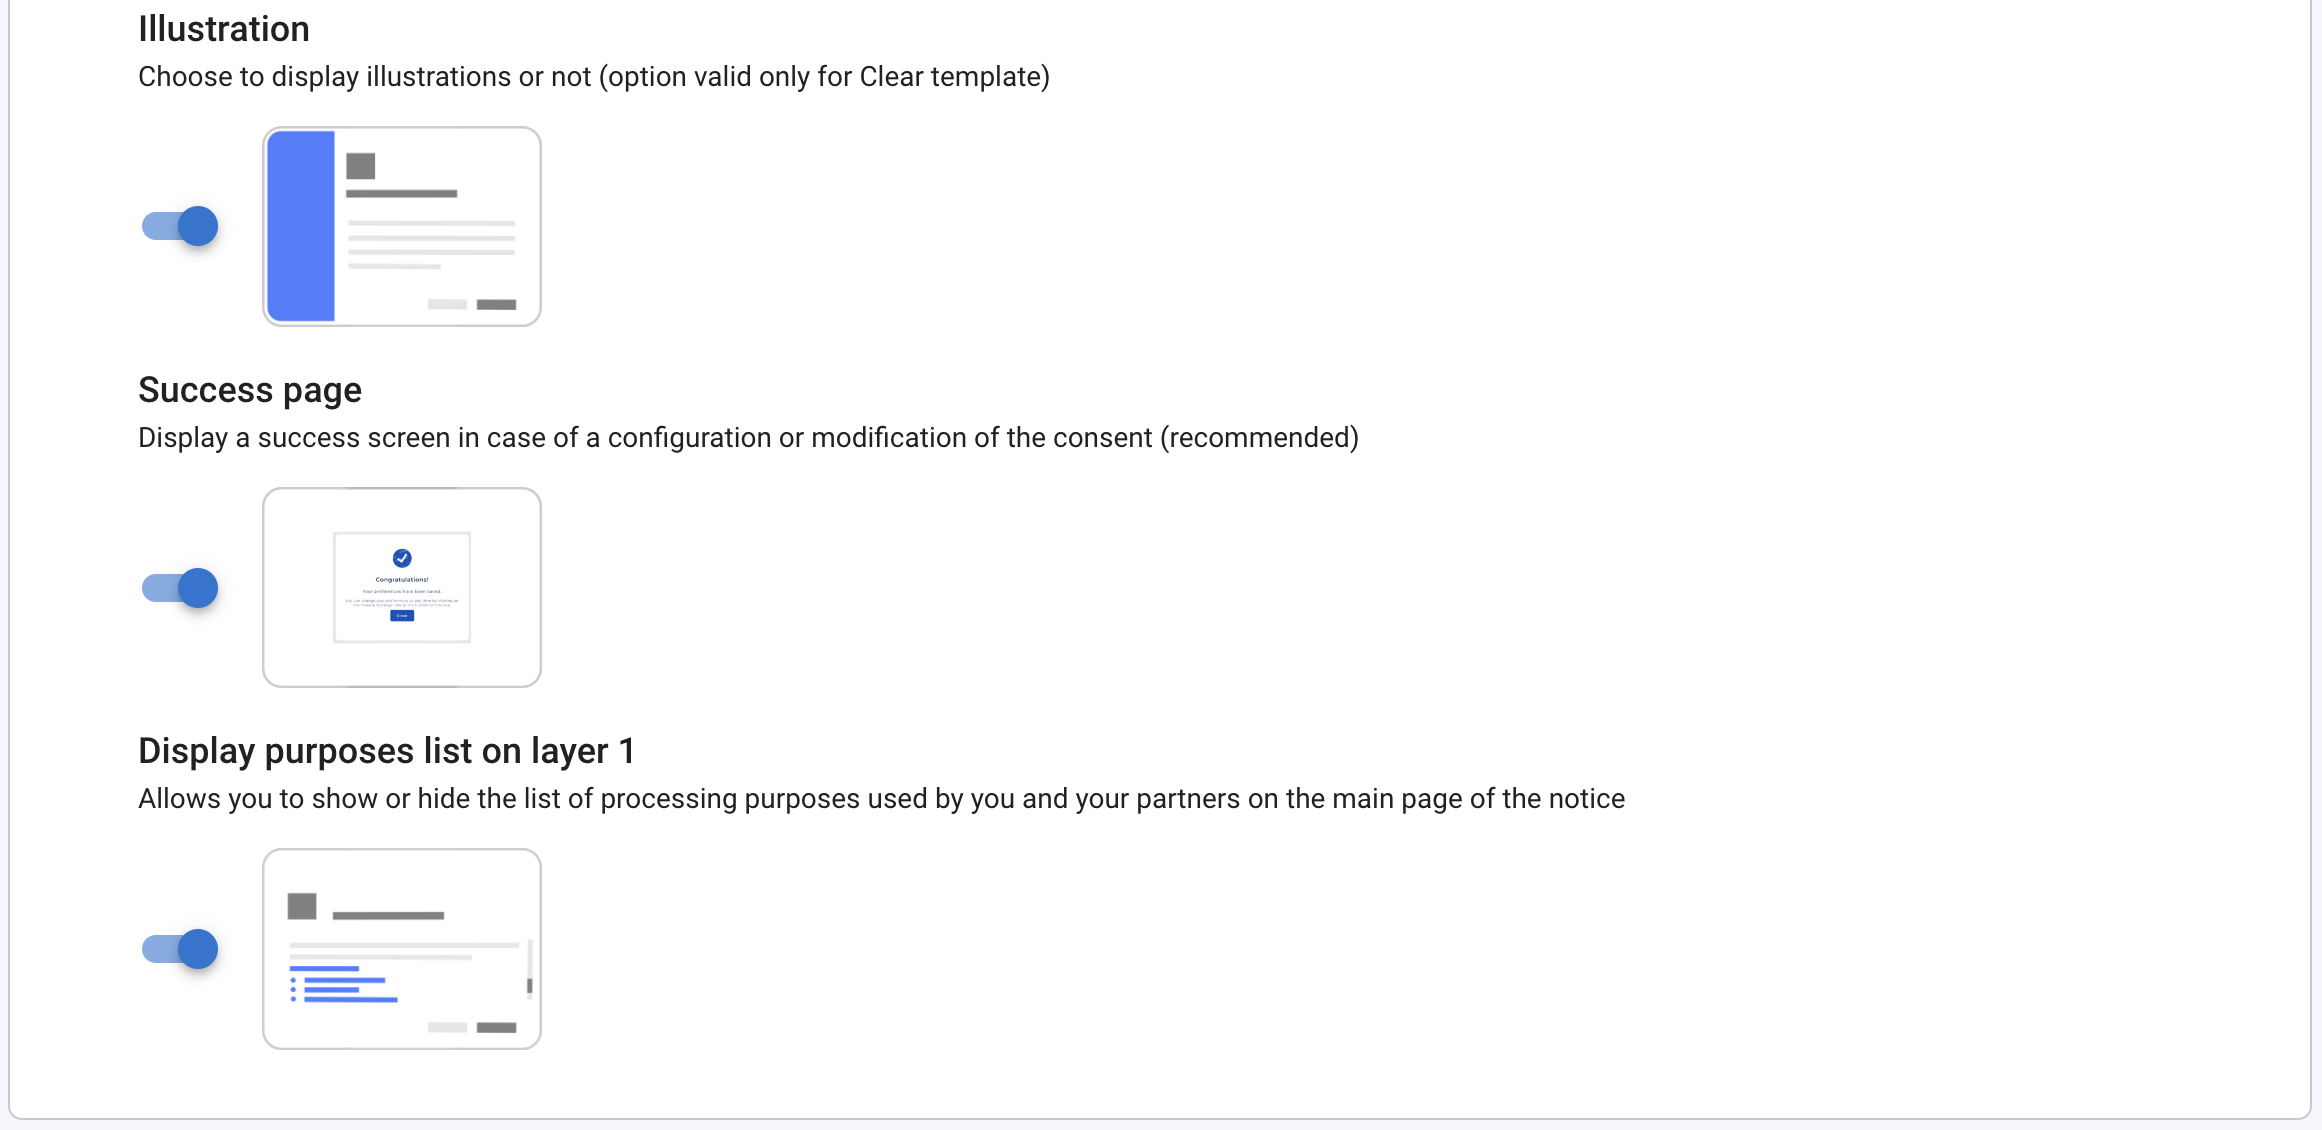
Illustration
[ Standard, Essential & Premium Plans] Choose to display illustrations or not on your banner. (only for Clear banner)
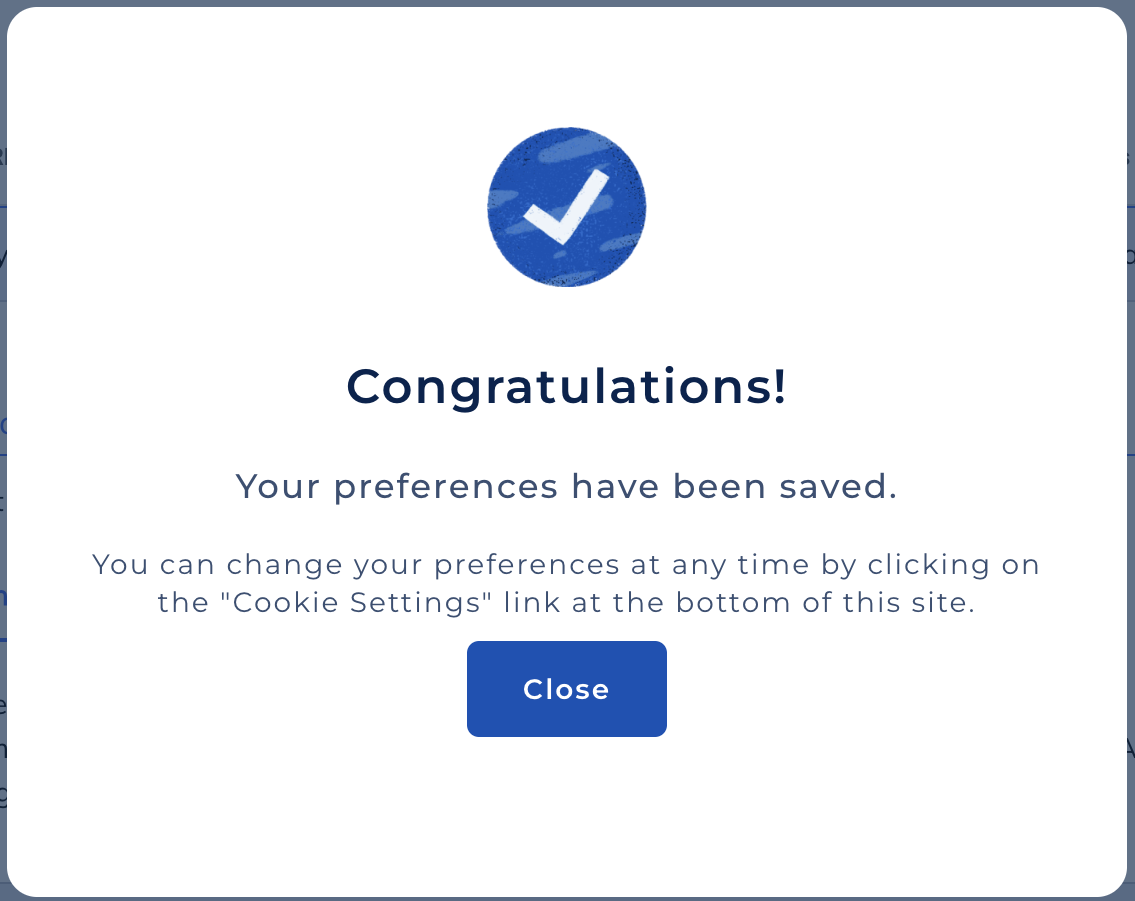
Success Screen
Activate this option if you want the following screen when the user goes beyond the introduction screen and makes mixed choices.
Display purposes list on layer 1
[ Standard, Essential & Premium Plans] Choose to display or hide the list of processing purposes used by you and your partners on the main page of the banner.
Important
Please note that the IAB TCF (Transparency and Consent Framework) and the various European DPAs require the purposes of processing to be displayed. If you deactivate this option, it is your responsibility to inform your users in an appropriate manner about the purposes for which their personal data is processed.
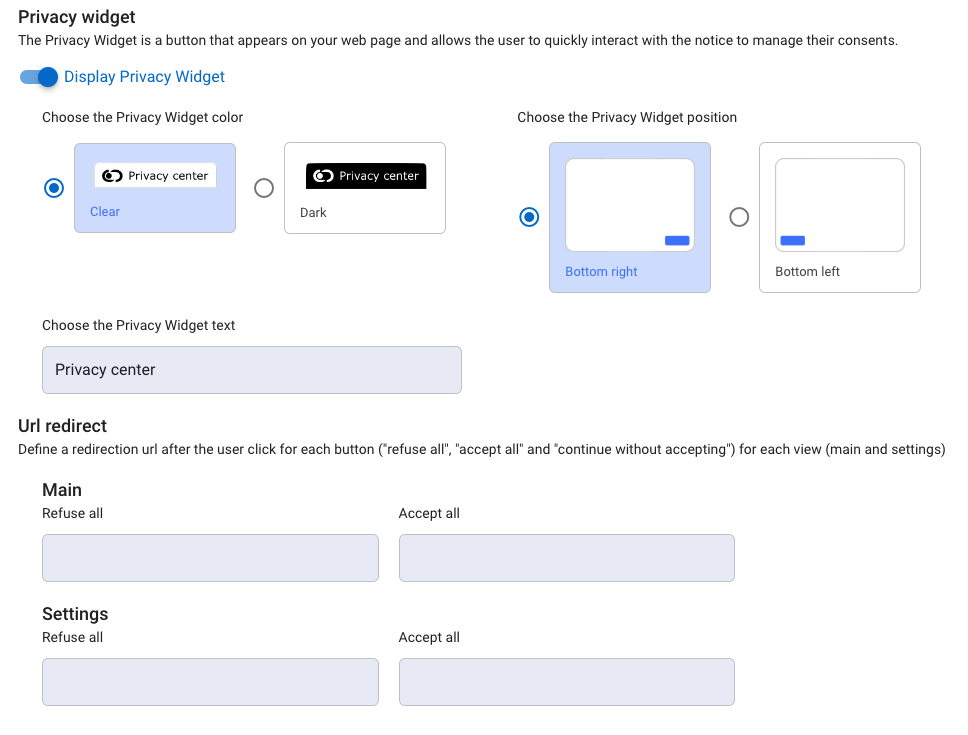
Privacy widget
This option enables you to activate the privacy widget and configure its display (colour, position and text). More information
Url redirect
The CMP offers the option of defining redirection urls after the click for each consent button ("refuse all", "accept all" and "continue without accepting") on each page (main and settings).
UI customization
[ Standard, Essential & Premium Plans ]
Banner pictures
Add a logo or icon : Your image will be displayed on your banner
Add a logo or icon to be displayed on the success page : If you have chosen to display a success screen, choose the image to be displayed on it.

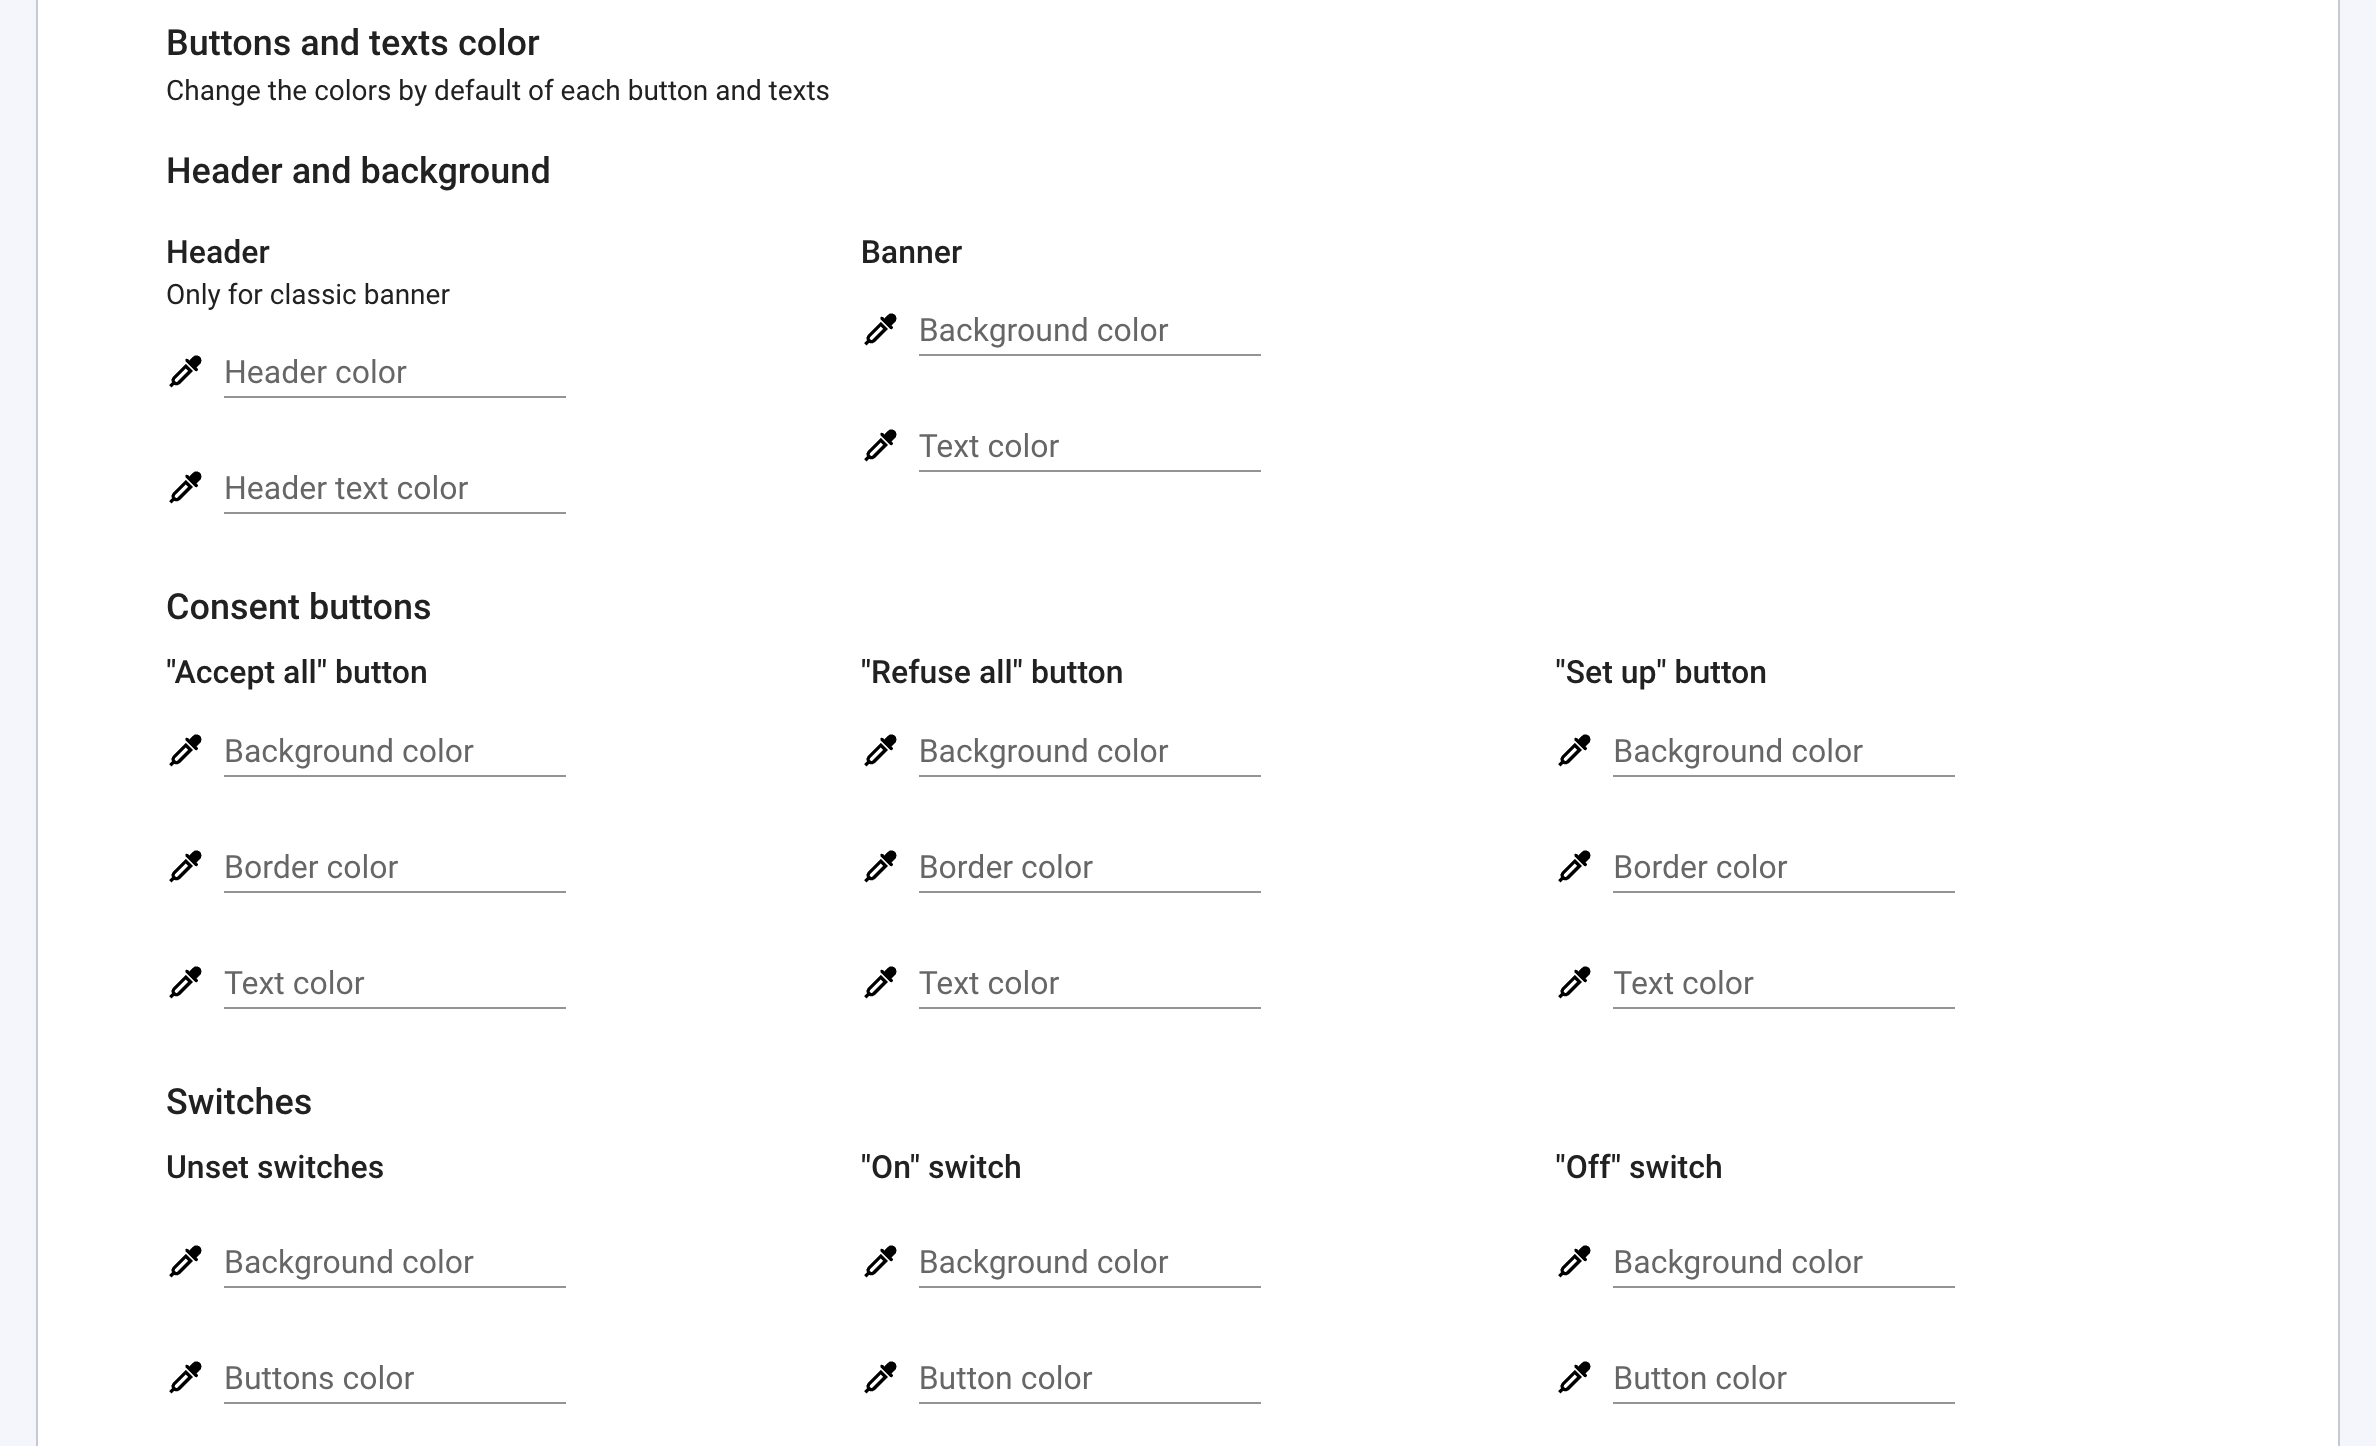
Buttons and texts color
note
If you do not fill any color codes, then the default colors will be applied.
Header and background
- Clear template
- Classic template
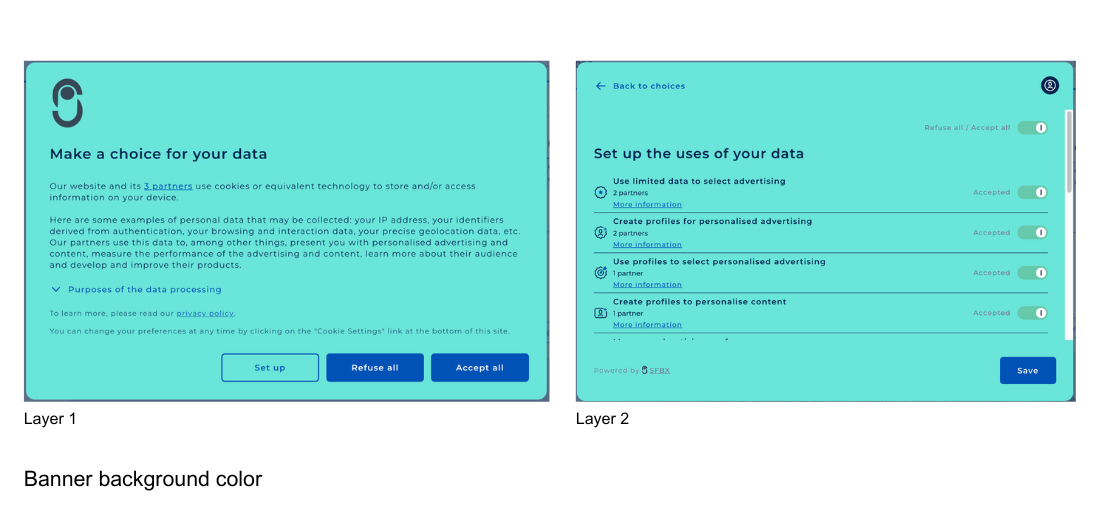
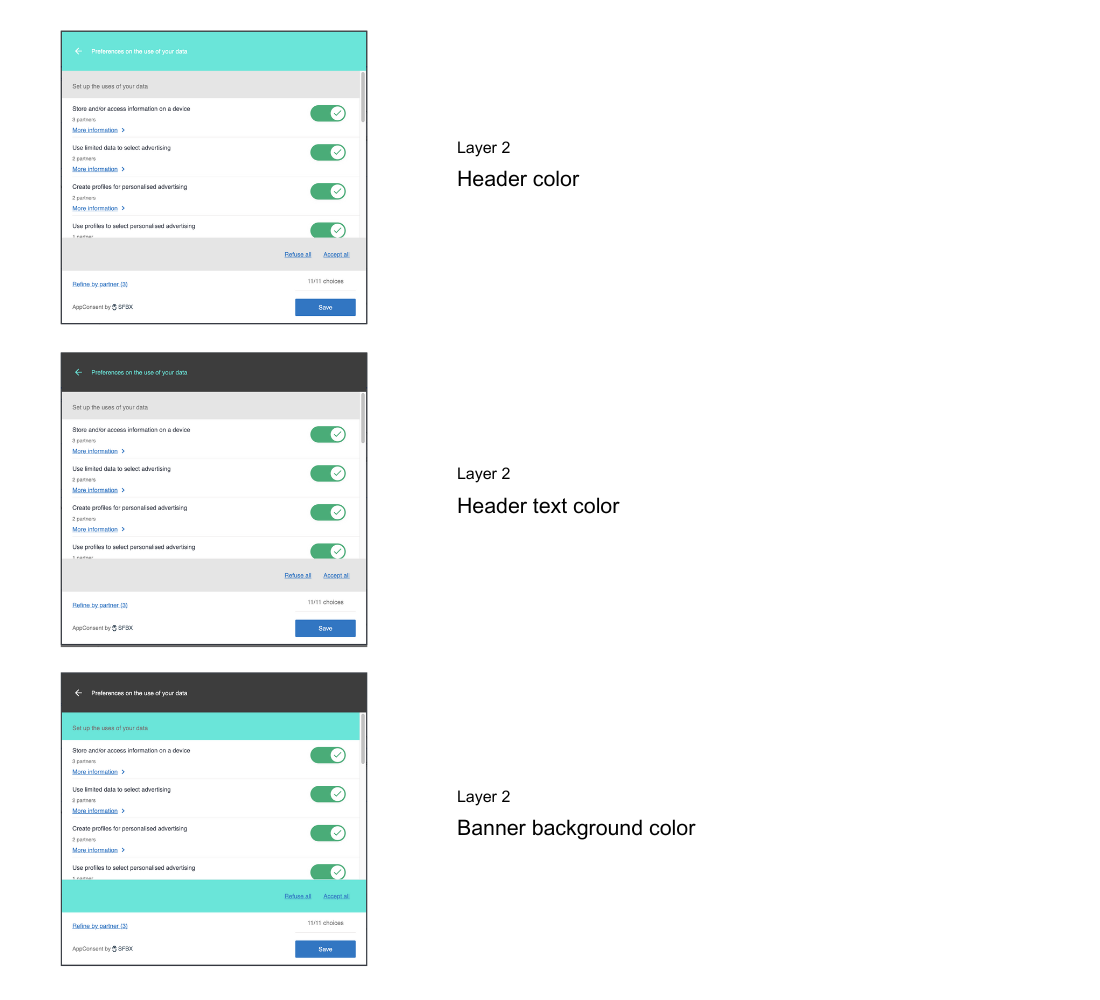
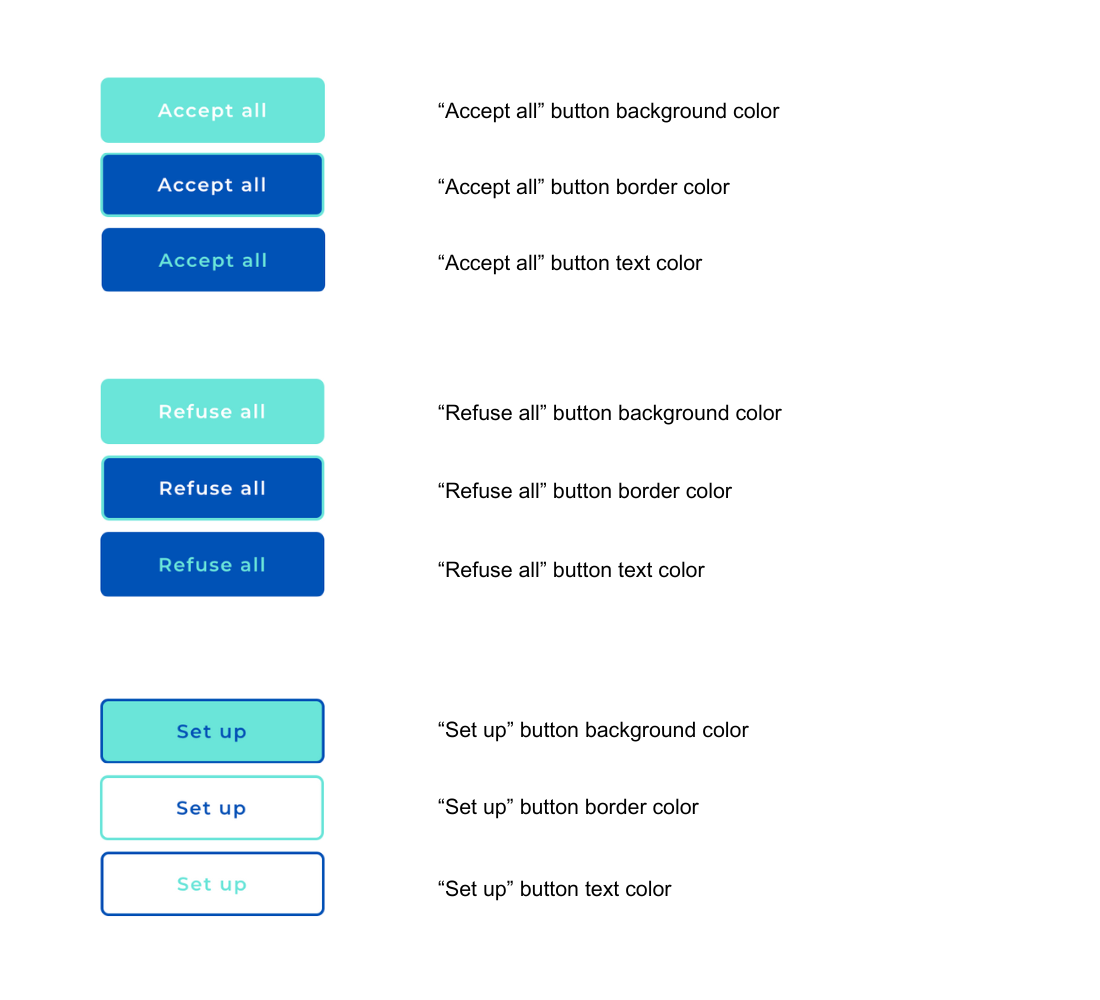
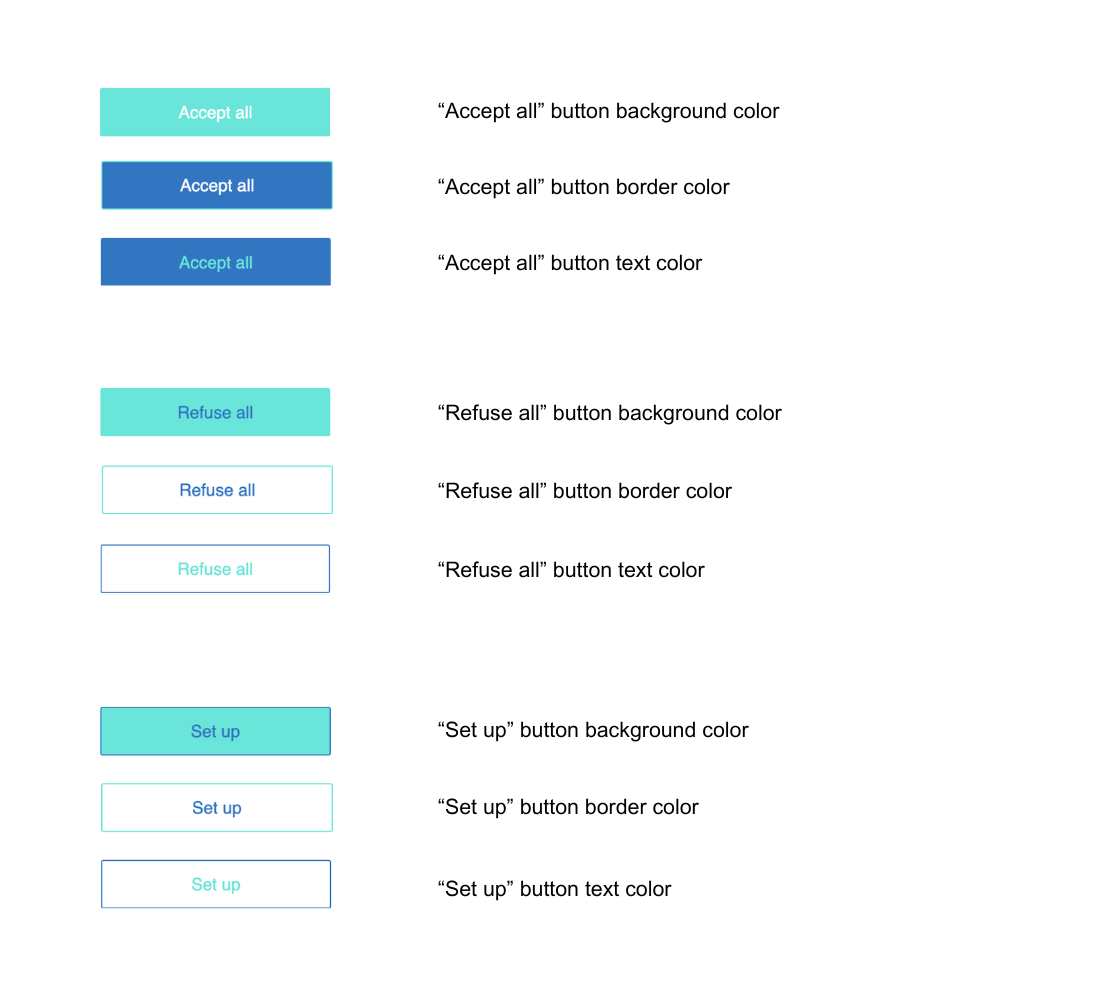
Consent buttons
- Clear template
- Classic template
Attention
Following the latest declarations of the CNIL, we insist that you do not favor one CTA over another. The European regulator is particularly attentive to this subject. For example, if you change the style ( background, size...) of an Accept button, you must apply the same style to the Configure or Reject button.
Switches
- Clear template
- Classic template
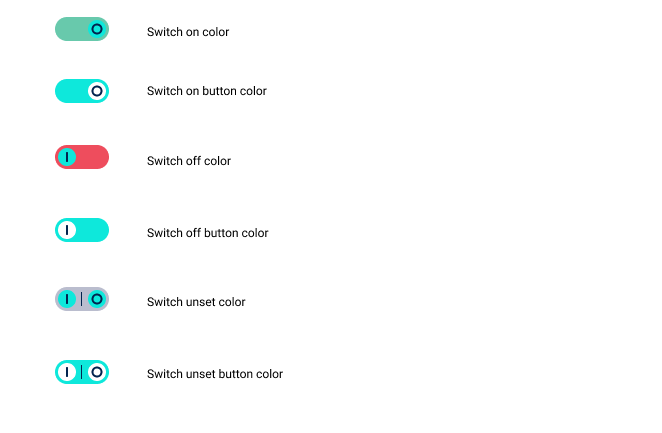
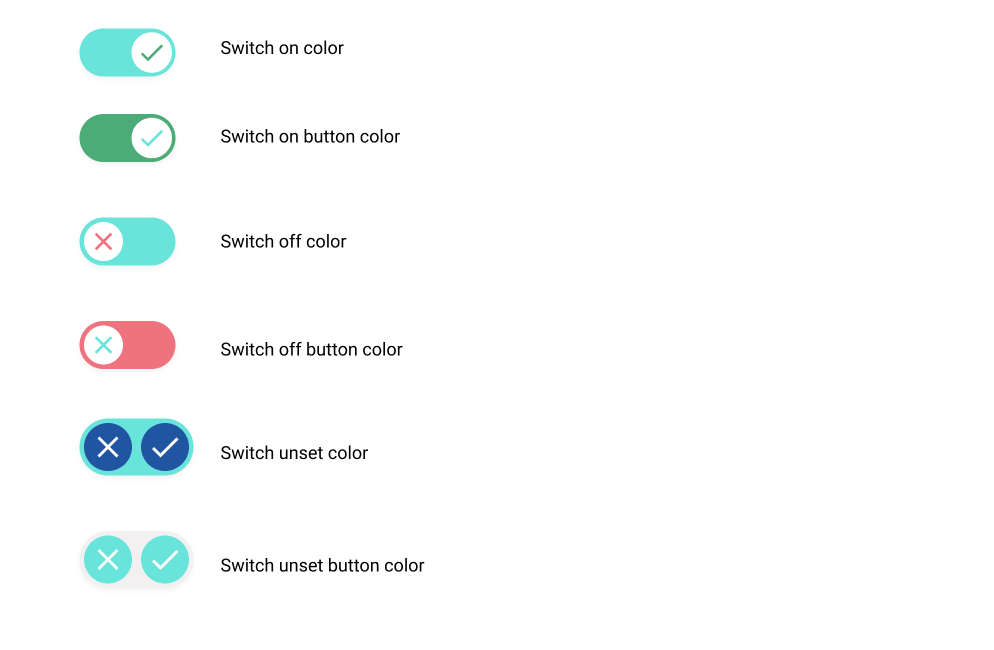
Additional CSS code

caution
CSS customization presented below is only for CMP with classic template. We advise you not to modify CSS properties of the CMP, especially geometrical properties. Indeed, we provide defaults that were intensely tested for responsivity.
Example of full CSS customization:
/* global variables */
:root {
    --background-color: #F6F6F6;
    --primary-color: #1F66BA;
    --font-color: #545465;
}
article.banner {
    background-color: var(--background-color);
    color: var(--font-color);
    border-top: 0;
    padding: 16px;
    box-sizing: border-box;
    height: auto;
    box-shadow: 0px 2px 4px rgba(0, 0, 0, 0.5);
}
@media (min-width: 900px) {
    article.banner {
        padding: 24px 32px;
    }
}
/* banner header */
.banner .banner__header,
.banner .banner__header + main {
    padding-left: 0;
    padding-right: 0;
}
.banner .banner__header + main {
    padding-right: 40px;
}
.banner .banner__header {
    display: flex;
    flex-direction: column;
    align-items: flex-start;
    padding-bottom: 10px;
}
.banner .banner__header .title {
    font-size: 17px;
    font-weight: 600;
    letter-spacing: -0.04em;
    margin: 10px 0 0 0;
}
.banner .brandTitle {
    max-width: 200px;
    margin: 0;
}
.banner .brandTitle img {
    width: 100%;
    display: block;
}
@media (min-width: 900px) {
    .banner__header {
        flex-direction: row;
        align-items: flex-end;
    }
    .banner .banner__header .title {
        margin-top: 0;
        margin-left: 24px;
    }
}
/* banner actions */
.banner .banner__controlArea {
    padding: 24px 0 0 0;
    margin: 24px 0 0 0;
    flex-direction: row;
    justify-content: left;
    align-content: center;
    flex-wrap: wrap;
    position: relative;
    box-shadow: none;
}
.banner .banner__controlArea:before {
    content: '';
    position: absolute;
    top: 0;
    left: 0;
    right: 0;
    bottom: inherit;
    height: 1px;
    background-color: var(--font-color);
}
@media (min-width: 900px) {
    .banner .banner__controlArea {
        padding-top: 48px;
        padding-bottom: 24px;
        padding-left: 64px;
        margin: 0;
    }
    .banner .banner__controlArea:before {
        top: 24px;
        right: inherit;
        bottom: 24px;
        width: 1px;
        height: auto;
    }
}
.banner .banner__controlArea > section {
    margin: 0;
    flex-direction: row;
    flex-wrap: wrap;
    width: 100%;
}
@media (min-width: 900px) {
    .banner .banner__controlArea > section {
        width:auto;
    }
}
.banner .banner__controlArea .fadedText {
    flex: 0 0 100%;
    margin: 12px 0 0;
}
.banner .banner__controlArea .banner__moreContent {
    margin-top: 0;
}
/* Generic elements (scoped with banner class to avoid side effects on other elements) */
.banner .baseText {
    font-size: 13px;
    line-height: 16px;
    color: var(--font-color);
    font-weight: 300;
}
/* link */
.banner .link {
    color: var(--primary-color);
    font-weight: 600;
    text-decoration: none;
    position: relative;
}
.banner .link:before {
    content: '';
    position: absolute;
    bottom: 0;
    left: 0;
    right: 0;
    height: 1px;
    background-color: var(--primary-color);
    bottom: 0px;
    transition: transform 0.35s ease;
    transform-origin: center center;
}
.banner .link:hover:before,
.banner .link:hover:focus
.banner .link:hover:active {
    transform: scaleX(0);
}
/* button */
.banner .button {
    border: 1px solid var(--primary-color);
    border-radius: 4px;
    margin: 0 24px 12px 0;
    padding: 12px 20px;
    background-color: transparent;
    position: relative;
    overflow: hidden;
    flex: 0 0 100%;
}
.banner .button:before {
    content: '';
    position: absolute;
    top: 0;
    left: 0;
    right: 0;
    bottom: 0;
    background-color: var(--primary-color);
    transform-origin: center bottom;
    transform: scaleY(0);
    transition: transform 0.35s ease;
}
.banner .button:hover:before,
.banner .button:focus:before,
.banner .button:active:before {
    transform: scaleY(1);
}
.banner .button .baseText {
    font-size: 17px;
    font-weight: 600;
    line-height: 1;
    color: var(--primary-color);
    position: relative;
    z-index: 1;
    transition: color 0.35s ease;
}
.banner .button:hover .baseText,
.banner .button:focus .baseText,
.banner .button:active .baseText {
    color: white;
}
.banner .button--filled {
    background-color: var(--primary-color);
}
.banner .button--filled:before {
    background-color: var(--background-color);
}
.banner .button--filled .baseText {
    color: white;
}
.banner .button--filled:hover .baseText,
.banner .button--filled:focus .baseText,
.banner .button--filled:active .baseText {
    color: var(--primary-color);
}
@media (min-width: 500px) {
    .banner .button {
        flex-basis: auto;
    }
}
/* Tweak for iFrame height */
@media (min-width: 900px) {
    .frame-root {
        display: flex;
        height: 100vh;
    }
    .frame-content {
        display: flex;
        align-items: flex-end;
        height: 100%;
    }
}
CSS : You can past specific CSS rules to customize the UI and adapt it. You can change the background color and so on. Example= ac-notice .intro { background: white!important; color:#656565!important;} .intro .title { color:#656565!important;}
The CSS rules are common for each languages.
Additional CSS code for AMP (Premium & Standard)
If you're using AMP, put in this field the same code as above.
info
If Additional CSS code for AMP is empty, the classic CSS will be applied to all notices, including AMP.
If Additional CSS code for AMP is filled in, it will be applied to AMP notices, the classic CSS will be applied to other notices.
Google Consent Mode (GCM) settings
Enable GCM (Google Consent Mode) so that Google Analytics is controlled by the CMP. See the AppConsent configuration for Google Analytics section.
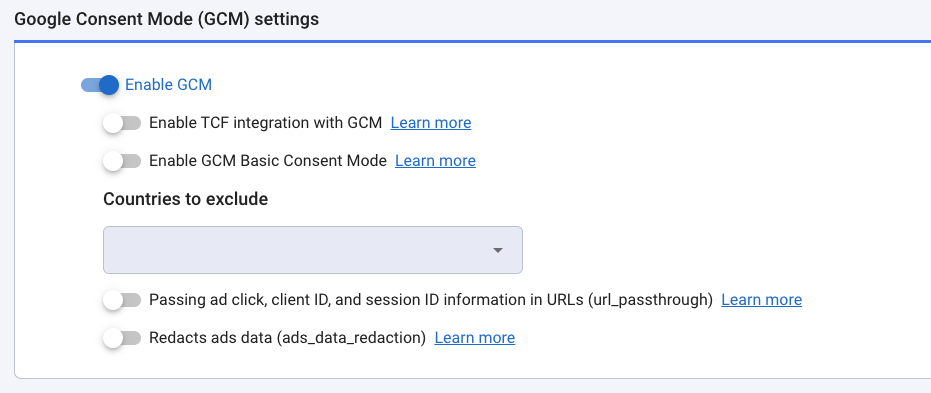
Enable TCF integration with GCM
Allows Google to use the IAB Transparency & Consent Framework to send consent signals to Google tags. En savoir plus
Enable GCM Basic Consent Mode
Delay the loading of Google tags until the user interacts with the notice, thereby regulating data transmission. En savoir plus.
Countries to exclude
Allows you to define a list of countries in which Google Consent Mode will not be applied.
Url_passthrough
When this property is activated, Google can transmit information in the URL about ad clicks. En savoir plus.
Ads_data_redaction
Used to hide ad data when ad_storage is set to denied. En savoir plus.
Advanced settings
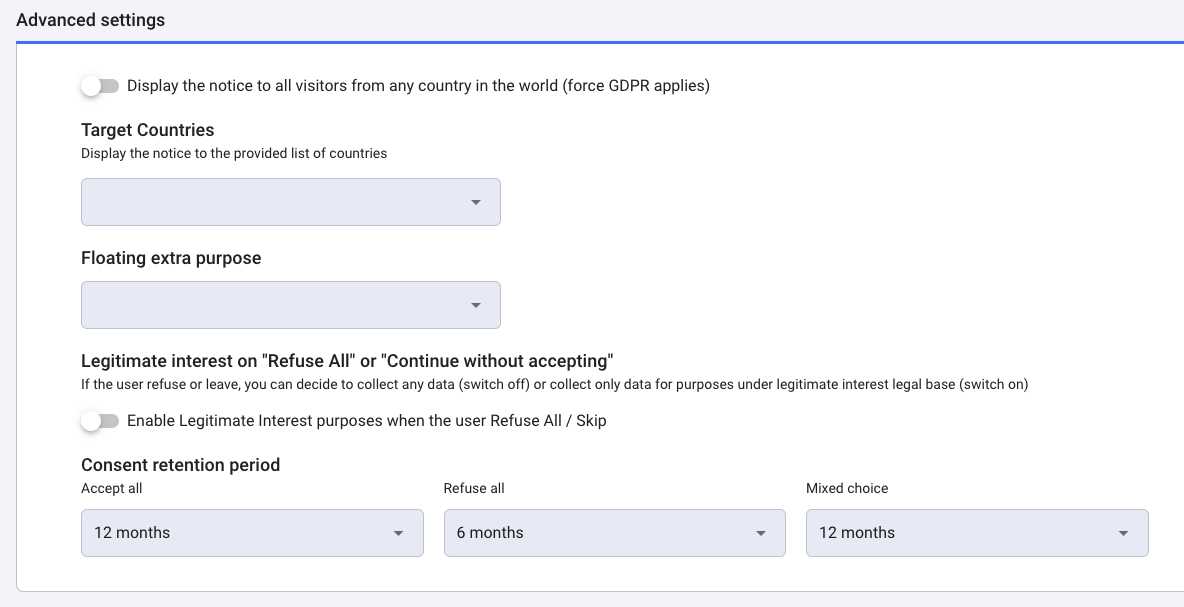
ForceGDPRApplies
Enables you to force the notice to be displayed for all visitors from any country in the world.
Target Countries
When this property is configured, the notice will only be displayed for the list of countries selected. If no country is selected, the notice will be displayed according to the rules defined by the RGPD.
Floating extra purpose
A floating purpose is a purpose for which only the storage of the consent is concerned. See the Floating purpose feature section.
note
The text part is managed on your side. In the case of Floating, it is a new API save-floating-purpose route that receives them with the UUID, the AppKey of the notice as well as the possible External IDs. The consent payload is stored separately in another table. If the payload contains an external ID it must be saved as it is at the moment in order not to lose the correspondence UUID/ContractID etc.
Enable Legitimate Interest purposes when Refuse All/Continue without accepting (skip)
If the user refuses or leaves, you can decide to collect any data (switch off) or collect only data for purposes under a legitimate interest legal base (switch on)
note
As recommended by the Italian regulator, the Garante, our Continue without accepting link is automatically replaced by a cross for all web notices, for whom the user browser is in Italian. This cross has the same effect as our link Continue without accepting: close the notice with no consent.

Consent retention period

These default values, which we recommend, allow you to be in compliance while maximizing your consent rates. Those durations represent the time lapse before the consent notice will be displayed again and consent will be sought once more.
Accept all: 12 months
Refuse all: 6 months
Mixed choice: 12 months
(If applicable) Continue without accepting: 3 days
You can modify the durations at any time.
note
If you have created your consent notice before October 28th, 2021, the default settings for mobile consent notices are on 12 months for all choices. Feel free now to adjust them.
Then click on save. The notice in Production is updated and ready to be implemented in your application.
Each update is stored in a specific ledger in our blockchain stack. We store the whole notice and the text altered, precise timestamp, account_id, consoleUserID, and so on.