Manage GTM by purposes
This page explains how to trigger a GTM tag according to the processing purposes consented to in the notice by the user. As a publisher, it can be useful to be able to trigger a script without appearing as a non-IAB partner.
The AppConsent CMP automatically triggers 11 events according to the 11 IAB purposes available.
caution
If you want to control a non-IAB partner, we recommend you visit this page: Control your extra vendors
Trigger creation
Let's start by adding a custom event.
- Click on the Triggers menu
- Then on the New button
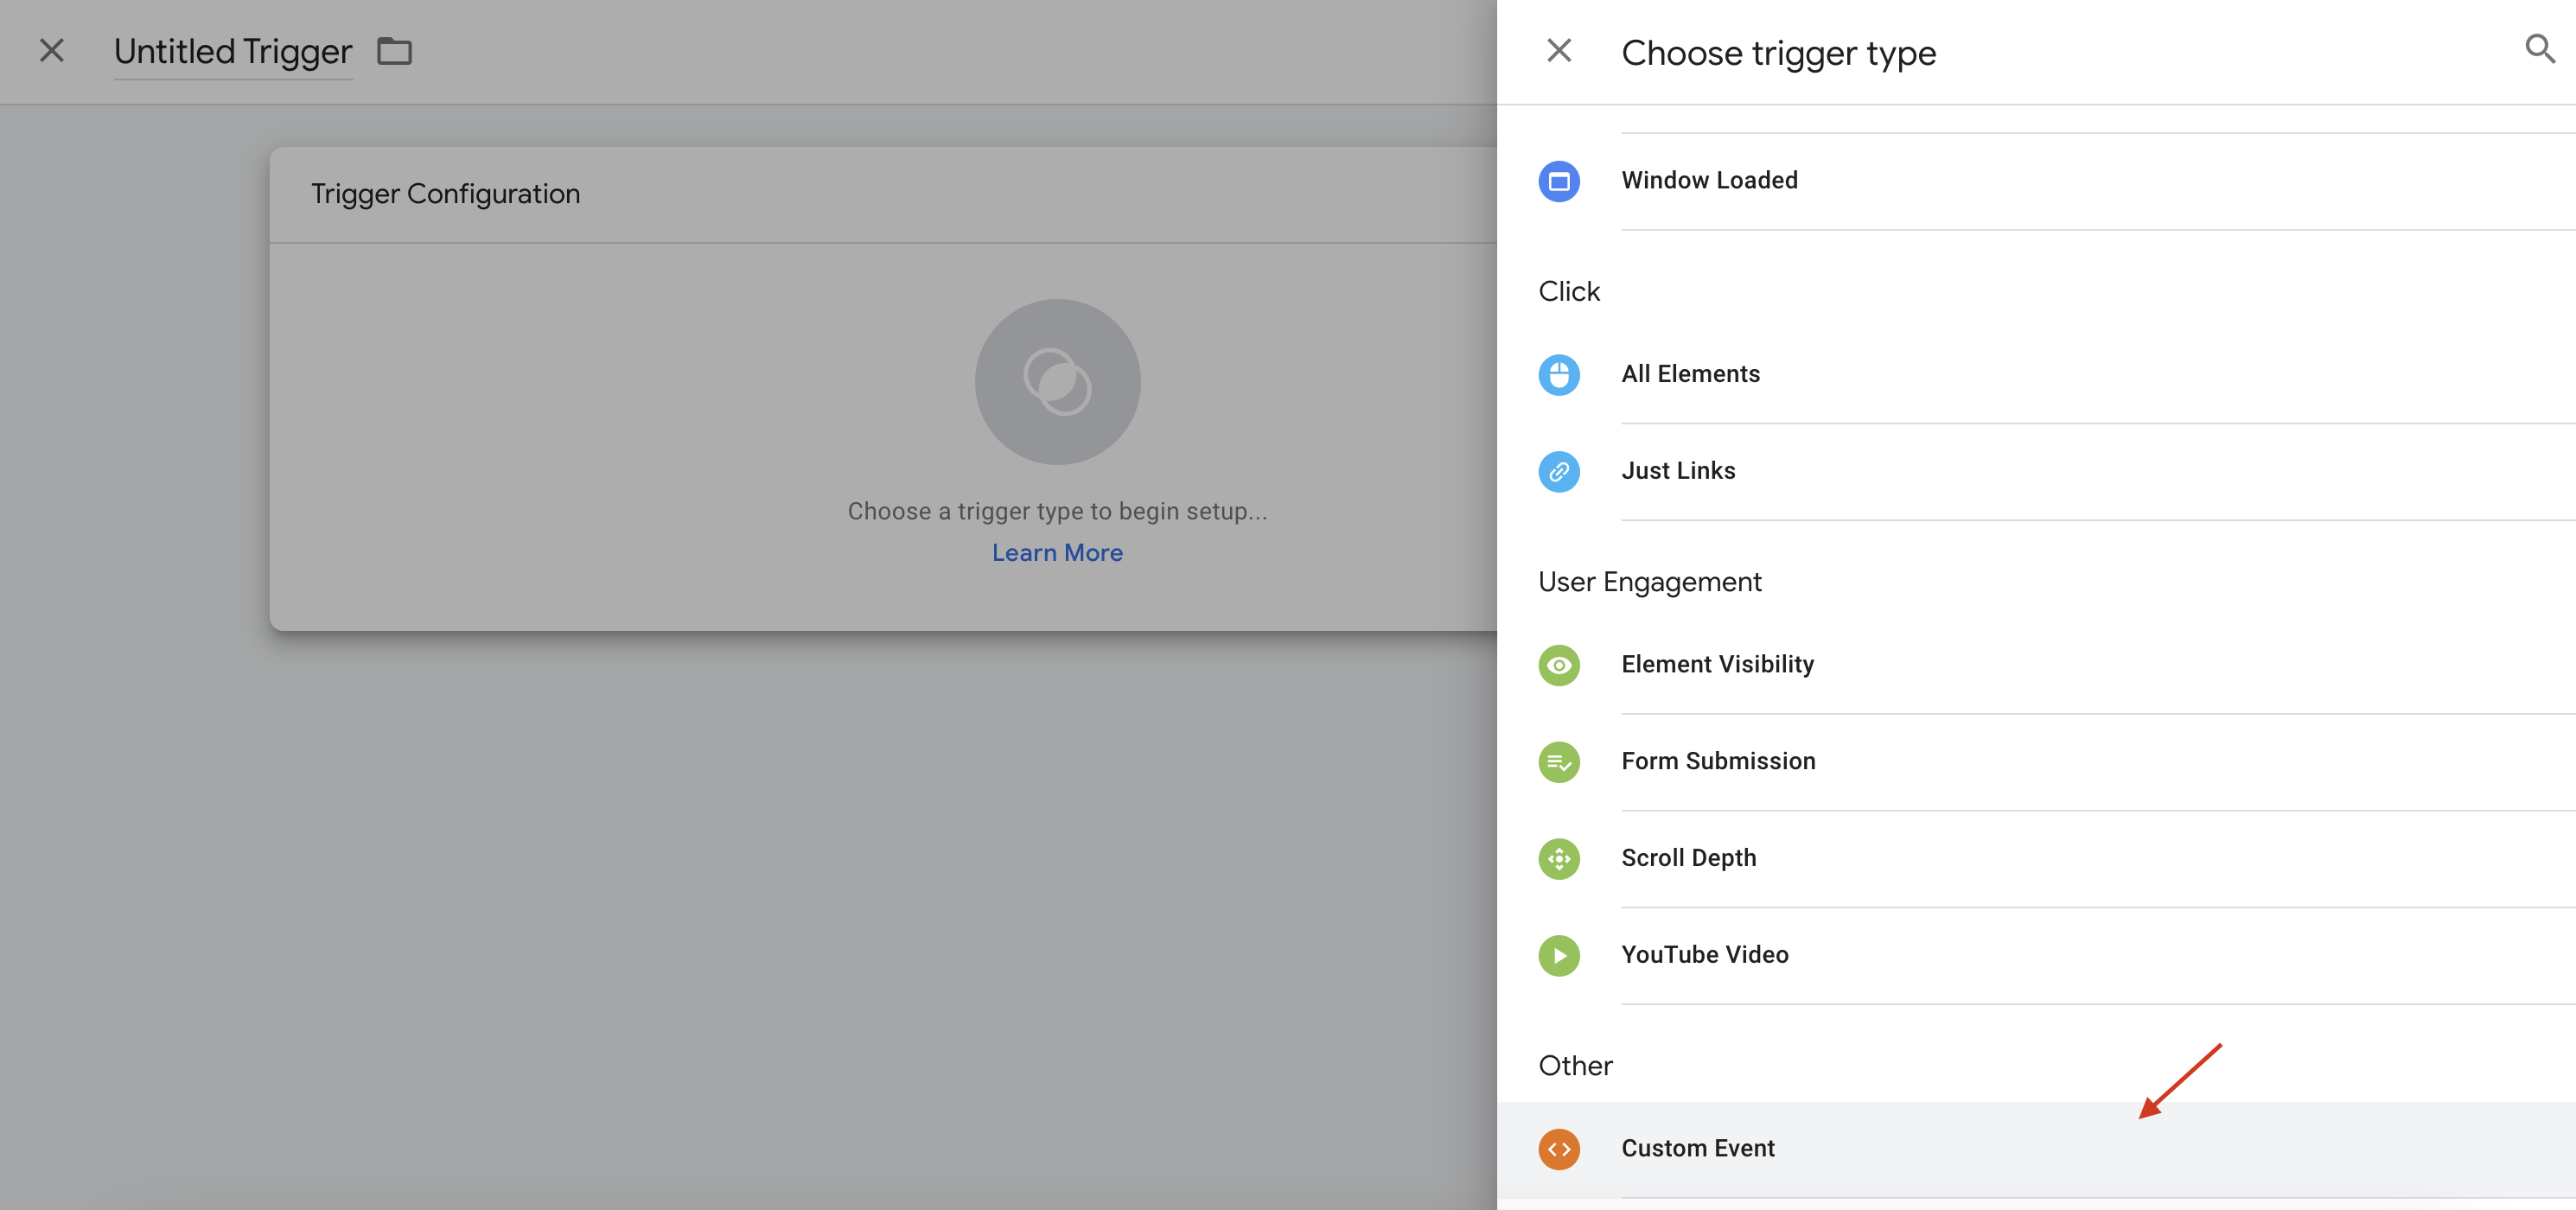
- Click on Trigger configuration
- From the list of events in the right-hand side panel, select Custom event
- In the Event name field, enter
appconsent_ctrl_+ the purpose number
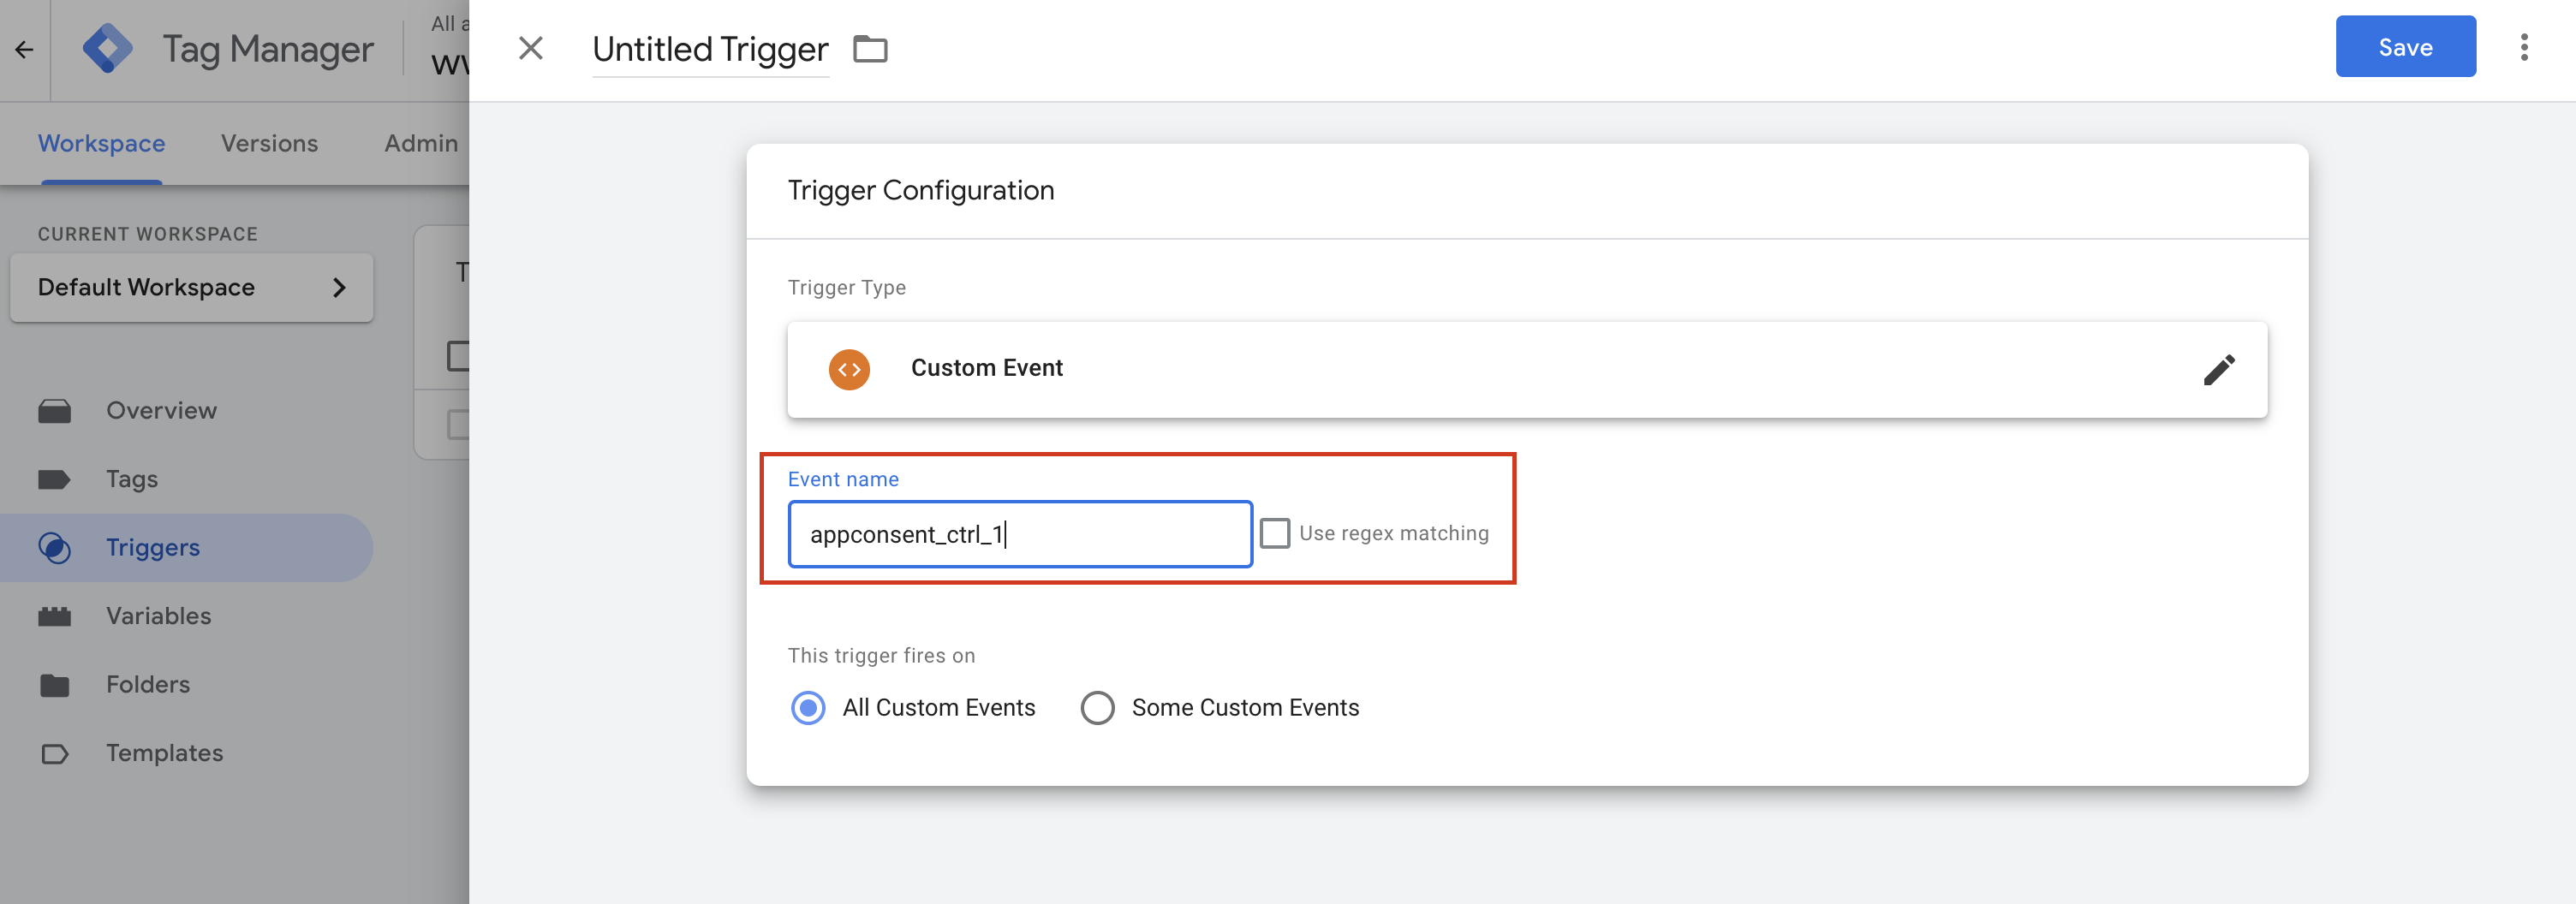
- Name the event as you like, then save.
Depending on your needs, do the same for appconsent_ctrl_2, appconsent_ctrl_3 ... appconsent_ctrl_10.
info
As a reminder, here is the list of purposes according to the IAB Framework:
List of purposes :
- Store and/or access information on a device
- Use limited data to select advertising
- Create profiles for personalised advertising
- Use profiles to select personalised advertising
- Create profiles to personalise content
- Use profiles to select personalised content
- Measure advertising performance
- Measure content performance
- Understand audiences through statistics or combinations of data from different sources
- Develop and improve services
- Use limited data to select content
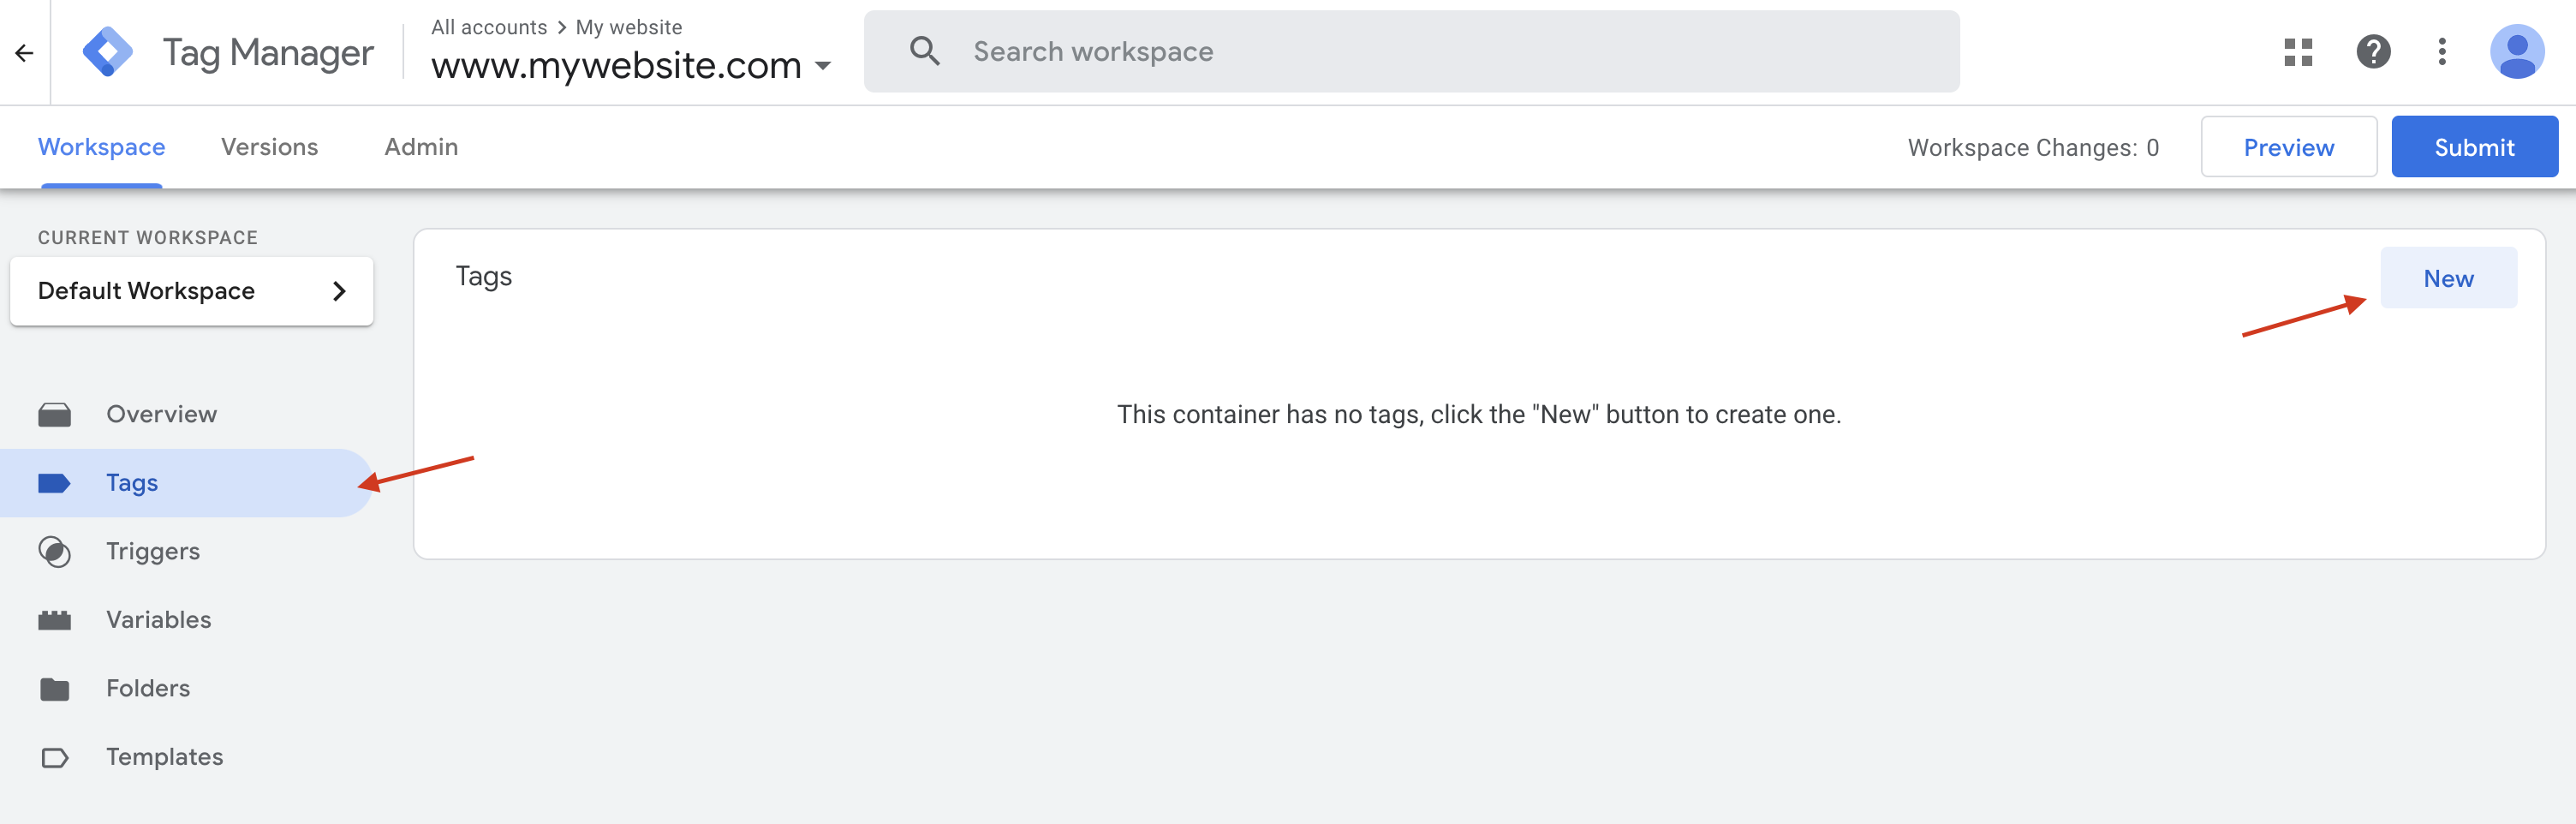
Link the event to a tag
- Click on the Tags menu in the left-hand side panel
- Then click on the New button
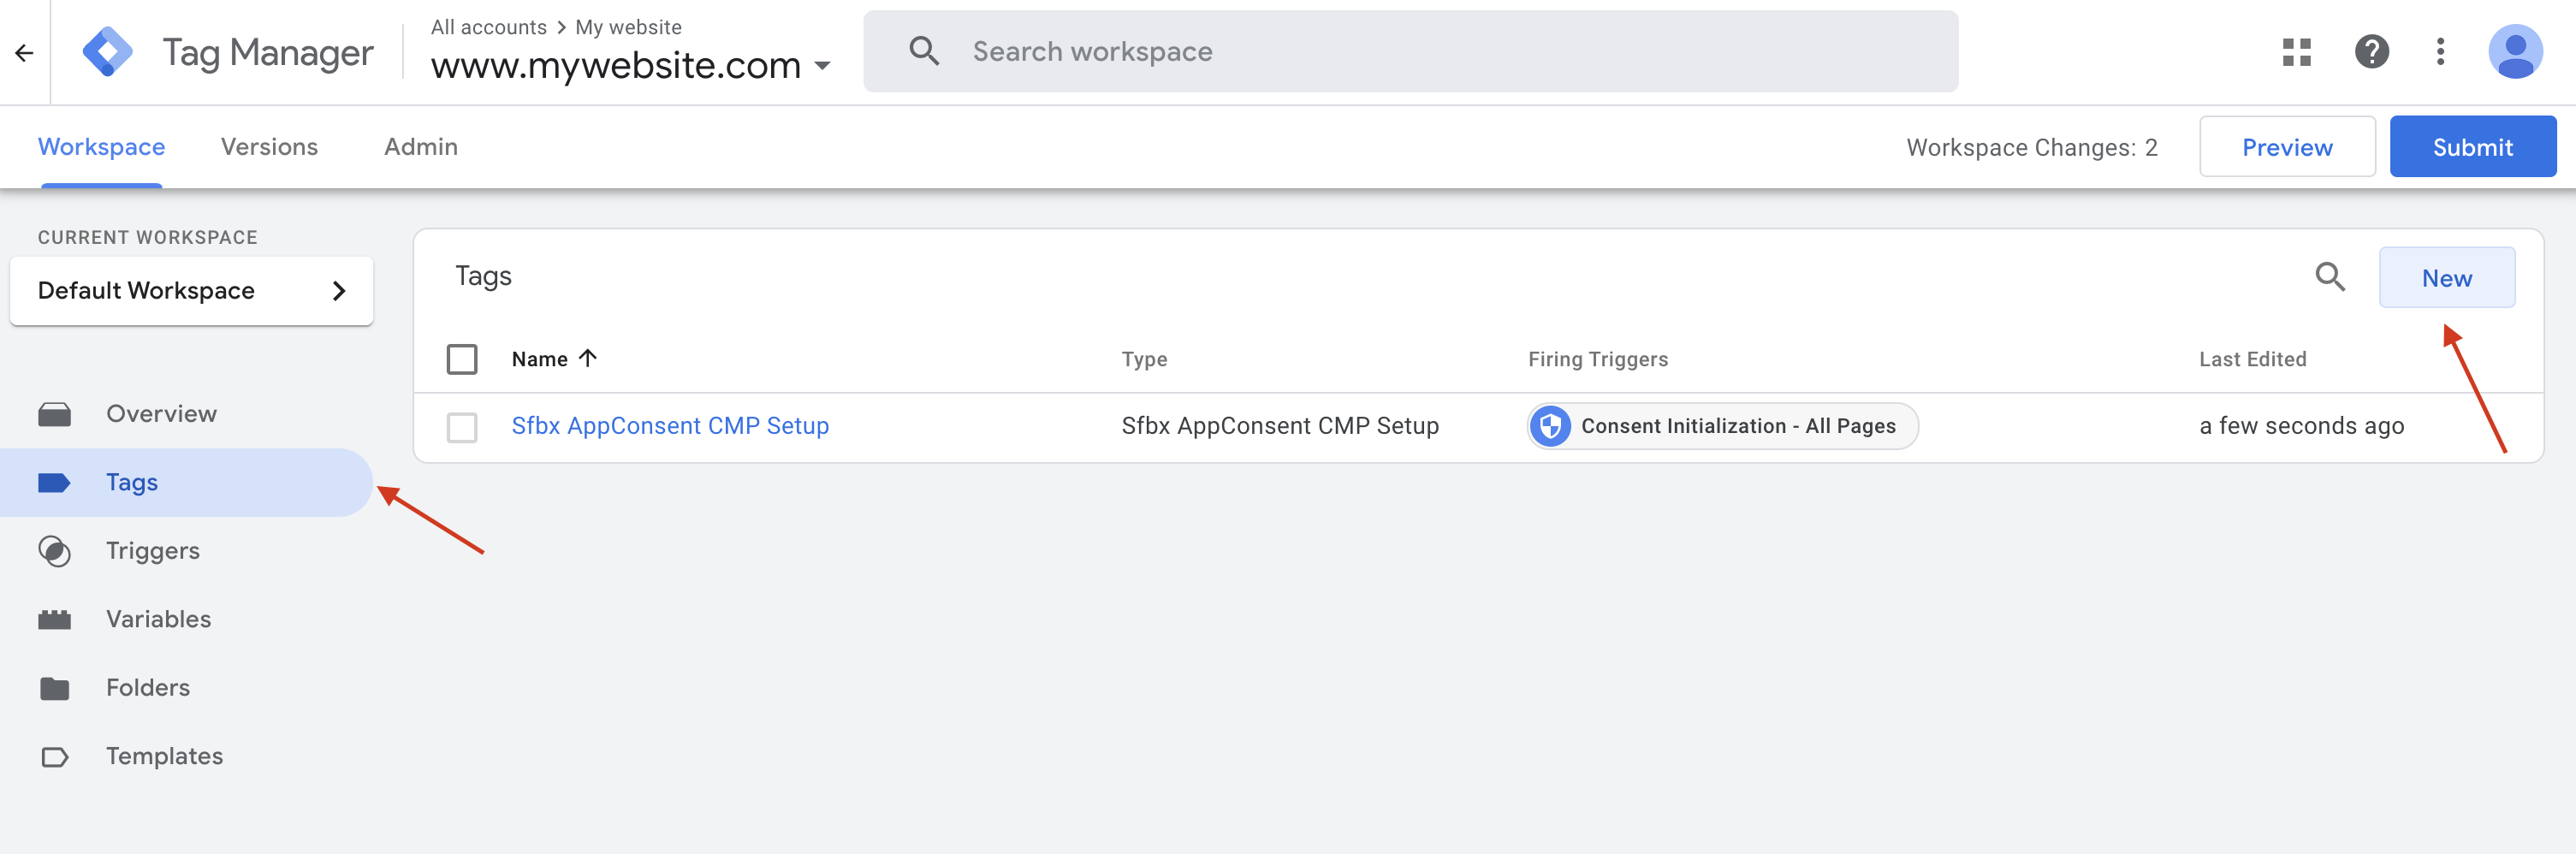
- Click on Tag Configuration
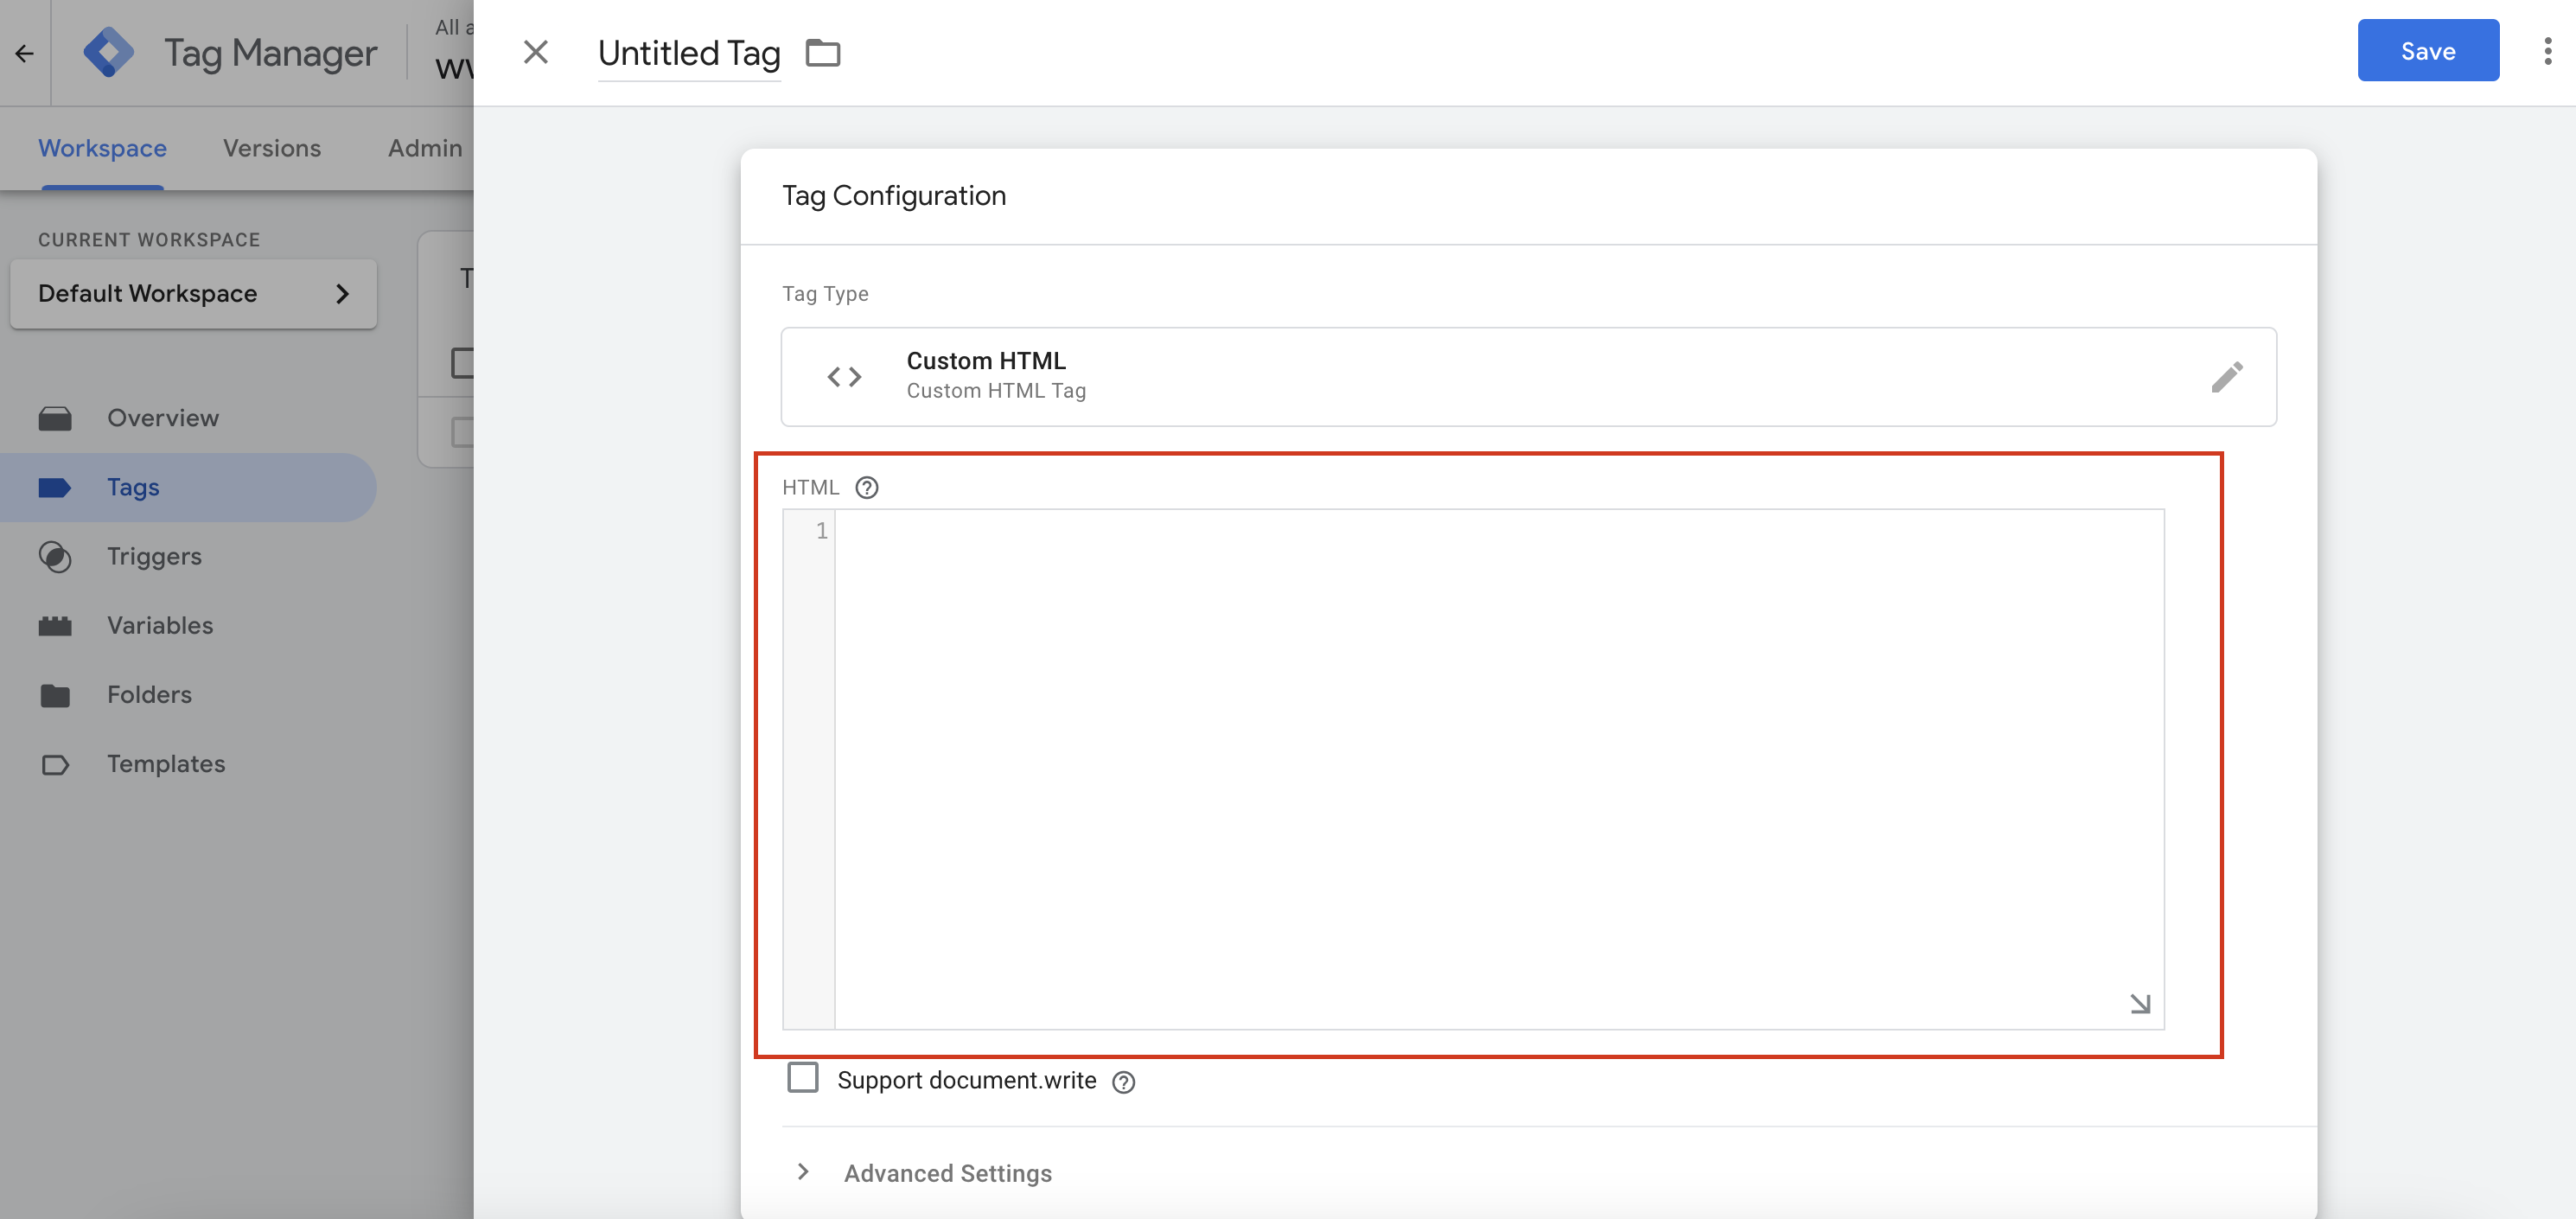
- Then select the Custom HTML template
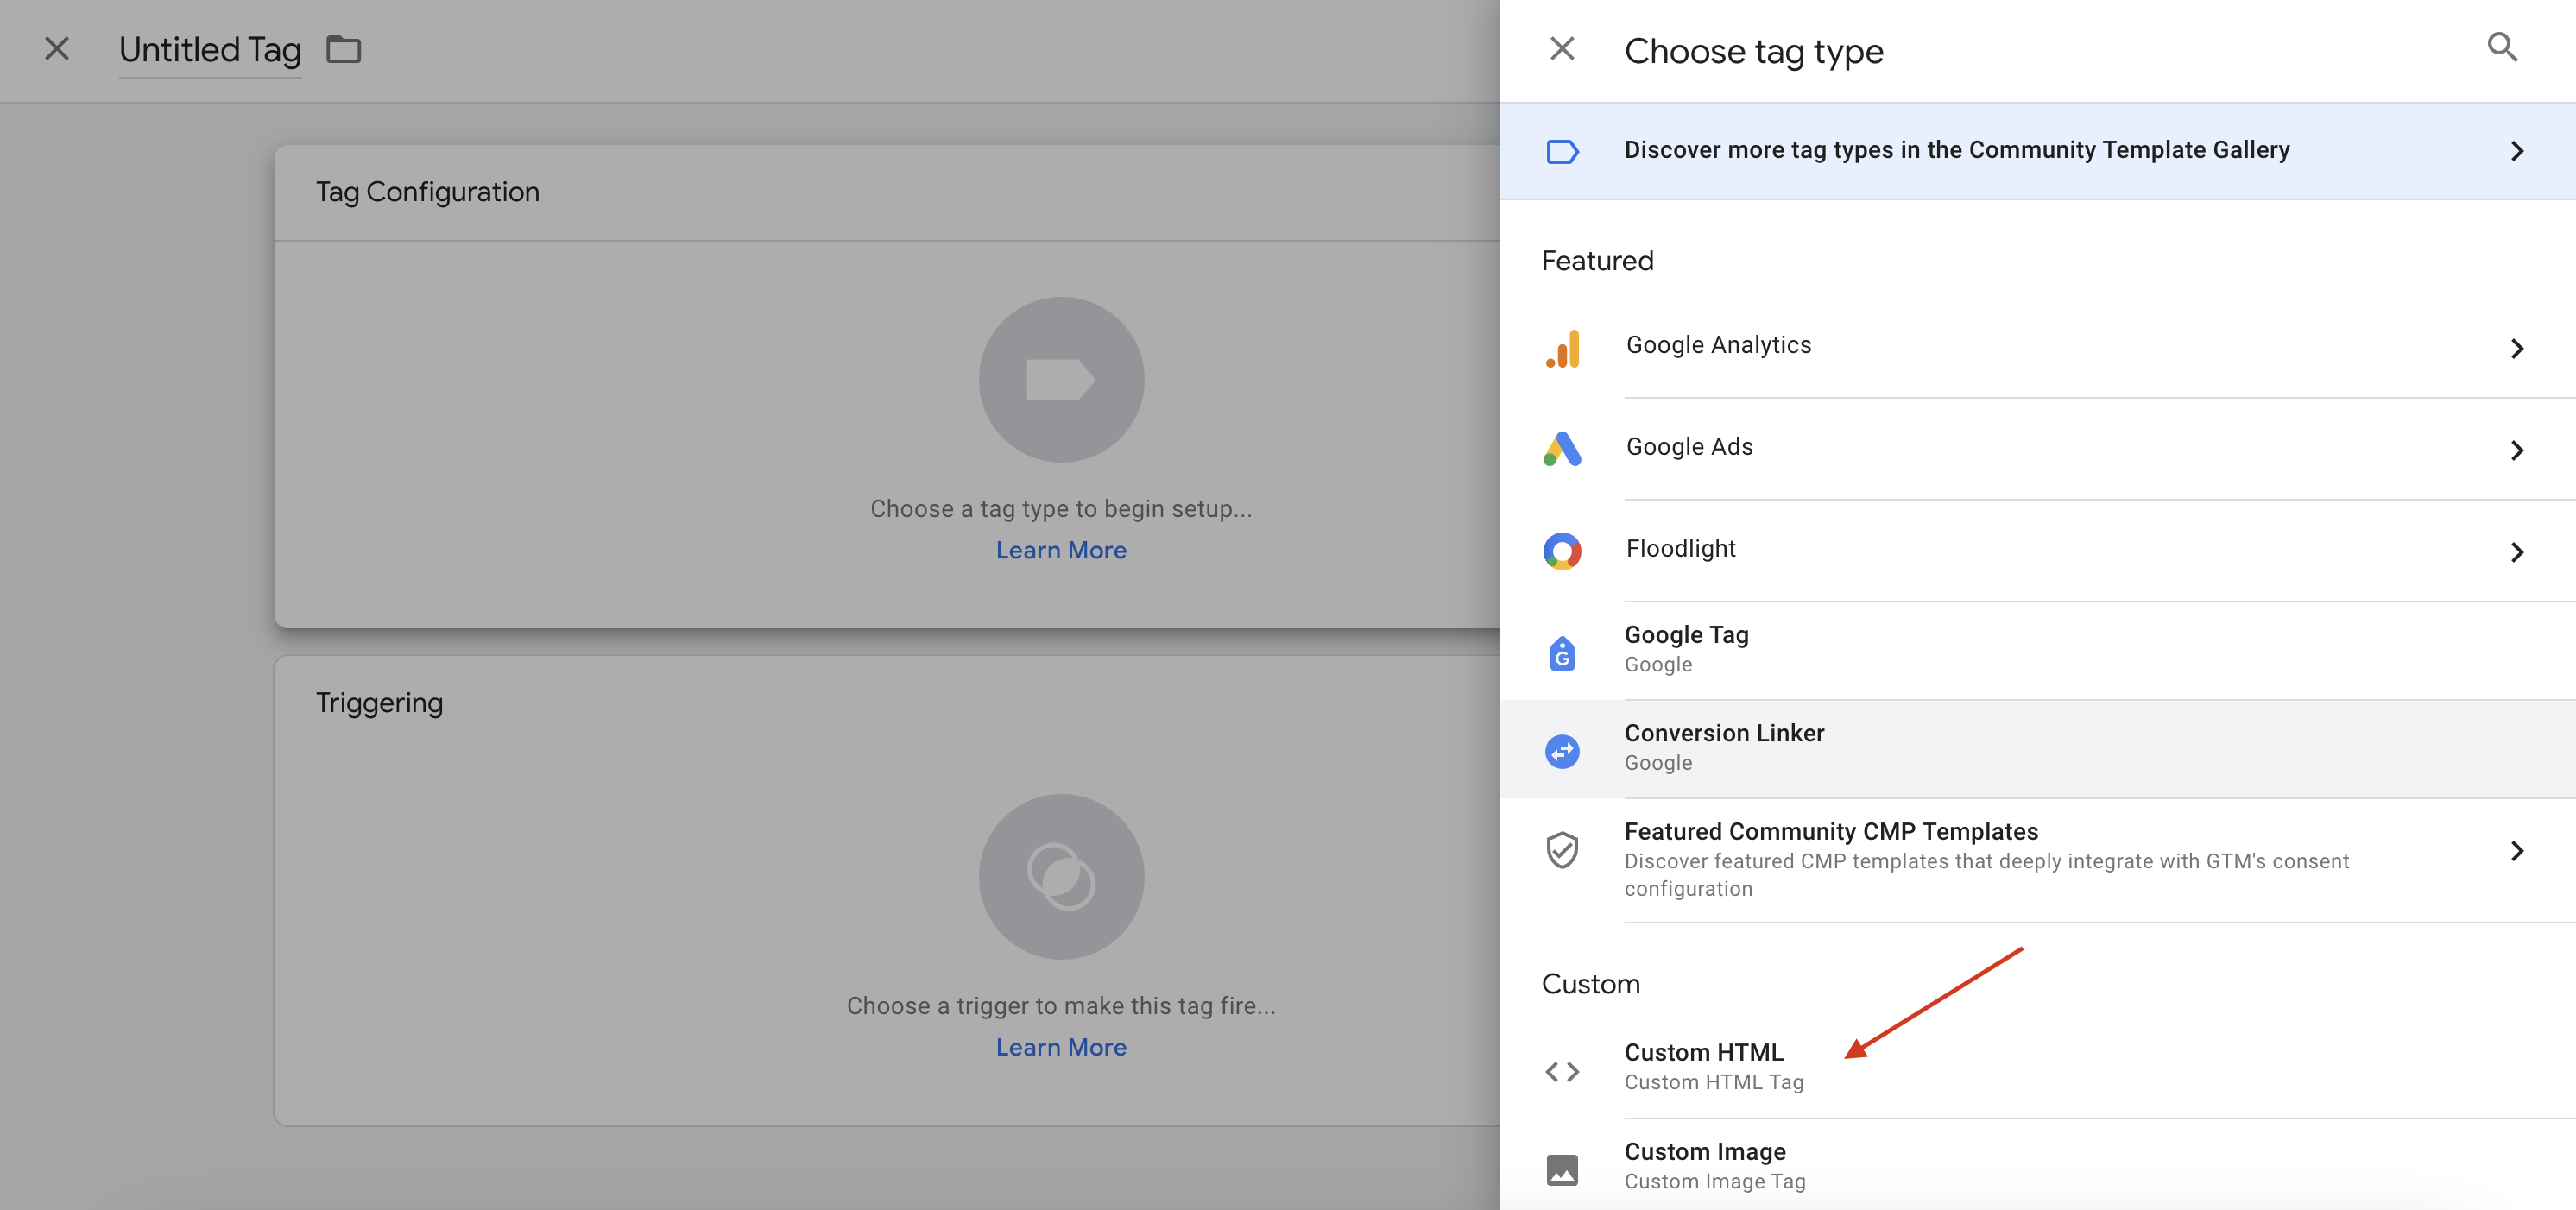
- Put the extra vendor's script in the HTML field
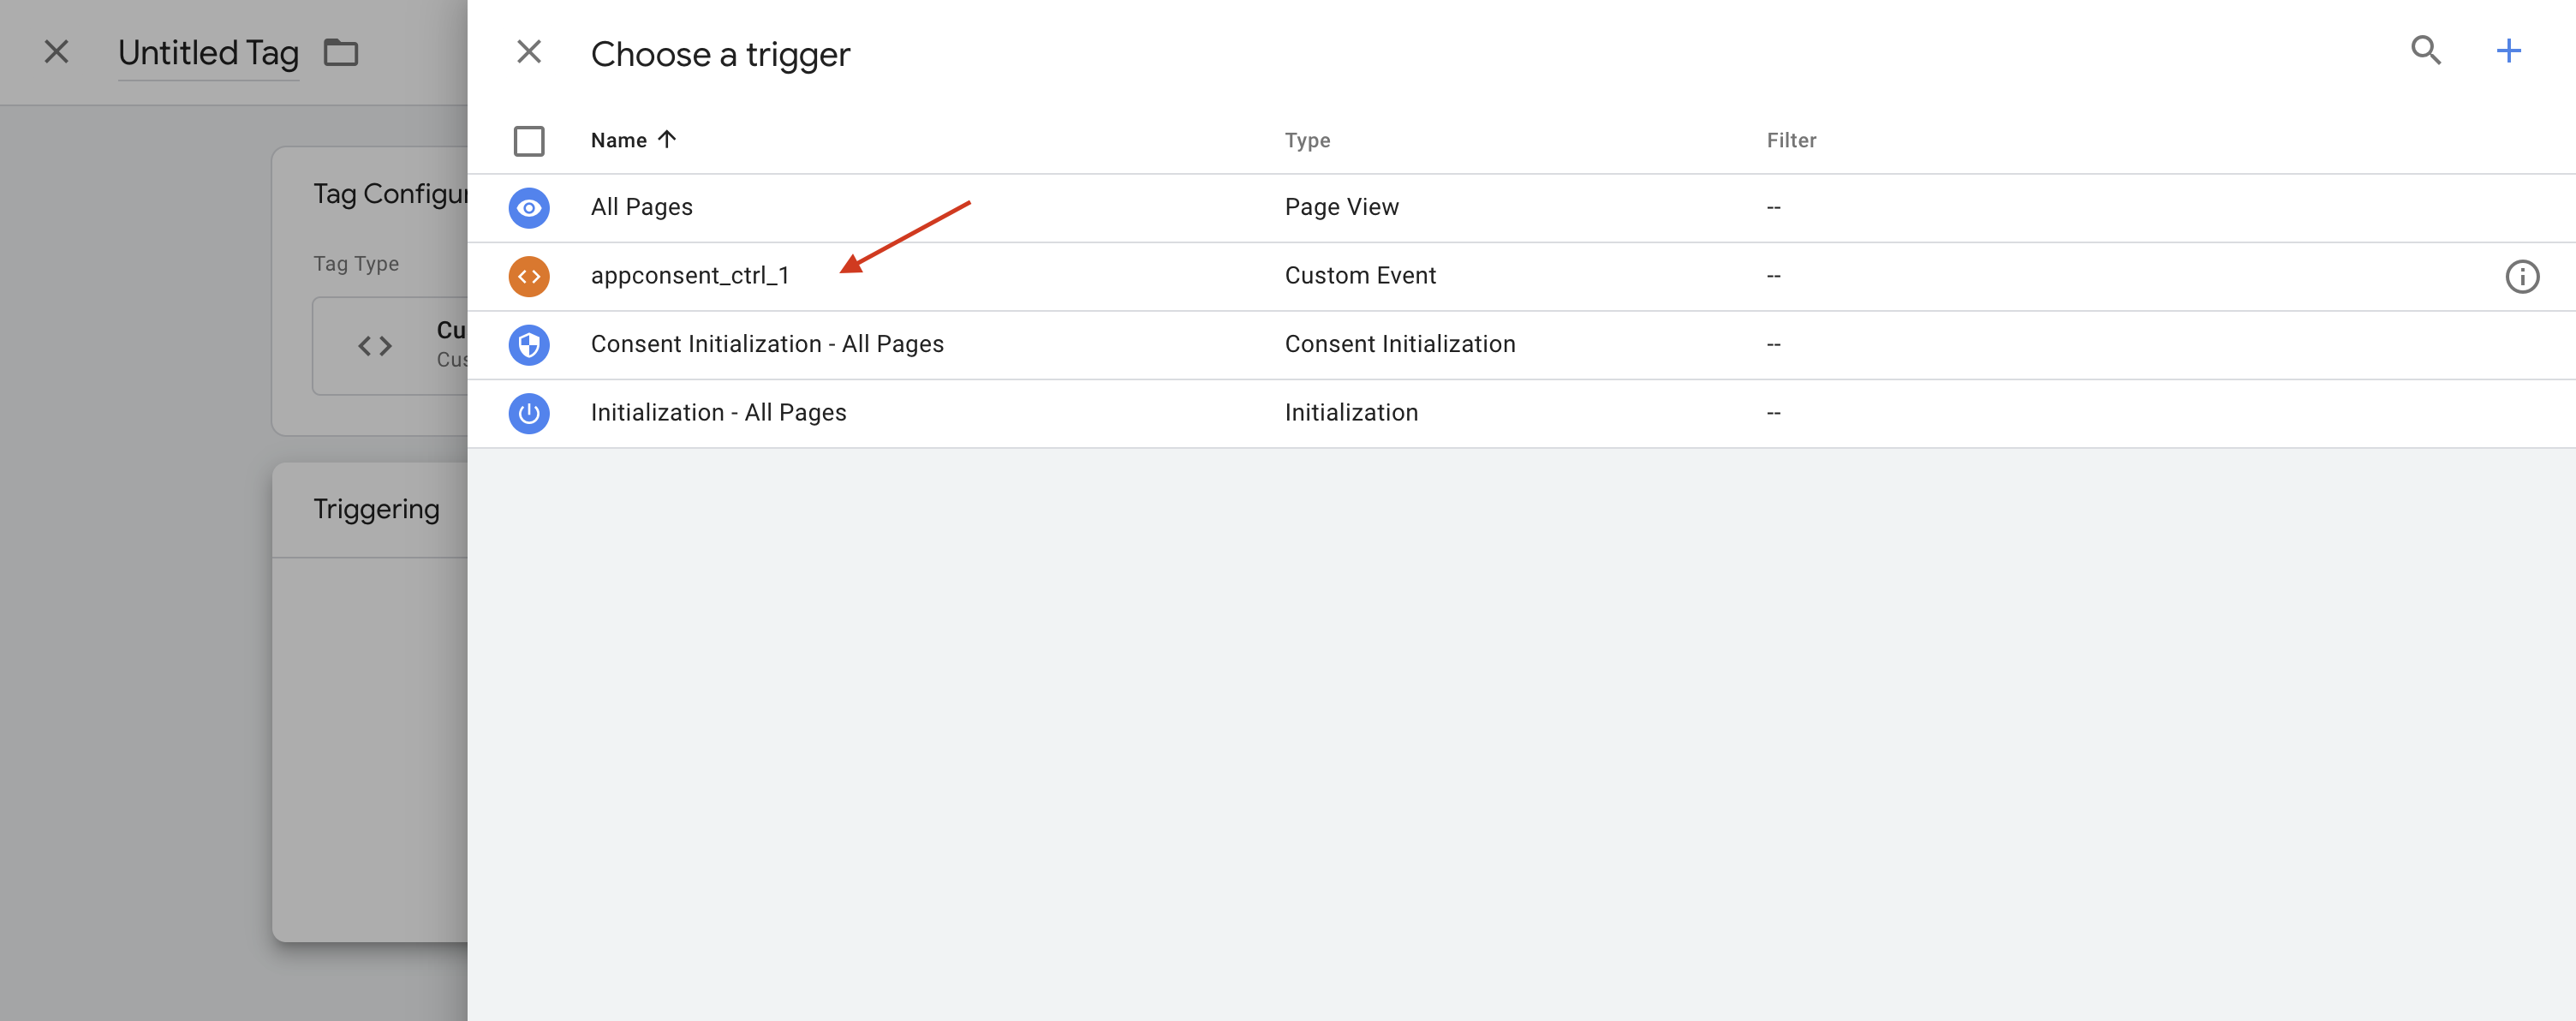
- Then click on the Trigger section
- Then select the custom trigger created earlier
- Name and save your tag
Attention
In this example, we're using the Custom HTML template, but it works with other template types.
That's it. Now your tag will be fired only if :
- If the processing purpose you have selected is consented by the user.
Have a suggestion ? Just drop an email to support@sfbx.io