Install Appconsent with Google Tag Manager
On this page you will find the method to implement AppConsent CMP with the solution of tag management system "Google Tag Manager"
caution
Before proceeding, we assume that you have an installation of GTM on your website.
If you note familiar with Google Tag Manager, please find the official documentation of Google here.
You can have one CMP implementation per site. If you wish to use Google Tag Manager rather than code-based implementation, make sure you don't have another AppConsent implementation on your site.
Import tag template AppConsent
To import the tag template AppConsent in your Google Tag Manager account :
- Go to your container
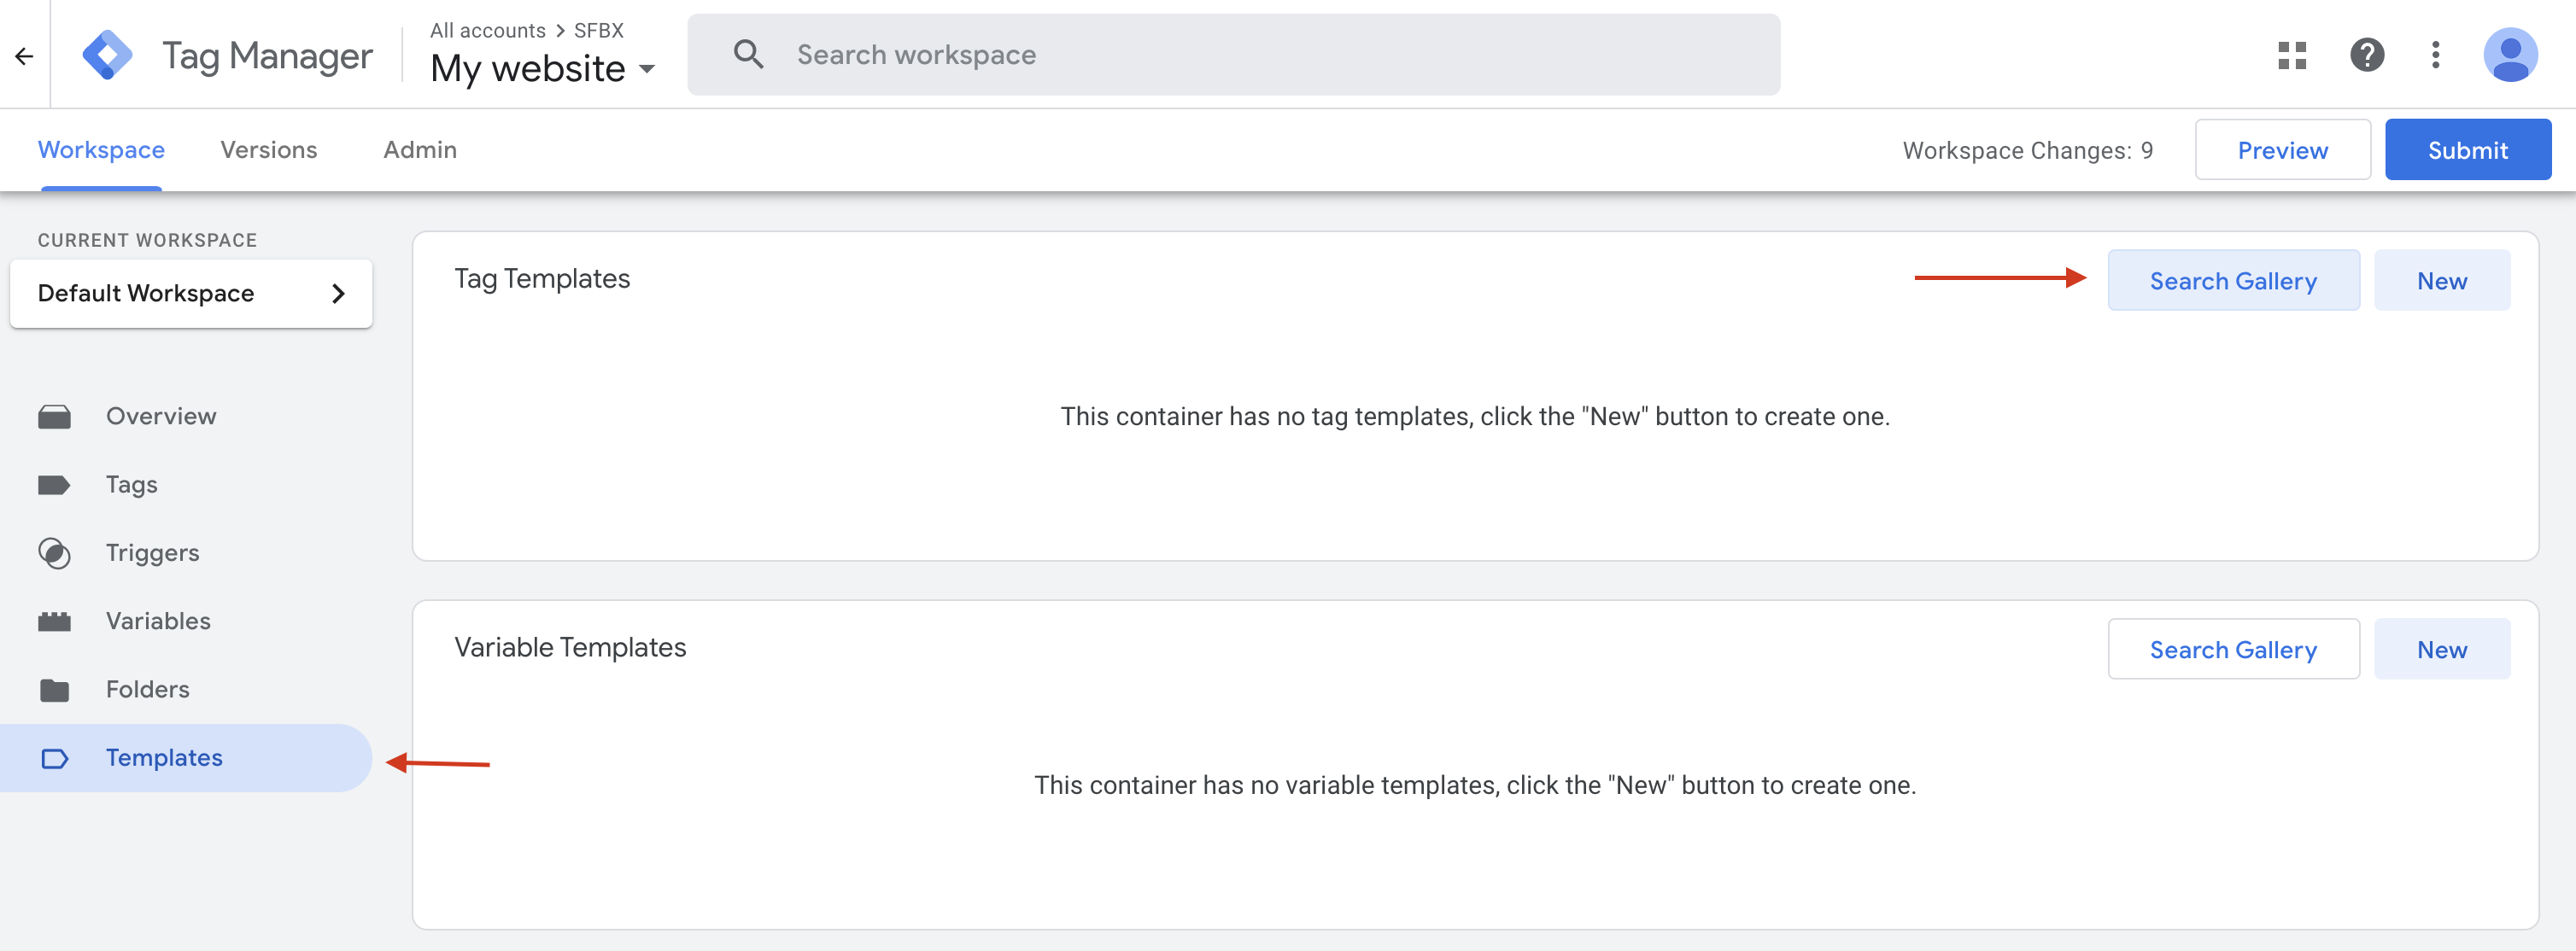
- Then, in the left-hand side panel, click on Templates
- Then, click on Search Gallery

- Then, in the search bar in right-hand side panel, search Sfbx AppConsent CMP Setup
- Find the template named Sfbx AppConsent CMP Setup
- Add it in your container

caution
The tag template named Sfbx - AppConsent CMP - Default Consent Mode is now deprecated. You no longer need to import it into your container.
Creation and configuration of the tag
To create the tag, you need :
- Click on Tags menu in the left-hand panel
- Then, click on the New button

On the configuration display that appears :
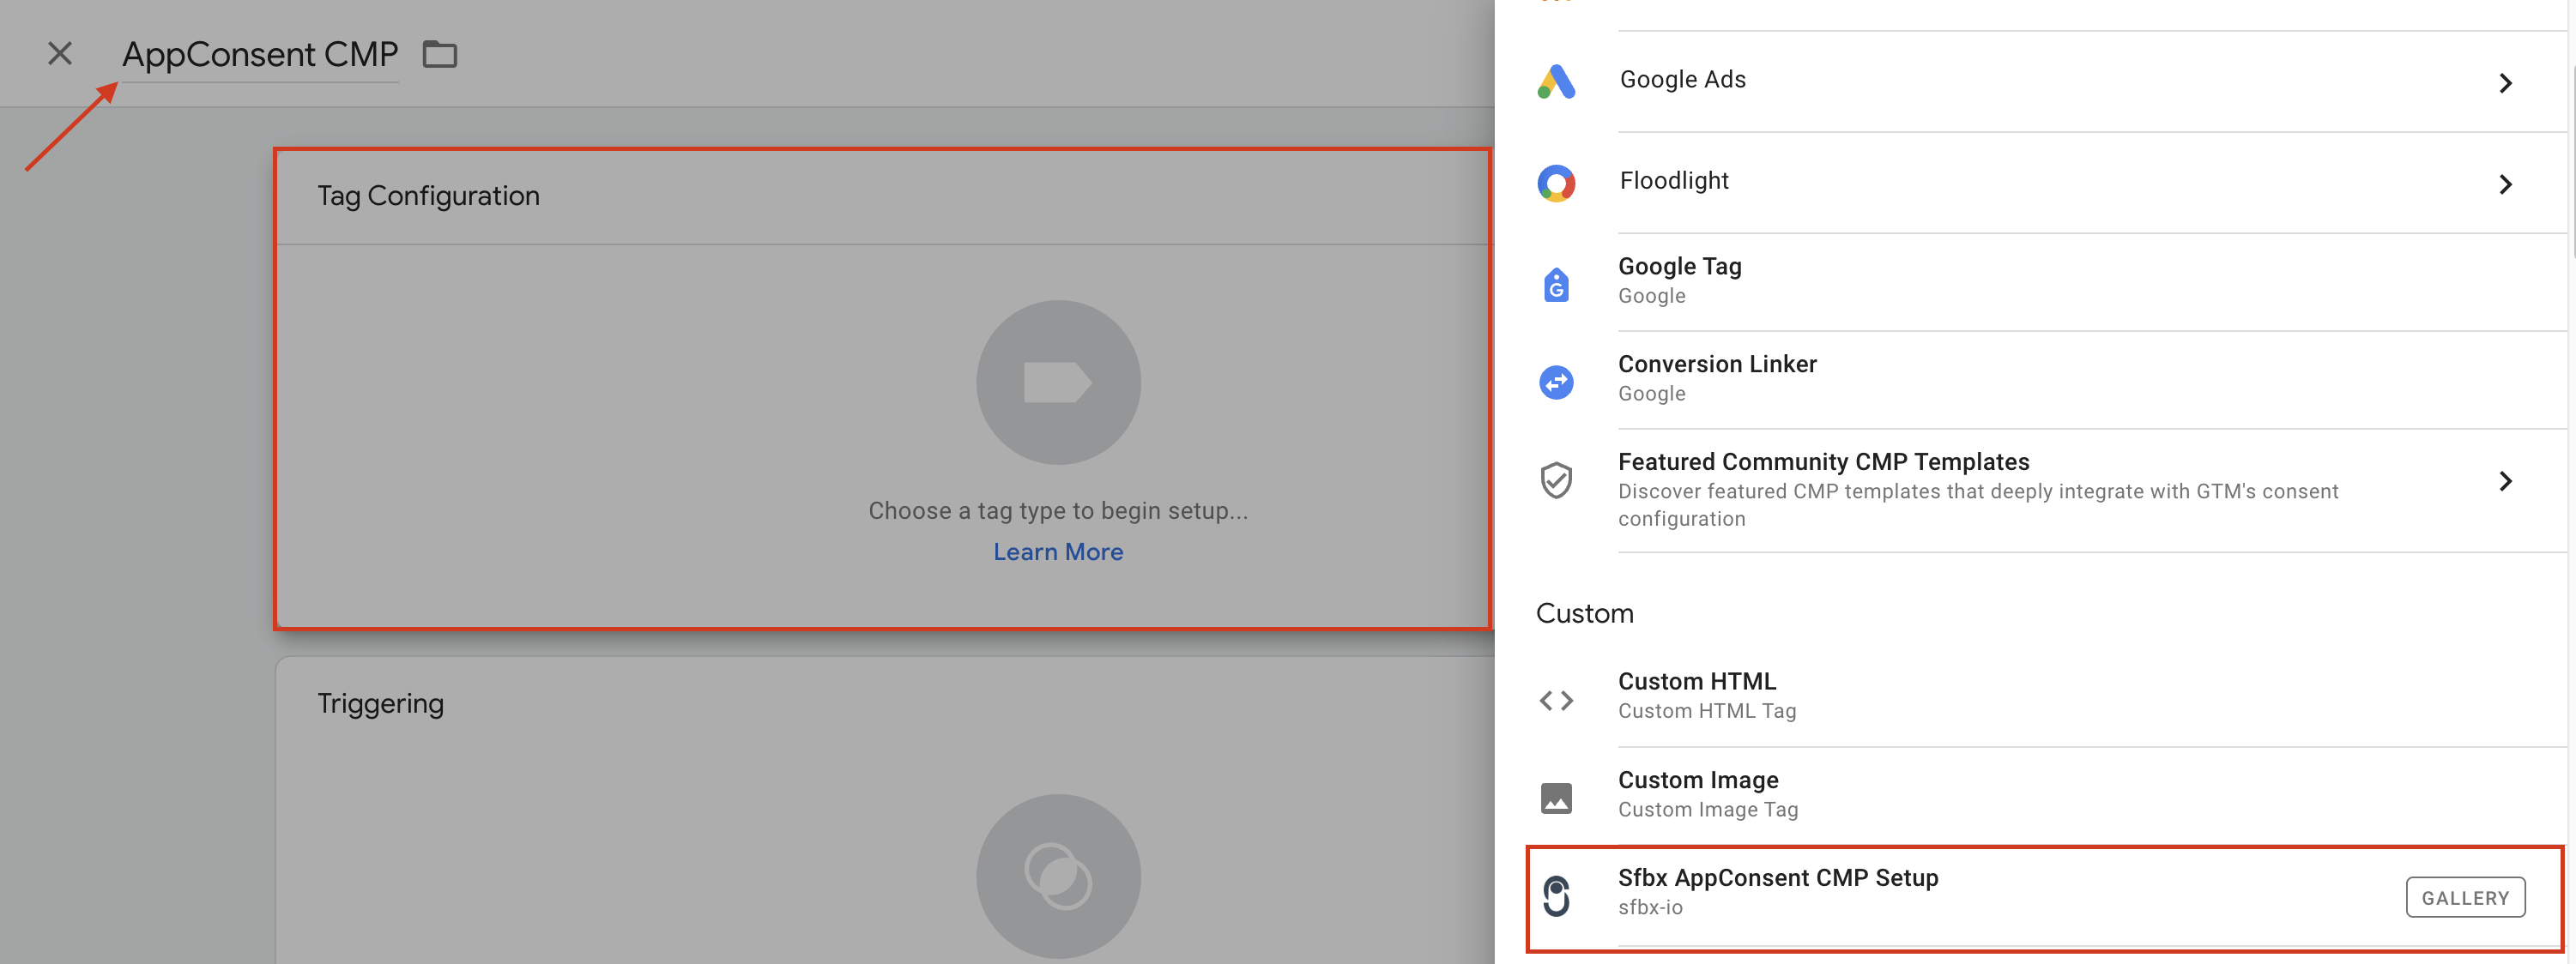
- Name the tag in top left text field
- Then click on Tag configuration section
- In right-hand side panel, select the tag template Sfbx Appconsent CMP Setup in Custom section

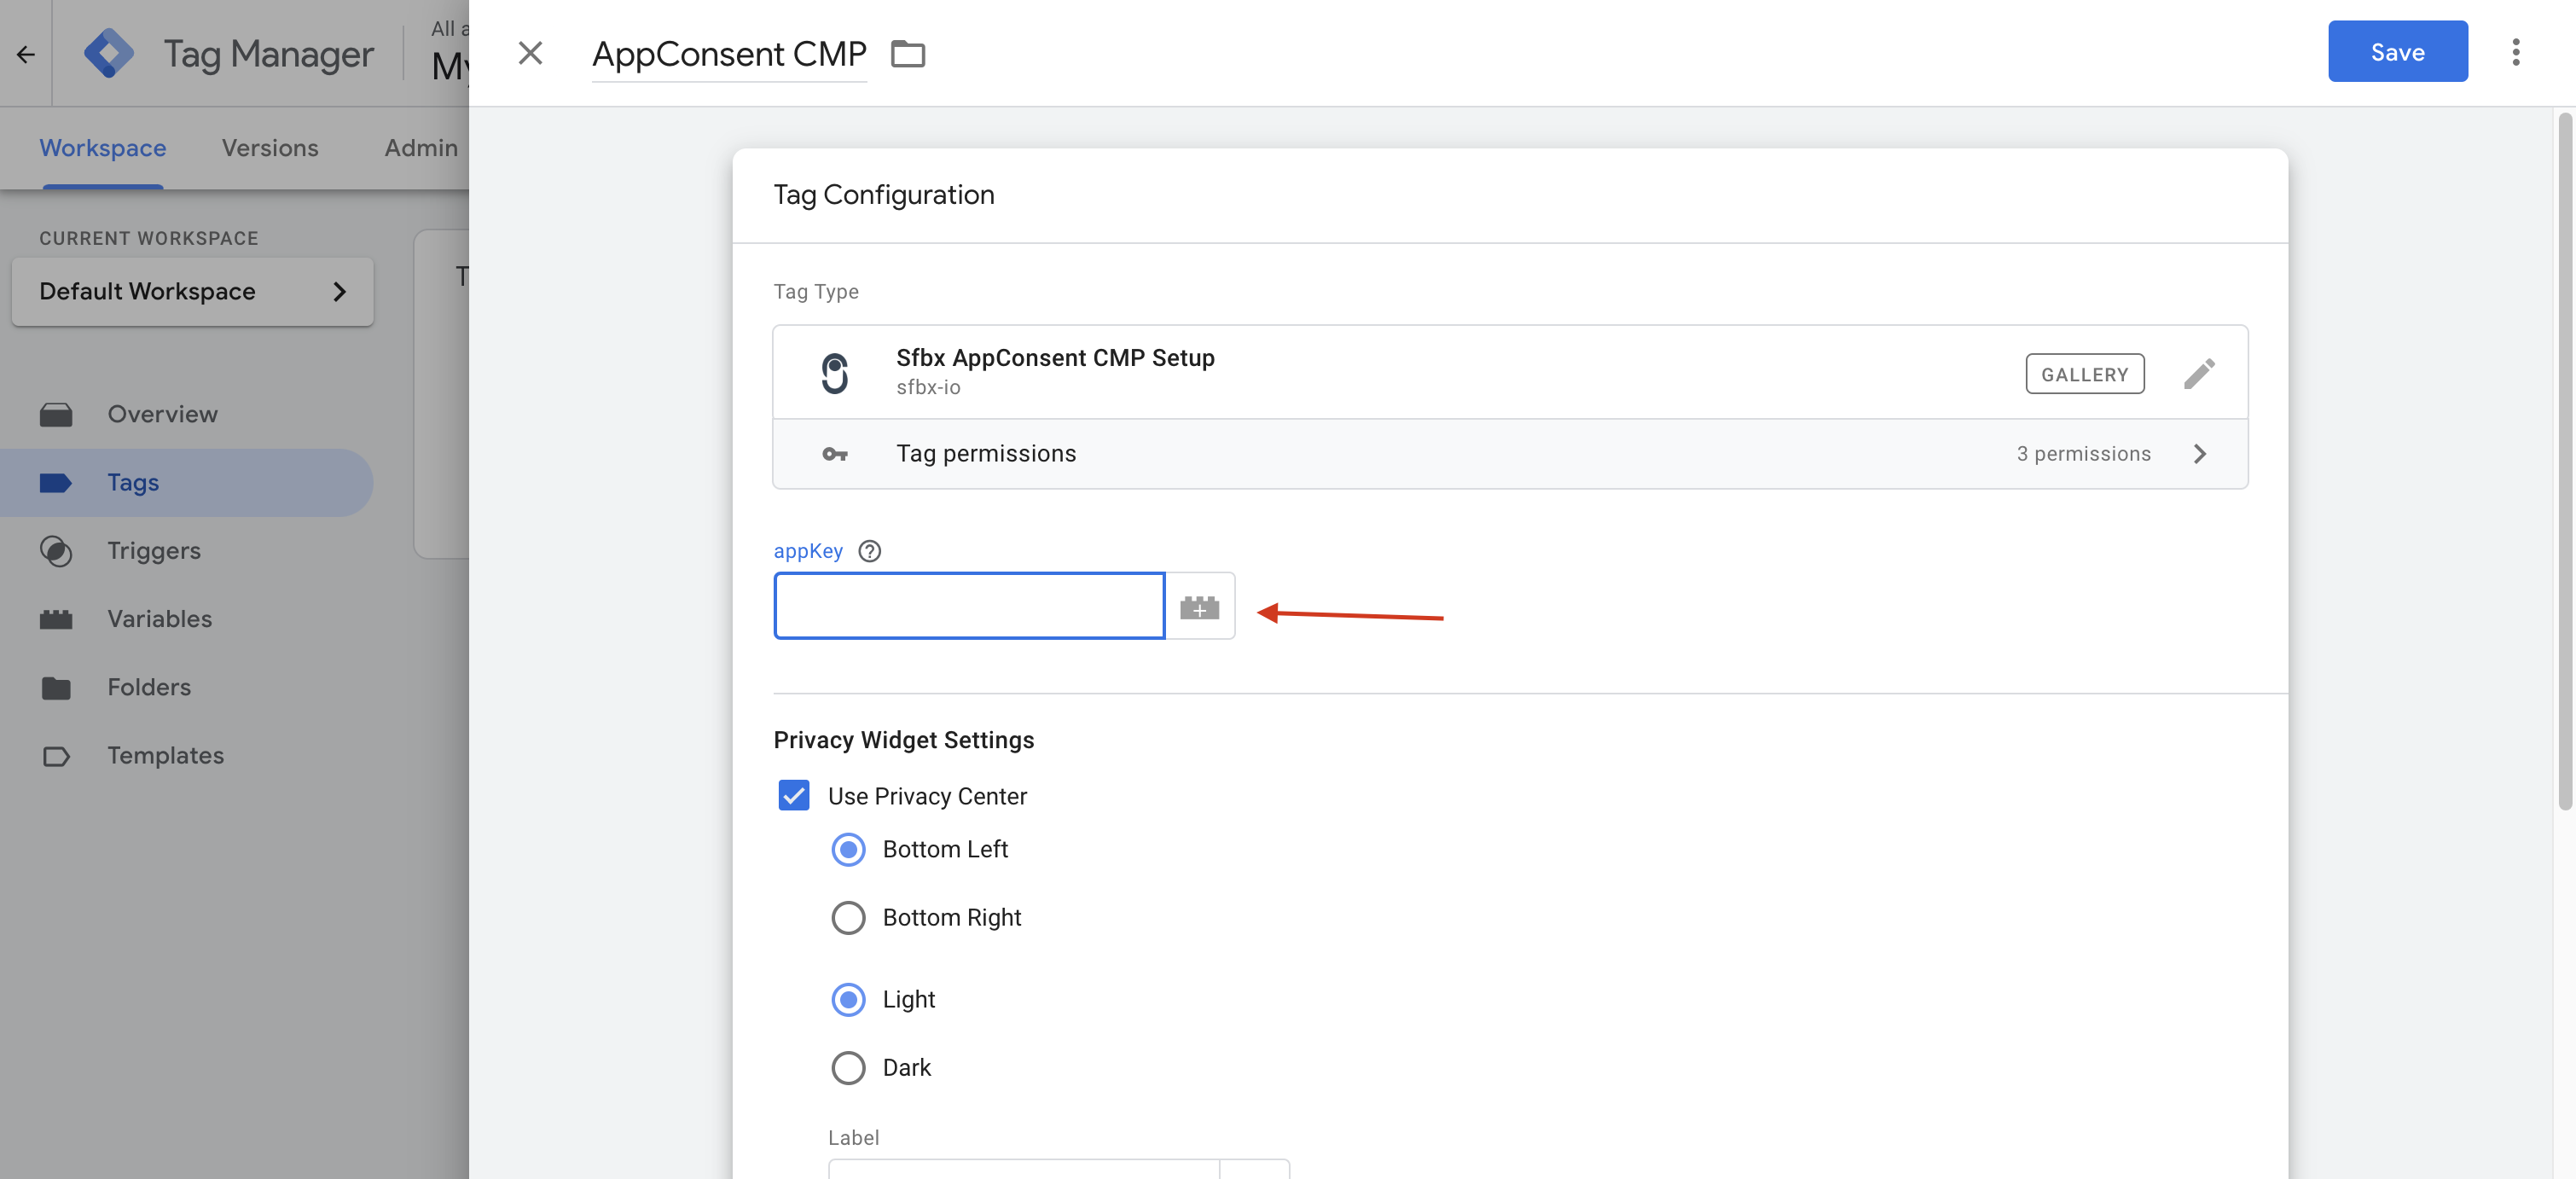
- Once you have selected the template, add the appkey of the notice and configure the tag to suit your needs

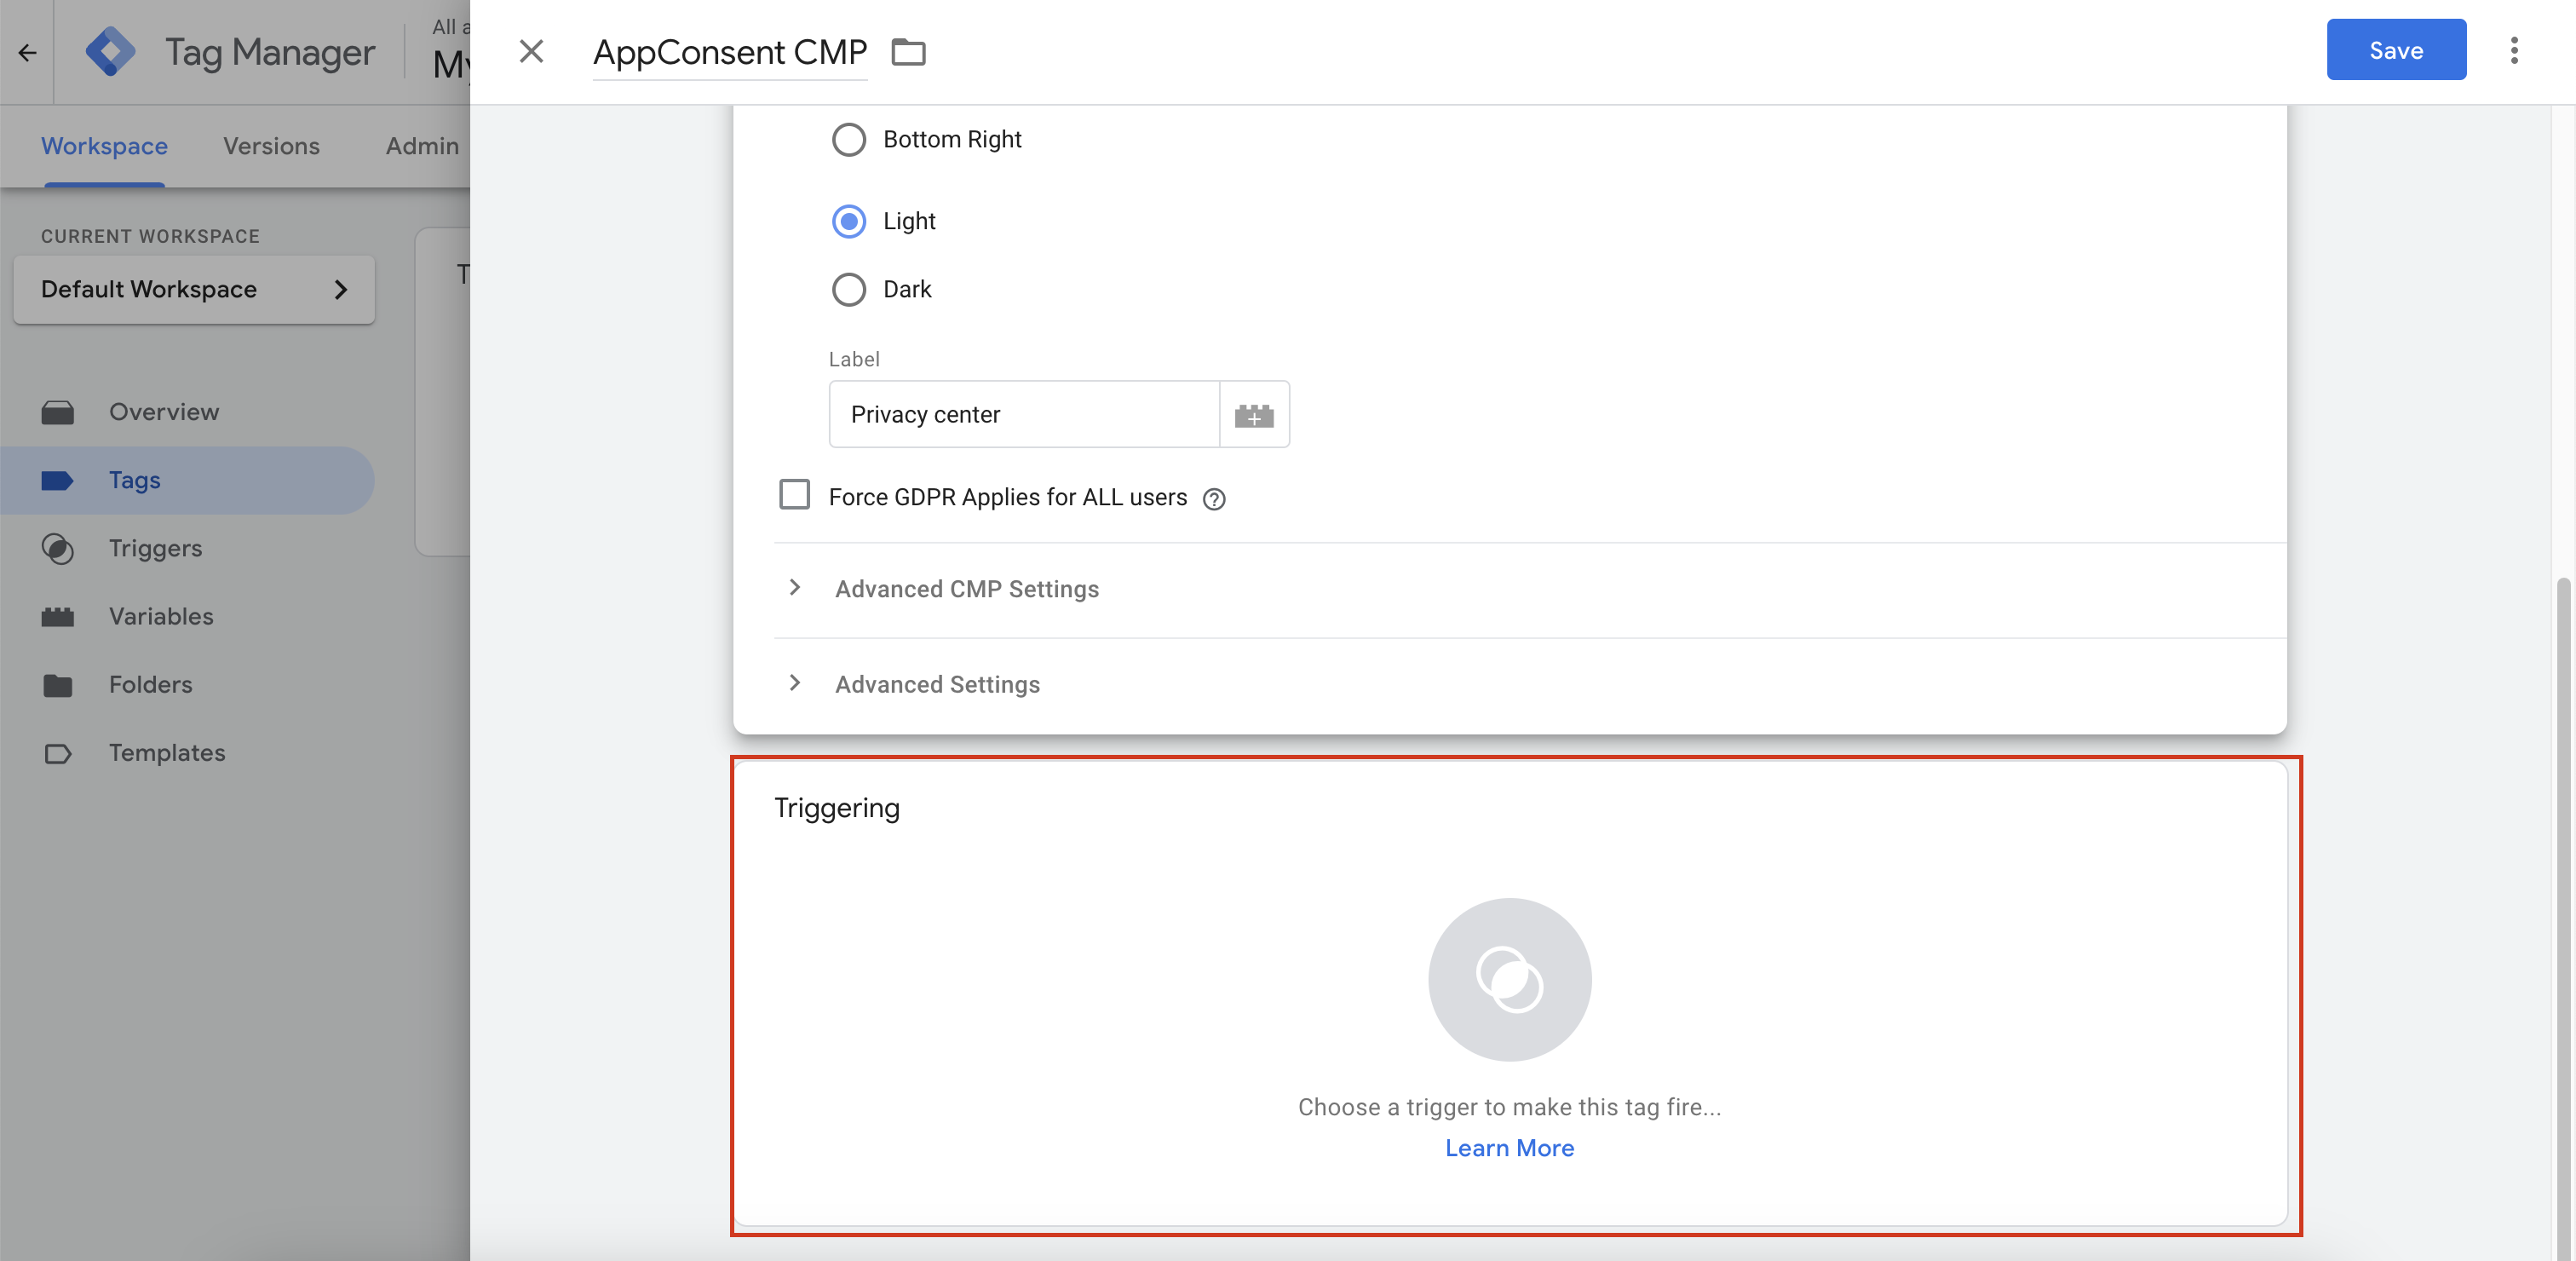
Finally, you need to tell GTM when to trigger the tag. To do this :
- Click on Triggering section

- Then select the Consent Initialization - All pages trigger in the right-hand side panel

- Once the trigger has been added, click Save to save the tag